FordParts
My Garage
My Account
Cart
OEM 2008 Ford Edge Camshaft
Cam- Select Vehicle by Model
- Select Vehicle by VIN
Select Vehicle by Model
orMake
Model
Year
Select Vehicle by VIN
For the most accurate results, select vehicle by your VIN (Vehicle Identification Number).
4 Camshafts found


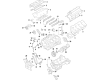
2008 Ford Edge Camshaft, Driver Side Part Number: 7T4Z-6250-B
$206.00 MSRP: $302.50You Save: $96.50 (32%)Product Specifications- Position: Driver Side
- Base No.: 6250
- Item Weight: 6.10 Pounds
- Item Dimensions: 25.0 x 3.0 x 3.1 inches
- Condition: New
- Fitment Type: Direct Replacement
- SKU: 7T4Z-6250-B
- Warranty: This genuine part is guaranteed by Ford's factory warranty.


2008 Ford Edge Camshaft, Passenger Side Part Number: 7T4Z-6250-C
$143.58 MSRP: $209.00You Save: $65.42 (32%)Product Specifications- Position: Passenger Side
- Base No.: 6250
- Item Weight: 4.40 Pounds
- Condition: New
- Fitment Type: Direct Replacement
- SKU: 7T4Z-6250-C
- Warranty: This genuine part is guaranteed by Ford's factory warranty.


2008 Ford Edge Camshaft, Passenger Side Part Number: 7T4Z-6250-A
Product Specifications- Position: Passenger Side
- Base No.: 6250
- Item Weight: 4.70 Pounds
- Item Dimensions: 24.2 x 4.2 x 4.2 inches
- Condition: New
- Fitment Type: Direct Replacement
- SKU: 7T4Z-6250-A
- Warranty: This genuine part is guaranteed by Ford's factory warranty.
2008 Ford Edge Camshaft, Driver Side Part Number: 7T4Z-6250-D
$180.11 MSRP: $262.17You Save: $82.06 (32%)Product Specifications- Position: Driver Side
- Base No.: 6250
- Item Weight: 4.40 Pounds
- Item Dimensions: 17.7 x 8.1 x 17.0 inches
- Condition: New
- Fitment Type: Direct Replacement
- SKU: 7T4Z-6250-D
- Warranty: This genuine part is guaranteed by Ford's factory warranty.
2008 Ford Edge Camshaft
If you're seeking quality and affordability, look no further than our extensive inventory of genuine 2008 Ford Edge Camshaft available at FordPartsDeal.com. You can confidently purchase our OEM 2008 Ford Edge Camshaft as they are supported by the manufacturer's warranty and our hassle-free return policy, alongside the benefit of our fast delivery service.
2008 Ford Edge Camshaft Parts Q&A
- Q: How to remove and replace the camshaft on 2008 Ford Edge?A: First position the support brackets of the subframe then fasten the 4 bolts loosely before securing the rear subframe bracket nuts with a torque setting of 133 Nm (98 lb-ft). Last tighten the four subframe support bolts to 90 Nm (66 lb-ft). The technician must tighten the four subframe support bracket bolts to 90 Nm (66 lb-ft). First position the lower bumper on the subframe and install three left-hand nuts which must be tightened to 9 Nm (80 lb-in). Afterward install three right-hand lower bumper-to-subframe nuts while following the torque specification of 9 Nm (80 lb-in). Position stabilizer bar links inside the lower control arms before tightening the securing nuts to 90 Nm (66 lb-ft). Install the pinch bolts on the ball joints inside the steering knuckles with a torque of 55 Nm (41 lb-ft). Tighten both tie-rod end nuts to 48 Nm (35 lb-ft) before including new cotter pins. Steer clear of letting the intermediate shaft rotate during disconnection from the gear because it can harm the Clock Spring; if rotation did occur then replace the Clock Spring with a centered location. Add the intermediate shaft to the steering gear through a fresh bolt that requires tightening to 23 Nm (17 lb-ft). The PSP tube installation requires a new banjo bolt together with two new seals which should be tightened to a torque of 48 Nm (35 lb-ft). After securing the engine roll restrictor-through-subframe bolt to 103 Nm (76 lb-ft) torque, proceed with the installation of the roll restrictor heat shield with 2 nuts positioned at 11 Nm (8lb-ft). Apply the brake to stop halfshaft rotation and mount a new RH front halfshaft nut which should be tightened to 350 Nm (258 lb-ft). When working on AWD vehicles keep the index marks on the rear driveshaft matched with the PTU flange before screwing and tightening the 4 bolts up to 70 Nm (52 lb-ft). Fasten the power steering cooler bracket bolt to the RH subframe side while tightening it to 9 Nm (80 lb-in). Then join the power steering cooler housing. Before putting a new engine oil filter in place, apply clean engine oil to the gasket and fix the filter using 5 Nm (44 lb-in) torque while continuing to turn it 180 more degrees. Secure both transmission fluid cooler tubes while applying the 2 secondary latches to those tubes. Place the LH inner splash shield alongside the radiator splash shield that has 3 pin-type retainers and 7 screws for installation. First apply a fresh gasket to install the Y-pipe and exhaust flexible pipe assembly and then fasten the 4 new nuts to 40 Nm torque value (30 lb-ft) before installing 2 exhaust hangers and clamping the assembly with a torque of 40 Nm (30 lb-ft). The ground wire and radio interference capacitor wire and their nut must be installed to the engine front cover stud using a torque of 10 Nm (89 lb-in) while another wire and bolt must be installed to the engine front cover with a torque of 10 Nm (89 lb-in). Set the wiring harness retainer onto the RH valve cover stud bolt but install the oil level indicator and join both engine wiring harness electrical connectors before attaching the electrical connector to the LH valve cover. The fuel hose routing clip goes on both the transaxle stud and fuel supply tube before connecting to power steering reservoir and A/C suction tube fitting with its safety clip installed. Fasten the A/C pressure tube fitting with a new O-ring followed by torquing the nut up to 8 Nm (71 lb-in). The engine block heater harness retainers should be attached to both the radiator support and the A/C suction tube. The wiring harness retainer installs onto the transaxle control cable bracket after control cable attachment and electrical connector installation to the control lever. The installation process involves connecting the upper radiator hose and these heater hoses and lower radiator hose to the thermostat housing then the process proceeds to connect the vacuum hose to the upper intake manifold and the upper evaporative emissions (EVAP) tube quick connect coupling to the purge valve. Firmly install the ground wire and bolt while applying 10 Nm (89 lb-in) torque and fix the 2 wiring harness retainers on the cowl. Follow the steps in order to initiate power connection at the battery terminal then secure the nut at 8 Nm (71 lb-in), attach the battery harness electrical connector, place the battery tray and engine air cleaner followed by installing the air cleaner outlet pipe and degas bottle. After fitting the accessory drive belt and power steering belt normalize the exposure time of Motorcraft High Performance Engine RTV Silicone to engine oil to a minimum of 90 minutes before installation of the engine front cover to avoid oil leaks. The last step involves filling the engine with clean engine oil while simultaneously bleeding and filling the cooling system followed by power steering system recharging and A/C system enhancement.
Related 2008 Ford Edge Parts
 2008 Ford Edge Timing Chain
 2008 Ford Edge Oil Pump
 2008 Ford Edge Cam Gear
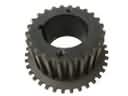 2008 Ford Edge Crankshaft Gear
 2008 Ford Edge Crankshaft Pulley
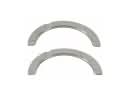 2008 Ford Edge Crankshaft Thrust Washer Set
 2008 Ford Edge Cylinder Head Gasket
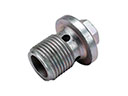 2008 Ford Edge Drain Plug
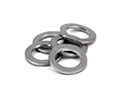 2008 Ford Edge Drain Plug Washer
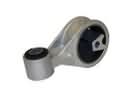 2008 Ford Edge Engine Torque Strut Mount
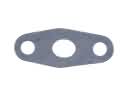 2008 Ford Edge Oil Pump Gasket
 2008 Ford Edge Valve Stem Seal