
Popular OEM Ford Edge Parts
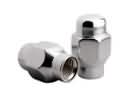
- Body & Hardware Parts View More >
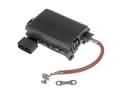
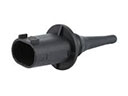
- Electrical Parts View More >
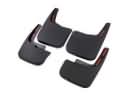
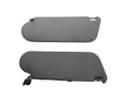
- Interior & Exterior Trim Parts View More >
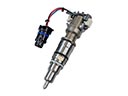
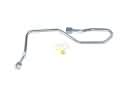
- Air & Fuel Delivery Parts View More >
- Steering Parts View More >
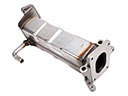
- Emission Control & Exhaust Parts View More >
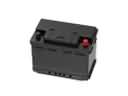
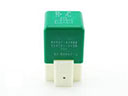
- Charging & Starting Parts View More >
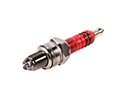
- Engine Parts View More >
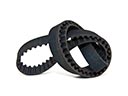
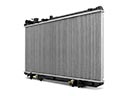
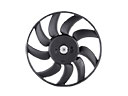
- Belts & Cooling Parts View More >
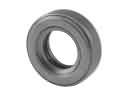
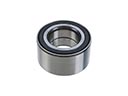
- Suspension Parts View More >
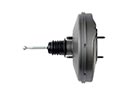
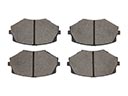
- Brakes Parts View More >
- A/C & Heating Parts View More >


Why Buy Genuine Ford Edge Parts From FordPartsDeal.com
FordPartsDeal.com offers a smart and convenient way to buy genuine parts online. We sell new OEM Ford Edge parts, including Headlights & Lighting. Authorized dealers directly provide all the Ford Edge parts and assemblies to ensure the optimal quality and fit. We also provide all properly fitting Ford Edge parts, such as Transmission, Driveline & Axles specific to your model. When you shop here, you get real Ford value at highly competitive prices. All our products come with the same Ford warranty available at other dealerships. Our easy-to-use catalog helps you quickly identify the right part for your car. You'll receive fast shipping from our warehouse network, keeping your Ford Edge running smoothly. Our staff consists of Ford professionals who are ready to assist you. We aim to treat each customer as if they were stepping out of a Ford showroom. VIN verification and our live support ensure that the part you order is the right Ford Edge part for your vehicle.
Ford launched the Edge into the North American midsize SUV market in 2007 as it entered this vehicle segment. The SUV completed two complete products and obtained key technical developments. When purchasing the Edge model Ford provides standard clients with a 2.0-liter EcoBoost I4 turbocharged gasoline engine and premium customers can select the 2.7-liter EcoBoost V6 engine that delivers better performance with a maximum towing capacity of 3,500 pounds. The automatic transmission added to The Edge allows its operators to achieve smooth gear transitions and enhanced fuel efficiency. In 2010 as a part of its innovative approach Ford implemented hybrid power system applications to V6 engines. Ford Edge excites its customer base because its handling system creates luxurious SUV driving stability. A wireless 12-inch touch screen joins other user-friendly technology features and sufficient storage options together with upgraded components to create outstanding driving quality in the Ford Edge interior where five people can comfortably sit. All Ford Edge vehicles include forward collision warning plus automatic emergency braking together with blind-spot monitoring systems as standard equipment because safety is their main priority. Extended performance and durability result from Ford Edge genuine parts given their strict quality standards.
Ford Edge has problems with a group of issues in its fuel storage, cooling, and valvetrain durability. At the fuel tank, where there is seam corrosion, the fuel may leak creating a raw smell. The Edge can leave wetness around straps or demonstrate evaporative test failures. Follow Ford recall guidance where possible, inspect the seams and replace the fuel tank where perforated. The water pump on V6 is located in a timing cover. When the pump goes, the Edge may combine coolant with oil and lose compression. Look out for coolant in oil, check the misfires, and schedule proactive water pump oil change appointments. Change oil as soon as it becomes contaminated, and send a sample where there is possible bearing damage. In engine durability, there was breakage of turbo intake valves in some Edge models and there was a sudden loss of power. Use the manufacturer and safety agency guidance and warranty information and software updates for the engine. Inspected by the borescope and codes, replaced covered valves under Ford warranty programs where applicable. Once the repairs and bleed cooling are done, reset the monitors and road test the Edge to ensure stable temperatures. Check fuel corrections as well as oil pressure to make sure your Edge starts clean and idles well. These are the actions that make the Ford Edge foreseeable, safe and fit to be applied every day.
Ford Edge Parts and Q&A
- Q: How to remove and replace the rear bumper cover on Ford Edge?A:In order to change the rear bumper cover, take out the scrivets and screws in the rear splash shield. Next remove the rear bumper cover-to-body brace screw. Disengage the trailer hitch and wiring harness, when necessary. Lastly, take out the back bumper cover and fit the new one following the steps in reverse.
- Q: How to service and repair the alternator on Ford Edge?A:In order to service the alternator, remove the battery, take out the cooling fan and re-align the accessory drive belt. Disassemble the generator by disconnecting the electrical connector of the generator, removing the generator stud nut, and removing the generator. Installation To be installed in reverse order of removal, essentially by tightening all elements to specified torque values.
- Q: How to service the LH catalytic converter on Ford Edge?A:In order to service the LH catalytic converter, place the car in neutral using a hoist. Dislodge the catalyst monitor sensor, the exhaust Y-pipe and the support bracket bolts. Install new catalytic converter nuts and studs and make sure they are tight. Reinstall using a new gasket.


