FordParts
My Garage
My Account
Cart
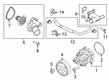
OEM 2008 Ford Ranger Water Pump
H2O Pump- Select Vehicle by Model
- Select Vehicle by VIN
Select Vehicle by Model
orMake
Model
Year
Select Vehicle by VIN
For the most accurate results, select vehicle by your VIN (Vehicle Identification Number).
3 Water Pumps found


2008 Ford Ranger Water Pump Part Number: XL5Z-8501-AD
$68.40 MSRP: $112.55You Save: $44.15 (40%)Product Specifications- Other Name: Pump Assembly - Water; Engine Water Pump; Water Pump Assembly
- Replaces: 5U3Z-8501-B, 5U3Z-8501-A, XL5Z-8501-AA, XL5Z-8501-AC
- Base No.: 8501
- Item Weight: 6.20 Pounds
- Item Dimensions: 7.6 x 6.0 x 13.8 inches
- Condition: New
- Fitment Type: Direct Replacement
- SKU: XL5Z-8501-AD
- Warranty: This genuine part is guaranteed by Ford's factory warranty.


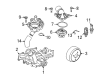
2008 Ford Ranger Water Pump Part Number: 4S4Z-8501-E
$49.61 MSRP: $81.64You Save: $32.03 (40%)Ships in 1 Business DayProduct Specifications- Other Name: Pump Assembly - Water; Engine Water Pump; Water Pump Assembly
- Replaces: 6M8Z-8501-AC, PW-447, 1S7Z-8501-AK, 4S4Z-8501-AA, 4S4Z-8501-D, PW-465
- Item Weight: 2.00 Pounds
- Item Dimensions: 6.3 x 6.2 x 4.6 inches
- Condition: New
- Fitment Type: Direct Replacement
- SKU: 4S4Z-8501-E
- Warranty: This genuine part is guaranteed by Ford's factory warranty.


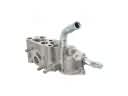
2008 Ford Ranger Water Pump Part Number: 6L2Z-8501-A
$127.08 MSRP: $209.09You Save: $82.01 (40%)Product Specifications- Other Name: Pump Assembly - Water; Engine Water Pump; Water Pump Assembly
- Replaced by: 6L2Z-8501-C
- Base No.: 8501
- Item Weight: 8.10 Pounds
- Item Dimensions: 14.7 x 8.1 x 9.3 inches
- Condition: New
- Fitment Type: Direct Replacement
- SKU: 6L2Z-8501-A
- Warranty: This genuine part is guaranteed by Ford's factory warranty.
2008 Ford Ranger Water Pump
If you're seeking quality and affordability, look no further than our extensive inventory of genuine 2008 Ford Ranger Water Pump available at FordPartsDeal.com. You can confidently purchase our OEM 2008 Ford Ranger Water Pump as they are supported by the manufacturer's warranty and our hassle-free return policy, alongside the benefit of our fast delivery service.
2008 Ford Ranger Water Pump Parts Q&A
- Q: How to service and repair the Water Pump on a 3.0L engine on 2008 Ford Ranger?A: Draining the cooling system should be the starting step for servicing or repairing the coolant pump on a 3.0L engine. First remove the combination of the air cleaner outlet tube and accessory drive belt followed by the fan blade and fan shroud. Before proceeding remove the bolts while disconnecting the heater hose and cooling pump pulley followed by disconnecting the wiring harness retainer. Detach the battery cable bracket by taking out the nut so you can remove side stud bolts from the A/C compressor mounting bracket followed by disconnecting the bypass hose. After removing the bolt on the accessory drive belt tensioner the front bolts are taken out to set the A/C compressor mounting bracket to the side. The final step requires removing the coolant pump bolts then cleaning all sealing areas. Installation procedure requires the coolant pump to be positioned first before installing the 10 bolts and 2 stud bolts among which bolts 1-7 should be tightened to 25 Nm (18 lb-ft) and bolts 8-12 to 10 Nm (89 lb-inch). When installing the A/C compressor mounting bracket position the front bolts while tightening them to 51 Nm (38 lb-ft). The accessory drive belt tensioner should be positioned first while tightening the bolt to 27 Nm (20 lb-ft). Next attach the bypass hose followed by installing the A/C compressor mounting bracket side stud bolts with a torque of 47 Nm (35 lb-ft). Attach the battery cable bracket while tightening the nut to 10 Nm (89 lb-inch). Then install the coolant pump pulley by applying torque of 25 Nm (18 lb-ft). Complete the installation process by putting on the accessory drive belt then attach the wiring harness retainer before connecting the heater hose while reinstalling the fan blade and fan shroud. As the final step dispose of the old air cleaner outlet tube while performing a cooling system fluid replacement.
Related 2008 Ford Ranger Parts
 2008 Ford Ranger Thermostat Housing
 2008 Ford Ranger Coolant Reservoir Cap
 2008 Ford Ranger Drive Belt
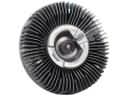 2008 Ford Ranger Fan Clutch
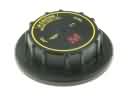 2008 Ford Ranger Radiator Cap
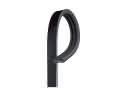 2008 Ford Ranger Serpentine Belt
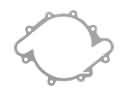 2008 Ford Ranger Water Pump Gasket
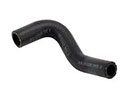 2008 Ford Ranger Cooling Hose
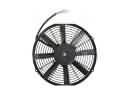 2008 Ford Ranger Engine Cooling Fan
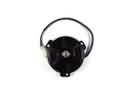 2008 Ford Ranger Fan Motor
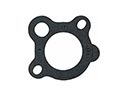 2008 Ford Ranger Thermostat Gasket
 2008 Ford Ranger V-Belt