My Garage
Cart

OEM 2009 Ford Explorer A/C Accumulator

Accumulator
  • Select Vehicle by Model
  • Select Vehicle by VIN
Select Vehicle by Model
Make
Model
Year
or
Select Vehicle by VIN
For the most accurate results, select vehicle by your VIN (Vehicle Identification Number).

1 A/C Accumulator found

  • 2009 Ford Explorer A/C Accumulator - JU2Z-19C836-B
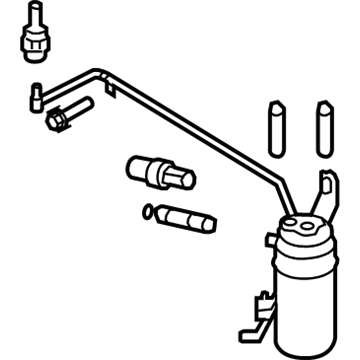
    2009 Ford Explorer A/C Accumulator Diagram - JU2Z-19C836-B
    View related parts
    Product Specifications
    • Other Name: Accumulator Assembly - Air Conditioning; A/C Accumulator; Drier Desiccant Element; A/C Receiver Drier; Accumulator
    • Replaces: 7L2Z-19C836-B, 6L2Z-19C836-A, 8L2Z-19C836-A, 7L2Z-19C836-A, YF-3330, YF-3492, YF-3284
    • Condition: New
    • Fitment Type: Direct Replacement
    • SKU: JU2Z-19C836-B
    • Warranty: This genuine part is guaranteed by Ford's factory warranty.
    Fits the following 2009 Ford Explorer Submodels:
    • Eddie Bauer, Limited, XLS, XLT | 6 Cyl 4.0 L GAS, 8 Cyl 4.6 L GAS

2009 Ford Explorer A/C Accumulator

If you're seeking quality and affordability, look no further than our extensive inventory of genuine 2009 Ford Explorer A/C Accumulator available at FordPartsDeal.com. You can confidently purchase our OEM 2009 Ford Explorer A/C Accumulator as they are supported by the manufacturer's warranty and our hassle-free return policy, alongside the benefit of our fast delivery service.

2009 Ford Explorer A/C Accumulator Parts Questions & Experts Answers

  • Q: How to Service and Repair the A/C Accumulator in the HVAC System on 2009 Ford Explorer?
    A: The first step to maintain the suction accumulator in HVAC involves complete recovery of refrigerant. The next task involves removing the PCM while disconnecting the A/C cycling switch electrical connector. First disconnect the suction accumulator bolt before installing it by following the torque specification of 11 Nm (97 lb-in). The service sequence begins by unbolting the PCM bracket followed by disassembly of the PCM bracket nut and PCM bracket before removing the suction accumulator stud and bracket bolts. The suction accumulator study needs to be removed following a proper torque of 11 Nm (97 lb-in) for reinstallation. The suction accumulator-to-compressor line bracket nut which connects the condenser-to-evaporator line bracket must be taken off on 4.6L vehicles. Unfasten the suction accumulator bracket bolt after which remove the suction accumulator followed by loosening and discarding both suction accumulator fitting nuts and the O-ring seals. The fittings must be tightened to 8 Nm (71 lb-in) after installation and new O-ring seals should be applied while PAG oil must be properly lubricated according to specifications. During the last steps conduct evacuation and perform leak testing before charging the refrigeration system. It is essential to minimize air exposure inside the suction accumulator during service while the installation of this component should occur after servicing multiple A/C system elements. The shipping caps should stay in place until fittings join and the A/C system evacuation procedure should activate instantly since it protects the suction accumulator desiccant from moisture intrusion. You need to replace the suction accumulator with a new one only when physical damage exists such as contamination from compressor failure or apparent leaks or moisture due to total refrigerant loss alongside sustained atmospheric pressure exposure. Refrigerant pressure above zero should be absent before maintenance due to which suction accumulators should not be replaced.

Related 2009 Ford Explorer Parts