FordParts
My Garage
My Account
Cart
OEM 2009 Ford Explorer Sport Trac Dimmer Switch
Light Dimmer Switch- Select Vehicle by Model
- Select Vehicle by VIN
Select Vehicle by Model
orMake
Model
Year
Select Vehicle by VIN
For the most accurate results, select vehicle by your VIN (Vehicle Identification Number).
1 Dimmer Switch found


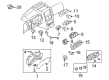
2009 Ford Explorer Sport Trac Dimmer Switch Part Number: 7L1Z-11691-BA
$29.38 MSRP: $41.67You Save: $12.29 (30%)Ships in 1-3 Business DaysProduct Specifications- Other Name: Resistor Assembly; Instrument Panel Dimmer Switch; Headlight Dimmer Switch; Instrument Light Rheostat; Rheostat
- Manufacturer Note: BLACK
- Base No.: 11691
- Item Weight: 0.40 Pounds
- Condition: New
- Fitment Type: Direct Replacement
- SKU: 7L1Z-11691-BA
- Warranty: This genuine part is guaranteed by Ford's factory warranty.
2009 Ford Explorer Sport Trac Dimmer Switch
If you're seeking quality and affordability, look no further than our extensive inventory of genuine 2009 Ford Explorer Sport Trac Dimmer Switch available at FordPartsDeal.com. You can confidently purchase our OEM 2009 Ford Explorer Sport Trac Dimmer Switch as they are supported by the manufacturer's warranty and our hassle-free return policy, alongside the benefit of our fast delivery service.
2009 Ford Explorer Sport Trac Dimmer Switch Parts Q&A
- Q: How to service and repair the instrument panel dimmer switch on 2009 Ford Explorer Sport Trac?A: To get at the dimmer switch on the instrument panel, first take off the driver side register. Next remove the bezel and headlamp switch as a unit, and unplug the electrical connections. Close the two tabs to take out the dimmer switch. In order to install new switch, just inverse these steps.
Related 2009 Ford Explorer Sport Trac Parts
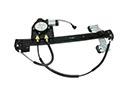 2009 Ford Explorer Sport Trac Window Regulator
 2009 Ford Explorer Sport Trac Air Deflector
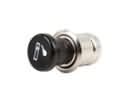 2009 Ford Explorer Sport Trac Cigarette Lighter
 2009 Ford Explorer Sport Trac Dome Light
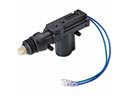 2009 Ford Explorer Sport Trac Door Lock Actuators
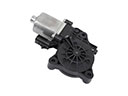 2009 Ford Explorer Sport Trac Power Window Motor
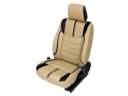 2009 Ford Explorer Sport Trac Seat Cover
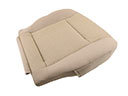 2009 Ford Explorer Sport Trac Seat Cushion
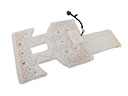 2009 Ford Explorer Sport Trac Seat Heater
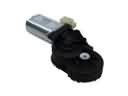 2009 Ford Explorer Sport Trac Seat Motor
 2009 Ford Explorer Sport Trac Seat Switch
 2009 Ford Explorer Sport Trac Weather Strip