FordParts
My Garage
My Account
Cart
OEM 2009 Ford Flex Windshield
Glass Windshield- Select Vehicle by Model
- Select Vehicle by VIN
Select Vehicle by Model
orMake
Model
Year
Select Vehicle by VIN
For the most accurate results, select vehicle by your VIN (Vehicle Identification Number).
1 Windshield found

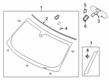
2009 Ford Flex Windshield, Front Part Number: 8A8Z-7403100-A
$222.22 MSRP: $346.13You Save: $123.91 (36%)Ships in 1-3 Business DaysProduct Specifications- Other Name: Glass - Windscreen; Windshield Glass, Front; Windshield, Front
- Position: Front
- Base No.: <03100
- Item Weight: 37.80 Pounds
- Condition: New
- Fitment Type: Direct Replacement
- SKU: 8A8Z-7403100-A
- Warranty: This genuine part is guaranteed by Ford's factory warranty.
2009 Ford Flex Windshield
If you're seeking quality and affordability, look no further than our extensive inventory of genuine 2009 Ford Flex Windshield available at FordPartsDeal.com. You can confidently purchase our OEM 2009 Ford Flex Windshield as they are supported by the manufacturer's warranty and our hassle-free return policy, alongside the benefit of our fast delivery service.
2009 Ford Flex Windshield Parts Q&A
- Q: How to service and repair a windshield on 2009 Ford Flex?A: The service and repair of windshields requires disclaimer and exterior A-pillar window moulding removal followed by the cowl panel grille upper and cowl panel grille side moulding removal before interior A-pillar trim panels, interior rear view mirror, overhead console, passenger front assist handle, and LH and RH sun visors with clips can be taken off properly. The front area of the headliner needs to be lowered while suitable supporting materials maintain its position. Wear protective eye gear together with gloves during every operation. Apply water on the existing urethane adhesive to enable the Deluxe Windshield Removal Tool to slice through the adhesive by starting from the middle-top area then moving to the bottom corners. After putting distance between the windshield glass and body with The Pumper you should cut remaining urethane adhesive before removing the windshield glass. You should fit the windshield glass onto the existing urethane adhesive bead found at the body pinch weld while checking for correct alignment. Apply a temporary marking pencil to the windshield glass so technicians can see the points of reference against body and setting blocks. Set the windshield glass onto a secure base. Repair all pinch weld corrosion because this structural element needs reparations and avoid damaging the weld with any scratches. Cut the urethane adhesive at a 1-2 mm base and then wipe away all foreign substances from the pinch weld area. Before reusing windshield glass it is necessary to remove excessive urethane adhesive and then clean the inside surface using glass cleaner. The installation of new windshields starts with using glass primer according to manufacturer instructions followed by a dry period of at least 6 minutes. Use a high-ratio electric or battery-operated caulk gun to apply urethane adhesive onto the trimmed bead with continuous flow but no gaps. Peninsula Windshield Replacement recommends installing the glass by aligning it to the preliminary markings before driving the vehicle until the urethane adhesive proper curing per manufacturing instructions. Inspection of adhesive bead must happen after curing for potential air and water leaks then additional adhesive should be applied if needed. The last steps involved repositioning the headliner along with installing sun visors and clips, passenger front assist handle, an overhead console, interior rear view mirror, A-pillar trim panels, cowl panel grille upper and side mouldings and external A-pillar window mouldings before cleaning both windshield surfaces with glass cleaner.
Related 2009 Ford Flex Parts
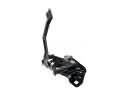 2009 Ford Flex Hood Latch
 2009 Ford Flex Air Deflector
 2009 Ford Flex Car Mirror
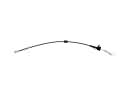 2009 Ford Flex Door Latch Cable
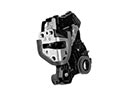 2009 Ford Flex Door Lock
 2009 Ford Flex Glove Box
 2009 Ford Flex Seat Cover
 2009 Ford Flex Seat Switch
 2009 Ford Flex Tailgate Lift Support
 2009 Ford Flex Window Run
 2009 Ford Flex Wiper Blade
 2009 Ford Flex Wiper Motor