FordParts
My Garage
My Account
Cart
OEM 2009 Ford Focus Windshield
Glass Windshield- Select Vehicle by Model
- Select Vehicle by VIN
Select Vehicle by Model
orMake
Model
Year
Select Vehicle by VIN
For the most accurate results, select vehicle by your VIN (Vehicle Identification Number).
1 Windshield found

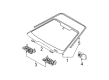
2009 Ford Focus Windshield, Front Part Number: 8S4Z-5403100-A
$228.70 MSRP: $335.83You Save: $107.13 (32%)Product Specifications- Other Name: Glass - Windscreen; Windshield, Front
- Position: Front
- Replaces: 7S4Z-5403100-A, 5S4Z-5403100-AA
- Base No.: 03100
- Item Weight: 36.70 Pounds
- Condition: New
- Fitment Type: Direct Replacement
- SKU: 8S4Z-5403100-A
- Warranty: This genuine part is guaranteed by Ford's factory warranty.
2009 Ford Focus Windshield
If you're seeking quality and affordability, look no further than our extensive inventory of genuine 2009 Ford Focus Windshield available at FordPartsDeal.com. You can confidently purchase our OEM 2009 Ford Focus Windshield as they are supported by the manufacturer's warranty and our hassle-free return policy, alongside the benefit of our fast delivery service.
2009 Ford Focus Windshield Parts Q&A
- Q: How to service and repair a windshield on 2009 Ford Focus?A: A proper windshield service or repair requires initial removal of the cowl panel grille followed by extracting the A-pillar trim panels, interior mirror and sun visors and their retaining clips along with lowering the front headliner portion near the windshield header. Operation technicians should apply oil-free compressed air or use clean shop towels to clean the windshield pinch weld area of all foreign materials. The Deluxe Windshield Removal Tool requires the windscreen's urethane adhesive to get water-based lubrication before operation. Protective gloves together with eye protection should be worn at all times when performing this work to avoid injuries. Keeping the paint and primer free from scratches in the pinch weld area will prevent rust formation. When inserting the blade into the Deluxe Windshield Removal Tool maintain the flat side against the glass keeping the urethane adhesive bead on the pinch weld for the dry fit of the replacement windshield. Support the windshield glass through its entire length as you begin to cut the urethane adhesive starting from the glass center and proceeding toward its lower corners. Use The Pumper to push the windshield glass away from the body before cutting the rest of the urethane adhesive when removing the glass. Place the windshield glass on a stable work surface. Place the newly fitted windshield glass over the urethane adhesive bead and position it in the center opening before adjusting any stop block positioning as necessary. Draw alignment marks on the surface through the use of tape or non-staining grease pencil marks. Place the glass with its interior surface on top of a solid work surface following dry-fitting. Repair all damaged areas on the pinch weld because this structural part must stay intact. Also normalize the pinch weld surface to prevent scratches. Remove the urethane adhesive from the pinch weld base until it results in a 1 to 2 mm edge which must then get wiped clean with a shop towel or oil-free compressed air. The process for glass replacement includes removing all unused urethane adhesive before applying a thin adhesive layer. Take a new windshield glass and use glass cleaner to clean its interior surface. The installation requires identical urethane adhesive and glass primer products which users should apply following manufacturer guidelines after the primer reaches minimum 6-minute dry time. Wield a specified length of urethane adhesive applicator tip to transfer adhesive onto the bead where you removed the trim while making sure the adhesive stays seamless against the surface. You must wait until the instanceof the urethane adhesive achieves proper hardness according to manufacturer guidelines for glass retention before starting vehicle operation. Before placing the windshield open all windows to stop air pressure from damaging the adhesive bond and use the alignment marks for proper positioning. The urethane adhesive needs at least one hour of curing time before leak tests can start and the technician should inspect the seal while reapplying adhesive if needed. After curing the windshield reinstall all components including the headliner, sun visors, retaining clips, interior mirror and cowl panel grille along with the A-pillar trim panels.
Related 2009 Ford Focus Parts
 2009 Ford Focus Washer Pump
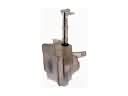 2009 Ford Focus Washer Reservoir
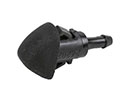 2009 Ford Focus Windshield Washer Nozzle
 2009 Ford Focus Wiper Arm
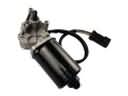 2009 Ford Focus Wiper Motor
 2009 Ford Focus Ashtray
 2009 Ford Focus Car Mirror
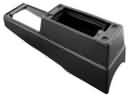 2009 Ford Focus Center Console Base
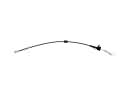 2009 Ford Focus Door Latch Cable
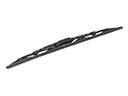 2009 Ford Focus Windshield Wiper
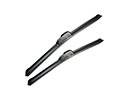 2009 Ford Focus Wiper Blade
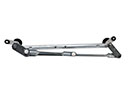 2009 Ford Focus Wiper Pivot