My Garage
Cart

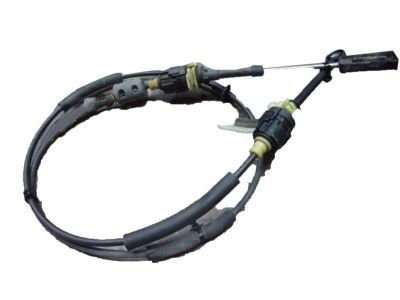
OEM 2009 Ford Taurus X Shift Cable

Transmission Shift Cable
  • Select Vehicle by Model
  • Select Vehicle by VIN
Select Vehicle by Model
Make
Model
Year
or
Select Vehicle by VIN
For the most accurate results, select vehicle by your VIN (Vehicle Identification Number).

1 Shift Cable found

  • 2009 Ford Taurus X Shift Cable - 8G1Z-7E395-C
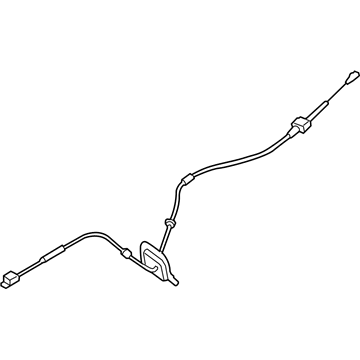
    2009 Ford Taurus X Shift Cable Diagram - 8G1Z-7E395-C
    View related parts
    Product Specifications
    • Other Name: Cable Assembly - Selector Lever Control; Automatic Transmission Shifter Cable; Shift Control Cable; Cable
    • Base No.: 7E395
    • Item Weight: 1.00 Pounds
    • Item Dimensions: 17.5 x 17.0 x 2.4 inches
    • Condition: New
    • Fitment Type: Direct Replacement
    • SKU: 8G1Z-7E395-C
    • Warranty: This genuine part is guaranteed by Ford's factory warranty.
    More Info
    Fits the following 2009 Ford Taurus X Submodels:
    • Eddie Bauer, Limited, SEL | 6 Cyl 3.5 L GAS

2009 Ford Taurus X Shift Cable

If you're seeking quality and affordability, look no further than our extensive inventory of genuine 2009 Ford Taurus X Shift Cable available at FordPartsDeal.com. You can confidently purchase our OEM 2009 Ford Taurus X Shift Cable as they are supported by the manufacturer's warranty and our hassle-free return policy, alongside the benefit of our fast delivery service.

2009 Ford Taurus X Shift Cable Parts Q&A

  • Q: How to Service and Repair the Shift Cable on 2009 Ford Taurus X?
    A: Service and repair of the selector lever cable requires the vehicle to be set to neutral position on a hoist. The service begins by untucking the LH front seat and selector lever trim ring while you lift the storage compartment lid. First detach the floor console finish panel by taking out its two securing screws followed by removing the panel. The LH floor console trim panel needs pulling outward from its retaining clips before pulling down the front to remove its pin-type retainers. The selector lever cable must be detached first from the selector lever and then from the selector lever cable bracket before disconnecting the connector for the LH floor console trim panel. The floor needs to be freed of its selector lever cable retainer before the cable is guided through the heater housing area. Start the replacement by taking off both grommet nuts near the bulkhead and disconnecting the mass air flow sensor connection while also disconnecting the engine breather from the air cleaner assembly. To remove the installment begin by unfastening the two bolts on the ACL assembly then loosen the ACL outlet pipe clamp where it meets the throttle body (TB) and finally detach the ACL assembly with the outlet pipe. Detach both the selector lever cable retainer from the brake tube bracket alongside the cable end from the manual control lever. The selector lever cable can be detached from its bracket position by depressing the two release tabs. To assemble the cable select the vehicle position for its placement before installing it into the bracket where both tabs should remain locked. After positioning the grommet on the brake tube bracket users must connect the selector lever cable retainer before installing two nuts which require 7 Nm (62 lb-in) torque. The cable must run under the heater housing while the retainer should be connected to floor level before installing on the selector lever housing where tabs need locking into position. Reinstall the LH floor console trim panel then the floor console finish panel while tightening all the screws to 5 Nm (44 lb-in). Insert drive mode on the selector lever before you install the trim ring and the LH front seat. Use a clockwise rotation on the manual control lever to reach the drive position until it stops before rotating counterclockwise by one detent. Should you need to unlock the adjuster slide its locking tab and position the selector lever cable end against the manual control lever after which join both parts when the locking tab remains unlocked. Lock the adjuster tab before positioning the ACL assembly and installing two bolts while torquing them to 11 Nm (97 lb-in). Secure the ACL outlet pipe close to 5 Nm torque at the TB section then reconnect the engine breather to the ACL unit and the MAF sensor cable. Verify the vehicle will start only in the park and neutral settings while the reverse lamp activates properly in reverse mode before installing the center console.

Related 2009 Ford Taurus X Parts