
Popular OEM Ford Taurus X Parts
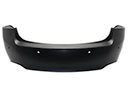
- Body & Hardware Parts View More >
- Electrical Parts View More >
- Air & Fuel Delivery Parts View More >
- Steering Parts View More >
- Emission Control & Exhaust Parts View More >
- Charging & Starting Parts View More >
- Engine Parts View More >
- Belts & Cooling Parts View More >
- Suspension Parts View More >
- Brakes Parts View More >
- A/C & Heating Parts View More >
- Headlights & Lighting Parts View More >


Why Buy Genuine Ford Taurus X Parts From FordPartsDeal.com
FordPartsDeal.com offers a smart and convenient way to buy genuine parts online. We sell new OEM Ford Taurus X parts, including Transmission. Authorized dealers directly provide all the Ford Taurus X parts and assemblies to ensure the optimal quality and fit. We also provide all properly fitting Ford Taurus X parts, such as Driveline & Axles specific to your model. When you shop here, you get real Ford value at highly competitive prices. All our products come with the same Ford warranty available at other dealerships. Our easy-to-use catalog helps you quickly identify the right part for your car. You'll receive fast shipping from our warehouse network, keeping your Ford Taurus X running smoothly. Our staff consists of Ford professionals who are ready to assist you. We aim to treat each customer as if they were stepping out of a Ford showroom. VIN verification and our live support ensure that the part you order is the right Ford Taurus X part for your vehicle.
The Ford Taurus X emerged between 2007 and 2009 as a design and performance upgraded version of the Ford Freestyle. The front-engine Taurus X operates with FWD or AWD powertrain configurations as it derives from the Ford D3 platform. Moving from a 3.0L V6 engine with 203 horsepower to the 3.5L Duratec 35 V6 engine delivers a 263 horsepower output in the Ford Taurus X. The car receives improved performance through its 6-speed automatic transmission which upgraded from the older ZF-Batavia continuously variable transmission to deliver more efficient and dynamic driving dynamics. The multi-seat capability of the Taurus X demonstrates adaptability and the vehicle offers important features which include adjustable seat configuration and automatic second-row seat folding alongside remote rear liftgate operation. Standard features on Taurus X included Electronic Stability Control (ESC) together with anti-lock braking system (ABS) and traction control which provided a secure driving environment. The Ford Taurus X stands out because its durability is widely acknowledged along with its capacity to provide dependable manufacturer replacement parts that determine operational efficiency. Thankfully the Taurus X owners can obtain genuine Ford parts to keep their vehicle operational with prime materials available. Quality-oriented performance characteristics help the Ford Taurus X outperform its segment competitors.
Ford Taurus X issues group into suspension, engine cooling, and ignition systems. In the front and rear, the Taurus X can show premature suspension wear. Struts and bushings soften, reducing ride comfort and control on the Taurus X. Inspect each suspension strut for leaks, check bushing cracks, and measure alignment per Ford guidance. Use torque specs, then road test to confirm quiet suspension movement. Within the engine, the Taurus X may suffer water pump failure from the internal chain drive. Coolant can leak into oil, risking bearing damage and rapid overheating on the Taurus X. Look for milky oil, pressure test, and replace the water pump with careful timing reassembly. Verify thermostat operation and fans, since chronic overheating can shorten water pump life on the Taurus X. For ignition performance, failing ignition coil modules cause misfires, rough idle, and weak acceleration. Scan for misfire counters, inspect plugs and boots, and replace the faulty ignition coil. Follow Ford procedures for coolant fill, air bleeding, and idle relearn. A final drive confirms restored cooling, smooth power, and stable handling on the Ford Taurus X.
Ford Taurus X Parts and Q&A
- Q: How to service the upper intake manifold on Ford Taurus X?A:To remove the upper intake manifold, disconnect the air cleaner outlet pipe, various hoses and connectors and remove support bracket bolts. Clean the sealing surfaces, install new gaskets and attach the manifold at defined torque. Installation is done by reconnecting all parts, such as, hoses and electrical connectors.
- Q: How to service the catalytic converter on Ford Taurus X?A:In order to service the catalytic converter, lift the car in neutral. Take off the Y-pipe flange nuts and gasket and screw in new ones to 40 Nm. Unscrew Torca clamp nut, and rescrew to 55 Nm. Isolate the converter and the muffler, replace, and ensure that there are no exhaust leakages.
- Q: How to service and repair the alternator on Ford Taurus X?A:In order to fix the alternator, one has to detach the battery, the engine cover, and the upper radiator hose. Disconnect the generator, remove the bolts and remove the generator. Install the new generator and tighten the bolts to the required torque, reconnect all the items and put the engine cover and battery back.


