FordParts
My Garage
My Account
Cart
OEM Ford Contour Oil Pan
Oil Drain Pan- Select Vehicle by Model
- Select Vehicle by VIN
Select Vehicle by Model
orMake
Model
Year
Select Vehicle by VIN
For the most accurate results, select vehicle by your VIN (Vehicle Identification Number).
3 Oil Pans found

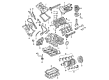
Ford Contour Oil Pan Part Number: 8L8Z-6675-A
$94.95 MSRP: $138.22You Save: $43.27 (32%)Ships in 1-3 Business Days
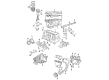
Ford Contour Oil Pan Part Number: F7RZ-6675-AA
$12.92 MSRP: $17.87You Save: $4.95 (28%)Ships in 1-2 Business Days
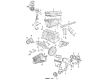
Ford Contour Oil Pan Part Number: F5RZ-6675-B
Ford Contour Oil Pan
OEM Oil Pan boasts unmatched quality. Each part goes through full quality checks. They adhere to Ford's official factory standards. These steps remove flaws and inconsistencies. So you can get Oil Pan with long life and a perfect fit. Come to our website and find genuine Ford Contour parts. We keep a wide inventory of OEM Contour parts at the highly affordable prices. It's easy to search, compare, and pick what you need. You'll love the clear info and simple checkout. We offer top-rated customer service, and we reply fast. We also ship promptly to ensure your order arrives on time.
Through this article, we are going to unveil the Oil Pan as a strategic mechanism as far as Ford Contour vehicles are concerned. The oil pan also known as the crankcase holds the engine oil which in turn provides lubrication by minimizing chances of leakage, thereby enhancing the efficiency of the mechanism. The Oil Pan is made with the wet sump system where the oil is collected through a pickup tube that enables the oil pump to pump it properly as it cools and lubricates other parts of the engine. The Ford Contour which was manufactured from 1995 to 2000, supports a number of models which comprises the GL, LX, and SE trims; all would favor the strengthened oil pan. However, a modern variation to Oil Pans is possible through the use of cast aluminium because it is far more superior to stamped steel designs. They also reduce oil slosh during hard cornering providing efficiency and safety in this advanced innovation. The above facts and aspects show that the sufficient oil capacity of the Oil Pan for different operations is vital for engine health. Also, the oil pan shape is distinctive and has been manufactured to fit the dimensions of the Ford Contour well. Due to durability and high performance associated with the Oil Pan, it is one of the most popular products in the auto-market and useful for everybody, who owns Ford Contour and wants to increase the effectiveness and lifespan of the car.
Ford Contour Oil Pan Parts and Q&A
- Q: How to service and repair the oil pan on Ford Contour?A:The first step for maintenance on the oil pan requires users to disconnect the battery ground cable followed by removing the Exhaust Manifold heat shield after disconnecting its upper bolt and nut. Start with removing the coolant hose bracket while detaching the engine lifting eye before you extract the engine oil dipstick tube and secure its bracket that holds the tube/hose (A/C). Following that step disconnect the Three Way Catalytic Converter (TWC) from the exhaust manifold by removing its lower bolts. The TWC can be removed by first supporting the vehicle then removing the bolt and retaining clip to separate it from the exhaust system along with disconnection of hanger insulators and electrical disconnection of Heated Oxygen Sensor (H02S) and lastly separating it from the clamp. Prior to removing the oil pan bolts drain the engine oil and put the drain plug in place before taking out the oil pan without damaging the facing surfaces by using a sharp spatula to split it from the lower crankcase and lightly tapping the drain plug after tightening with a rubber hammer if needed. The first step for installation requires wiping the old sealer off mating faces before inserting two M6 x 20 studs into the lower crankcase to guide the oil pan installation while thoroughly cleaning all mating surfaces from oil and residue. Fasten 3 mm sealer at the oil pan mating surface before installation within a ten-minute time frame. Tightening of the bolts must be done in a dual-stage process starting with Stage 1 at 6 Nm torque followed by Stage 2 at 10 Nm torque. The TWC installation requires a sequence where you feed it to exhaust manifold studs and Exhaust Pipe before bracket attachment while linking H02S electrical and hanger insulators installation and exhaust connection to maintain exhaust manifold contact. Finish securing the clip for the TWC followed by bolt installation before lowering the vehicle. The TWC needs to be joined again with the exhaust manifold while installing the exhaust manifold heat shield. You should put the oil level indication tube into the cylinder block followed by installing the coolant hose bracket and engine lifting eye and fastening the upper bolt and nut and the lower bolts before attaching the bracket to the A/C line. Use engine-grade oil to satisfy the defined quantity levels for filling the engine. Some abnormal drive symptoms will occur after reattaching the battery ground cable because the vehicle needs to relearn its adaptive strategy when driving at least 16 km (10 miles). Inspection of fluid levels should be followed by necessary corrections while vacuum hoses and wiring require secure cable ties for their routing.

Related Ford Contour Parts
 Ford Contour Timing Belt
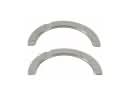 Ford Contour Crankshaft Thrust Washer
 Ford Contour Cylinder Head Gasket
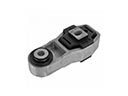 Ford Contour Engine Mount Torque Strut
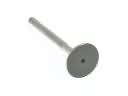 Ford Contour Exhaust Valve
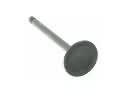 Ford Contour Intake Valve
 Ford Contour Oil Filter
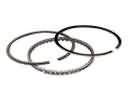 Ford Contour Piston Ring Set
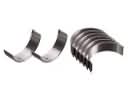 Ford Contour Rod Bearing
 Ford Contour Timing Chain
 Ford Contour Valve Stem Seal
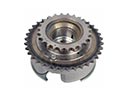 Ford Contour Variable Timing Sprocket