My Garage
Cart
Make sure this part fits

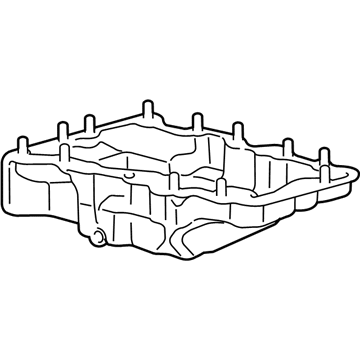
Ford 8L8Z-6675-A
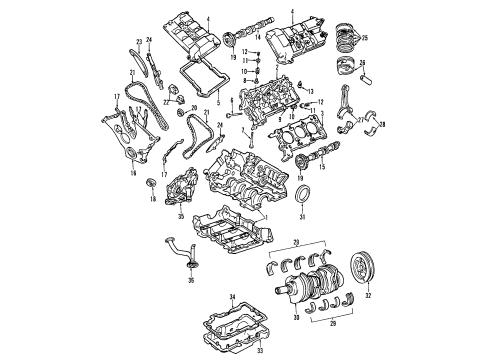
Oil Pan

1995-2008 Ford 8L8Z6675A

Customer Questions & Expert Answers (15)
Ford 8L8Z-6675-A Oil Pan
  • Part Description
    Pan Assembly - Engine Oil; Engine Oil Pan
  • Base No.
    6675
  • Replaces
    7L8Z-6675-A, 5L8Z-6675-AA
  • Manufacturer
    Ford
Make sure this part fits
$94.95 MSRP: $138.22
You Save: $43.27 (32%)
Ships in 1-3 Business Days
1
ADD TO CART
  • Vehicle Fitment

    Year Make Model Trim Engine
    1995-2000 Ford ContourGL, GL Sport, LX, LX Sport, SE, Sport, SVT6 Cyl 2.5 L GAS
    2001-2008 Ford EscapeLimited, XLS, XLT, XLT No Boundaries, XLT Sport6 Cyl 3.0 L GAS
    1999-2002 Mercury CougarBase, S, V66 Cyl 2.5 L GAS
    2005-2008 Mercury MarinerBase, Luxury, Premier6 Cyl 3.0 L GAS
    1995-2000 Mercury MystiqueBase, GS, GS Spree, LS, LS Young America6 Cyl 2.5 L GAS
    Warning: California's Proposition 65
  • Customer Questions & Expert Answers

    Q:
    Will this 8L8Z-6675-A work in my car? Posted by FordPartsDeal Specialist
    A:
    Select Your Vehicle model to verify if part number 8L8Z-6675-A fits your car.
    Posted by FordPartsDeal Specialist
    Q:
    How to service and repair the oil pan on Ford Contour? Posted by Customer
    A:
    The first step for maintenance on the oil pan requires users to disconnect the battery ground cable followed by removing the exhaust manifold heat shield after disconnecting its upper bolt and nut. Start with removing the coolant hose bracket while detaching the engine lifting eye before you extract the engine oil dipstick tube and secure its bracket that holds the tube/hose (A/C). Following that step disconnect the Three Way Catalytic Converter (TWC) from the exhaust manifold by removing its lower bolts. The TWC can be removed by first supporting the vehicle then removing the bolt and retaining clip to separate it from the exhaust system along with disconnection of hanger insulators and electrical disconnection of Heated Oxygen Sensor (H02S) and lastly separating it from the clamp. Prior to removing the oil pan bolts drain the engine oil and put the drain plug in place before taking out the oil pan without damaging the facing surfaces by using a sharp spatula to split it from the lower crankcase and lightly tapping the drain plug after tightening with a rubber hammer if needed. The first step for installation requires wiping the old sealer off mating faces before inserting two M6 x 20 studs into the lower crankcase to guide the oil pan installation while thoroughly cleaning all mating surfaces from oil and residue. Fasten 3 mm sealer at the oil pan mating surface before installation within a ten-minute time frame. Tightening of the bolts must be done in a dual-stage process starting with Stage 1 at 6 Nm torque followed by Stage 2 at 10 Nm torque. The TWC installation requires a sequence where you feed it to exhaust manifold studs and exhaust pipe before bracket attachment while linking H02S electrical and hanger insulators installation and exhaust connection to maintain exhaust manifold contact. Finish securing the clip for the TWC followed by bolt installation before lowering the vehicle. The TWC needs to be joined again with the exhaust manifold while installing the exhaust manifold heat shield. You should put the oil level indication tube into the cylinder block followed by installing the coolant hose bracket and engine lifting eye and fastening the upper bolt and nut and the lower bolts before attaching the bracket to the A/C line. Use engine-grade oil to satisfy the defined quantity levels for filling the engine. Some abnormal drive symptoms will occur after reattaching the battery ground cable because the vehicle needs to relearn its adaptive strategy when driving at least 16 km (10 miles). Inspection of fluid levels should be followed by necessary corrections while vacuum hoses and wiring require secure cable ties for their routing.
    Posted by FordPartsDeal Specialist
    Q:
    How to service and repair the oil pan on Mercury Cougar? Posted by Customer
    A:
    Service and repair of the oil pan requires users to begin by unplugging the battery ground cable alongside heat shield removal. Begin by unrusting the upper bolt then remove the coolant hose bracket followed by the engine-lifting eye and engine oil dipstick tube. To begin removal of the A/C tube/hose equipment one should disconnect its bracket then unfasten the lower bolts. Start the service by disconnecting the Three Way Catalytic Converter from the exhaust manifold followed by vehicle lift then removal of the TWC by unhooking its rubber mountings after taking out the bolt and retaining clip. The technician disconnects the Heated Oxygen Sensor (H02S) electrical connector then takes off the TWC from its bracket allowing engine oil drainage from the drain plug before removing all six oil pan bolts. A sharp spatula and light hammer movement should be used to separate the oil pan from the lower crankcase without damaging the mating faces. Installation begins with cleansing the mating faces to remove all traces of old sealer after their oil and gasket residue is removed. Clean the oil pan with solvent. Install studs (M6 x 20) in dead end bores of the oil pan then apply 3 mm silicone gasket and sealant to the mating face before installing the pan within 10 minutes without touching anything afterward. Crank the indicated bolts following two steps which start with 6 Nm force in stage one then move to 10 Nm force in stage two. You should reinstall the TWC by guiding it to the exhaust manifold studs while attaching it to the bracket and connecting the HO2S electrical connector and rubber mounting before securing it to the exhaust with proper contact against the exhaust manifold. First secure the retaining clip for the TWC before you install the bolt. Afterward you should lower the vehicle to attach the TWC to the exhaust manifold. Begin by installing the heat shield then add the oil level indicator tube into the cylinder block followed by placing the coolant hose bracket and engine lifting eye. Secure the upper bolt/nut while installing all lower bolts and then install the bracket to the A/C line. The tank should receive engine oil according to its fill level instructions and oil type requirements. Some abnormal drive symptoms will appear after battery reconnection as the vehicle learns its adaptive strategy during which driving at least 16 km (10 miles) could be necessary. Verify fluid levels while also making necessary adjustments before securing vacuum hoses and wiring according to the cable tie procedure.
    Posted by FordPartsDeal Specialist
    Q:
    How to service and repair the oil pan on Mercury Mystique? Posted by Customer
    A:
    The first step for maintenance on the oil pan requires users to disconnect the battery ground cable followed by removing the exhaust manifold heat shield after disconnecting its upper bolt and nut. Start with removing the coolant hose bracket while detaching the engine lifting eye before you extract the engine oil dipstick tube and secure its bracket that holds the tube/hose (A/C). Following that step disconnect the Three Way Catalytic Converter (TWC) from the exhaust manifold by removing its lower bolts. The TWC can be removed by first supporting the vehicle then removing the bolt and retaining clip to separate it from the exhaust system along with disconnection of hanger insulators and electrical disconnection of Heated Oxygen Sensor (H02S) and lastly separating it from the clamp. Prior to removing the oil pan bolts drain the engine oil and put the drain plug in place before taking out the oil pan without damaging the facing surfaces by using a sharp spatula to split it from the lower crankcase and lightly tapping the drain plug after tightening with a rubber hammer if needed. The first step for installation requires wiping the old sealer off mating faces before inserting two M6 x 20 studs into the lower crankcase to guide the oil pan installation while thoroughly cleaning all mating surfaces from oil and residue. Fasten 3 mm sealer at the oil pan mating surface before installation within a ten-minute time frame. Tightening of the bolts must be done in a dual-stage process starting with Stage 1 at 6 Nm torque followed by Stage 2 at 10 Nm torque. The TWC installation requires a sequence where you feed it to exhaust manifold studs and exhaust pipe before bracket attachment while linking H02S electrical and hanger insulators installation and exhaust connection to maintain exhaust manifold contact. Finish securing the clip for the TWC followed by bolt installation before lowering the vehicle. The TWC needs to be joined again with the exhaust manifold while installing the exhaust manifold heat shield. You should put the oil level indication tube into the cylinder block followed by installing the coolant hose bracket and engine lifting eye and fastening the upper bolt and nut and the lower bolts before attaching the bracket to the A/C line. Use engine-grade oil to satisfy the defined quantity levels for filling the engine. Some abnormal drive symptoms will occur after reattaching the battery ground cable because the vehicle needs to relearn its adaptive strategy when driving at least 16 km (10 miles). Inspection of fluid levels should be followed by necessary corrections while vacuum hoses and wiring require secure cable ties for their routing.
    Posted by FordPartsDeal Specialist
    Q:
    How to Ensure Proper Functioning of the Oil Pan on a Mercury Cougar? Posted by Customer
    A:
    The service or repair of the oil pan requires beginning work by disconnecting the battery ground wire and removing the heat shield. The repair of the oil pan begins with undoing the upper bolt/nut before removing the coolant hose bracket and the engine lifting eye and the engine oil dipstick tube. Before servicing the tube/hose related to the A/C component and the lower bolts you should remove their bracket. The first service step involves disconnecting the Three Way Catalytic Converter from the exhaust manifold but vehicle support is required before removing the TWC from its rubber mountings by unhooking its Heated Oxygen Sensor (H02S) electrical connector as well as draining engine oil at the drain plug. Start by disconnecting all oil pan bolts then proceed to separate the oil pan from the lower crankcase by using a sharp spatula which requires mild tapping against the drain plug with a rubber hammer. To install the parts first wipe off the mating areas from previous sealer while making sure both surfaces have no remaining oil or gasket residue before cleaning the oil pan with solvent. Running 10 studs (M6 x 20mm) through dead end bores serves to protect the ladder frame before applying a 3mm silicone gasket seal that needs installation within 10 minutes of application. Install the bolts through their designated order by first tightening them to 6 Nm and then progressing to 10 Nm torque. You should install the TWC by placing it onto the exhaust manifold studs while you connect it to the bracket then link the H02S electrical connector and rubber mounting and finally attach it to the exhaust touching the exhaust manifold. Fix the retaining clip before instilling the TWC bolt then lower the vehicle down. Add the heat shield to the vehicle then place the oil level indicator tube within the cylinder block followed by mounting the coolant hose bracket alongside installing the engine lifting eye. Install the upper bolt and screw in the upper nut before adding lower bolts to the bracket which should attach to the A/C line. The system requires engine oil in designated amounts and specific kind for proper filling. Abnormal drive symptoms might be experienced during adaptive strategy learning until the vehicle traveled 16 km (10 miles) or more. You should check the fluid levels for proper adjustment and use cable ties to secure all vacuum hoses and wires.
    Posted by FordPartsDeal Specialist
    Q:
    How to service and repair the oil pan on Mercury Mariner? Posted by Customer
    A:
    After positioning the vehicle on a hoist with NEUTRAL selection you should drain the engine oil before reinstalling and tightening the drain plug to 28 Nm (21 ft. lbs.). Complete the oil pan repair by taking out the 4 lower engine front cover bolts as well as the 4 oil pan-to-bell housing bolts and the 13 bolts that hold the oil pan in place. The installation process for the oil pan requires use of plastic scraping tools instead of metal scratchers or abrasive instruments to prevent sealing surface scratches which cause leaks. Before sealing the oil pan apply a two and a half millimeter bead of silicone gasket and sealant onto its surface. All mating surfaces need inspection during this operation. The technician must also remove any sealant if the oil pan remains unsecured in the four minutes following sealant application. This procedure calls for cleaning the area with metal surface cleaner before complete drying. Affix 2.5 millimeters (0.09 inches) of silicone gasket and sealant to the oil pan before installing it with tightened 2 rear oil pan bolts using your fingers. First tighten the 4 oil pan-to-bell housing bolts to 48 Nm (35 ft. lbs.) then proceed with the 4 lower engine front cover bolts while tightening to 10 Nm (89 inch lbs.). Nub the last oil pan bolts according to a particular sequence before tightening them to 25 Nm (18 ft. lbs.). Afterward, reinstall the oil level indicator and tube while filling the engine with clean engine oil.
    Posted by FordPartsDeal Specialist
    Q:
    How should the remaining oil pan bolts be tightened for the 2005 Ford Escape? Posted by Customer
    A:
    Tighten them in the specified sequence to 25 Nm (18 ft. lbs.).
    Posted by FordPartsDeal Specialist
    See expert answers on similar Oil Pan
    Q:
    What bolts need to be removed after loosening the front lower bellhousing-to-engine bolts for the 2008 Ford Escape? Posted by Customer
    A:
    Remove the two oil pan-to-bellhousing bolts and the two bellhousing-to-oil pan bolts.
    Posted by FordPartsDeal Specialist
    See expert answers on similar Oil Pan
    Q:
    What should be done after tightening the oil pan bolts for the 2003 Ford Escape? Posted by Customer
    A:
    Install the oil pan-to-transaxle bolts and tighten the oil pan bolts in the specified sequence.
    Posted by FordPartsDeal Specialist
    See expert answers on similar Oil Pan
    Q:
    What should be taken care of when preparing for installation for the 2001 Ford Escape? Posted by Customer
    A:
    Avoid using abrasive grinding discs for gasket material removal and only use manual scrapers to prevent scratching or gouging the aluminum sealing surfaces.
    Posted by FordPartsDeal Specialist
    See expert answers on similar Oil Pan
    Q:
    What is the final step after installing the oil pan for the 2002 Ford Escape? Posted by Customer
    A:
    Reinstall the catalytic converter and fill the crankcase with Super Premium SAE 5W-20 Motor Oil or an equivalent that meets Ford specification WSS-M2C153-H.
    Posted by FordPartsDeal Specialist
    See expert answers on similar Oil Pan
    Q:
    How should the be positioned for the repair for the 2006 Ford Escape? Posted by Customer
    A:
    Position the vehicle in NEUTRAL on a hoist.
    Posted by FordPartsDeal Specialist
    See expert answers on similar Oil Pan
    Q:
    What should be done after draining the oil for the 2004 Ford Escape? Posted by Customer
    A:
    Install the drain plug and then remove and discard the oil filter.
    Posted by FordPartsDeal Specialist
    See expert answers on similar Oil Pan
    Q:
    What should be removed next after loosening the bolts for the 2007 Mercury Mariner? Posted by Customer
    A:
    Remove the 7 retainers and the LH splash shield, followed by the oil level indicator and tube.
    Posted by FordPartsDeal Specialist
    See expert answers on similar Oil Pan
    Q:
    What is the final step in the installation process for the 2000 Mercury Cougar? Posted by Customer
    A:
    Screw in the upper bolt/nut, install the lower bolts, attach the bracket to the A/C line, fill with engine oil according to specifications, and reconnect the battery.
    Posted by FordPartsDeal Specialist
    See expert answers on similar Oil Pan
    If you have any questions about this product, please don't hesitate to ask us. We will be happy to help you!

OEM Ford Oil Pan 8L8Z-6675-A Designed for Proper Fit and Performance

The Ford part 8L8Z-6675-A Oil Pan as a genuine Ford Oil Pan component delivers both authenticity and reliability. This item carries a warranty from the manufacturer which guarantees 12-month, 12,000-mile of use. The Ford 8L8Z-6675-A Oil Pan is used with Ford Escape, Contour vehicles and Mercury Cougar, Mariner, Mystique models. The original Ford part will bear the manufacturer part number: 8L8Z-6675-A and where it is made at Ford. It has the code: 6675.
This component has dimensions of 9.6 x 18.9 x 14.9 inches and its weight is approximately 12.00 Pounds. The part 8L8Z6675A is available in New condition while meeting the standards of the product rating. The Pan Assembly - Engine Oil; Engine Oil Pan belongs to the Direct Replacement category to guarantee it is suitable for its specific vehicle applications. This part 8L8Z-6675-A replaces 7L8Z-6675-A, 5L8Z-6675-AA. The inventory reference for this item is SKU: 8L8Z-6675-A. The Ford manufacturer issues a factory warranty for this component which ensures dependable operation and peak performance. You can find delivery and returns information on our Shipping Policy and Return Policy pages.
Original equipment manufacturer parts are of the top standards and their performance is outstanding and top notch. This is explained by the fact that they follow the official manufacturing techniques of Ford, use of premium material and meets high standards of quality. Our site is worth visiting, in case you need high-quality and affordable OEM Ford components. We promise the optimal priced Ford parts on a wide range. You can relax that all OEM products you buy from us include a manufacturer warranty and will be covered by our simple and easy-to-use return policy, so you will not worry about buying a part.