FordParts
My Garage
My Account
Cart
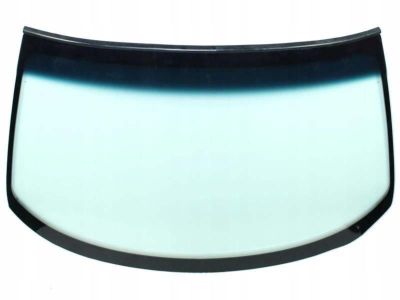
OEM Ford F-150 Heritage Windshield
Glass Windshield- Select Vehicle by Model
- Select Vehicle by VIN
Select Vehicle by Model
orMake
Model
Year
Select Vehicle by VIN
For the most accurate results, select vehicle by your VIN (Vehicle Identification Number).
1 Windshield found

Ford F-150 Heritage Windshield, Front Part Number: 3L3Z-1503100-AA
$209.04 MSRP: $306.97You Save: $97.93 (32%)
Ford F-150 Heritage Windshield
OEM Windshield boasts unmatched quality. Each part goes through full quality checks. They adhere to Ford's official factory standards. These steps remove flaws and inconsistencies. So you can get Windshield with long life and a perfect fit. Come to our website and find genuine Ford F-150 Heritage parts. We keep a wide inventory of OEM F-150 Heritage parts at the highly affordable prices. It's easy to search, compare, and pick what you need. You'll love the clear info and simple checkout. We offer top-rated customer service, and we reply fast. We also ship promptly to ensure your order arrives on time.
Ford F-150 Heritage Windshield Parts and Q&A
- Q: How to reseal the windshield on Ford F-150 Heritage?A:The windshield sealing procedure starts with the removal of cowl grille and left-hand and right-hand A-pillar assist handles followed by the unscrewing of their covers. Begin the windshield resealing by taking off both windshield side garnish mouldings. You need to start by removing the screw from the sunglass storage bin inside before releasing the three clips to move the roof console forward and down before disconnecting the electrical connectors due to a full overhead console without roof opening panel. To remove the mini overhead console (with roof opening panel) you should first pull it downward to release four mounting clips followed by disconnecting its electrical connectors. The next step includes taking out the interior rear view mirror and the roof opening panel trim from the headliner surface. First position the two sun visors through the side window frames to gain access to the internal screws which you can remove. Then place the sun visors onto the storage position before extracting them by taking out the four screws and the two sun visor and visor arm clips while disconnecting all electrical connectors if present. Lower the front section of the headliner partially from the windshield upper edge before securing it with proper materials. Use an alcohol-free cleaner to prepare the edge where glass meets existing urethane adhesive at the windshield top and sides as well as at the exterior of the bottom edge. You need a prepared urethane applicator tip which you would install into a high-ratio electric or battery-operated caulk gun to implement a seamless bead of urethane adhesive (Essex 400-HV) over the cleaned area. Use a single continuous motion to remove excess urethane sealant then start backfilling the application zone before cleaning all excess urethane. The first hour of the urethane adhesive curing time requires testing for both air and water leaks before adding more urethane adhesive if needed. Insert both sun visors and reinstall the headliner along with the overhead console as well as the windshield side garnish mouldings while making sure to join electrical connectors if they exist. First position the sun visors to side windows and secure them with internal screws and install the A-pillar assistance handles along with screws as well as their covers. Windshield glass cleaning needs to be finished by installing the cowl grille followed by application of an alcohol-free cleaner to the inside and outside glass surfaces.


