
Popular OEM Ford F-150 Heritage Parts
- Body & Hardware Parts View More >
- Electrical Parts View More >
- Air & Fuel Delivery Parts View More >
- Steering Parts View More >
- Emission Control & Exhaust Parts View More >
- Charging & Starting Parts View More >
- Engine Parts View More >
- Belts & Cooling Parts View More >
- Suspension Parts View More >
- Brakes Parts View More >
- A/C & Heating Parts View More >
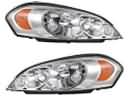
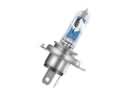
- Headlights & Lighting Parts View More >


Why Buy Genuine Ford F-150 Heritage Parts From FordPartsDeal.com
FordPartsDeal.com offers a smart and convenient way to buy genuine parts online. We sell new OEM Ford F-150 Heritage parts, including Transmission. Authorized dealers directly provide all the Ford F-150 Heritage parts and assemblies to ensure the optimal quality and fit. We also provide all properly fitting Ford F-150 Heritage parts, such as Driveline & Axles specific to your model. When you shop here, you get real Ford value at highly competitive prices. All our products come with the same Ford warranty available at other dealerships. Our easy-to-use catalog helps you quickly identify the right part for your car. You'll receive fast shipping from our warehouse network, keeping your Ford F-150 Heritage running smoothly. Our staff consists of Ford professionals who are ready to assist you. We aim to treat each customer as if they were stepping out of a Ford showroom. VIN verification and our live support ensure that the part you order is the right Ford F-150 Heritage part for your vehicle.
Ford launched the F-150 Heritage in 2004 to honor the F-Series history because it featured modern engineering elements. Customers can purchase the Ford F-150 Heritage with either a 4.6L Triton V8 or a 5.4L Triton V8 or choose the supercharged 5.4L V8 that powers the Ford F-150 Heritage Lightning. The premium edition engine system of the F-150 Heritage can achieve both 380 horsepower and 450 lb-ft of torque power output which enables the vehicle to reach 60 mph in 5 seconds. The Ford F-150 Heritage came with a four-speed automatic transmission which provided effortless operation along with fine driving capability. The Regular Cab and Super Cab versions of the vehicle have all-wheel drive but the Ford F-150 Heritage Lightning uses rear-wheel drive only for superior performance handling. All Ford F-150 Heritage models come standard with air conditioning alongside four-wheel disc brakes coupled with power steering and twin front airbags to ensure a reliable operation. The Ford F-150 Heritage offers customers three configuration options starting from standard cab and moving on to Super Cab and ending with Lightning chassis types. The engineering standards of OEM components for Ford F-150 Heritage vehicles exactly match original vehicle specifications to provide high-quality performance results. Quality control tests ensure this equipment stays reliable and compatible for Ford F-150 Heritage models and so customers can employ these parts for work applications as well as their everyday life needs.
Ford F-150 Heritage involves groups into engine emissions control, ignition energy and HVAC electrical energy. On the F-150 Heritage, a stuck EGR sensor can cause the EGR valve to stay partially open because of idling. Symptoms include rough idle, slight pinging, poor mileage and an occasional warning light on the F-150 Heritage. Visually check vacuum lines, clean passages, graph EGR feedback, and change the valve and sensor with Ford procedures. When the gap between the spark plugs exceeds the required specification due to time and heat, ignition problems are experienced on the F-150 Heritage. The engine backfires, jerks on hills and raises a coil primary fault inside the F-150 Heritage. Install new plugs and boots, replace any failed ignition coils and check dwell using the Ford service data. An HVAC concern may also manifest when the blower is running high only. The series circuit is exposed to the heat and moisture and the connector and the blower motor resistor close to the glove box burn out. Check the fuse and body integrity, wiring, replace blower motor resistor and use Ford guidelines in applying the dielectric grease. Complete by driving cycle so F-150 Heritage idles along, accelerates, and offers complete airflow.
Ford F-150 Heritage Parts and Q&A
- Q: How to service and repair the alternator on Ford F-150 Heritage?A:To service the alternator, disconnect the battery ground cable, loosen the accessory drive belt, generator bracket bolt and loosen the ignition wire of the 4.6L engine. Ease the load of the generator bolts, electrical connectors and B+ cable. In order to install the new alternator, reverse the procedure in removing.
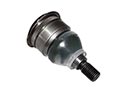
- Q: How to service and repair the axle shaft of a 8.8 Inch Rear Differential on Ford F-150 Heritage?A:To buy a Ford 8.8 Inch Rear Differential axle shaft, to repair, one needs to raise the vehicle, remove the wheel and empty the lubricant. Put out the differential cover and rear brakes. Removal of pinion shaft and axle shafts should be done and O-rings should not be damaged. Install the components once again, use sealant, and fill with lubricant and reattach the wheel.
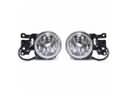
- Q: How to service and repair the front bumper cover for the Lightning on Ford F-150 Heritage?A:In order to fix the front bumper cover on the Lightning model, one has to unfit the bumper, unfit the fog lamp harness, and extract the fog lamps. Then take out the pin-type retainers and the six screws holding the bumper cover. Removing and installing Reverse the process and adjust the fog lamps as necessary.


