FordParts
My Garage
My Account
Cart
OEM Lincoln Blackwood Timing Cover
Engine Timing Cover- Select Vehicle by Model
- Select Vehicle by VIN
Select Vehicle by Model
orMake
Model
Year
Select Vehicle by VIN
For the most accurate results, select vehicle by your VIN (Vehicle Identification Number).
1 Timing Cover found

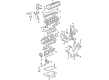
Lincoln Blackwood Timing Cover, Front Part Number: 2L7Z-6019-BA
Lincoln Blackwood Timing Cover
OEM Timing Cover boasts unmatched quality. Each part goes through full quality checks. They adhere to Lincoln's official factory standards. These steps remove flaws and inconsistencies. So you can get Timing Cover with long life and a perfect fit. Come to our website and find genuine Lincoln Blackwood parts. We keep a wide inventory of OEM Blackwood parts at the highly affordable prices. It's easy to search, compare, and pick what you need. You'll love the clear info and simple checkout. We offer top-rated customer service, and we reply fast. We also ship promptly to ensure your order arrives on time.
The Lincoln Blackwood Timing Cover is a key part that defines the reliability and performance of the Lincoln Blackwood, a luxury pickup truck, which enjoys benchmark standing for the unique Blackwood design and engineering. This Timing Cover is rather crucial since it safeguards the engine's timing mechanisms, whether a belt or a chain, from contamination and weather extremities. Made from a hard wearing metal like aluminum, plastic or steel the Lincoln Timing Cover is built to take the wear and tear that most vehicles will endure while enhancing the performance of the vehicles engine. That it can be used with different models of Blackwood makes it more attractive, especially as it blends with the car's overall innovation. The Timing Cover is usually fitted with gaskets for additional protection of the timing belt and thus the general performance of the Lincoln Blackwood. It is therefore important to frequently check the health of the Timing Cover since replacement at the right time avert catastrophic engine breakdown, thus keeping the car safe to operate. In overall the Lincoln Timing Cover has these characteristics that make stand apart in the automobile market; construction and function, it is a very integral part of the engine. Thus, it may be noted that apart from fortifying the performance of the Blackwood, the Lincoln Timing Cover also underlines the car's reliability to spectacular effect.
Lincoln Blackwood Timing Cover Parts and Q&A
- Q: How to service and repair the timing cover on Lincoln Blackwood?A:Start servicing or repairing the timing cover by removing left and right valve covers, the cooling fan and water pump pulley bolts. Begin by removing the crankshaft pulley then take out its bolts before you put the power steering pump to the side. Starting with the removal of the A/C muffler nut to move the component away then proceed by disconnecting the Crankshaft Position (CKP) sensor electrical connector. Pour out all engine oil before taking out bolts from the rear of the crankshaft to remove its front oil seal. The vehicle should be lowered while removing the electrical connector from the Camshaft Position (CMP) sensor. Use a plastic scraping tool to eliminate all traces of sealant because metal scrapers and abrasive tools will damage the sealing surfaces during the removal of the bolt and belt idler pulley. You should extract the bolts along with studs and engine front cover and gaskets before thoroughly cleaning and inspecting both the oil pan sealing surfaces and front cover sealing surfaces. Apply metal surface cleaner to delete all sealant when installing since the front cover and gasket requires securement within four minutes. Install the engine front cover after applying specified silicone sealant while following these bolt installation steps: bolt one through five to 25 Nm (18 ft. lbs.) then six and seven to 50 Nm (37 ft. lbs.) until bolt 11 through 15 reaches 25 Nm (18 ft. lbs.). Bolt and connect the CMP sensor before lifting the vehicle to execute a bolt tightening procedure at three stages beginning with 2 Nm (18 inch lbs.) then moving to 20 Nm (15 ft. lbs.) and finally completing the process by torquing the bolts an additional 60 degrees. Position the crankshaft front oil seal before installing the drain plug and restoring connection between the sensor and crank pulser. Position the A/C muffler before securing the nut and afterward position the power steering pump for bolt installation. Begin by installing the hose support nuts and then proceed with crankshaft pulley installation alongside water pump pulley and their related bolts. The vehicle requires clean engine oil before reinstalling the cooling fan together with left and right valve covers.

Related Lincoln Blackwood Parts
 Lincoln Blackwood Cam Gear
 Lincoln Blackwood Camshaft
 Lincoln Blackwood Crankshaft Pulley
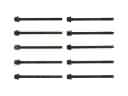 Lincoln Blackwood Cylinder Head Bolts
 Lincoln Blackwood Dipstick
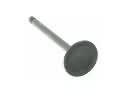 Lincoln Blackwood Intake Valve
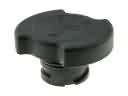 Lincoln Blackwood Oil Filler Cap
 Lincoln Blackwood Oil Pump
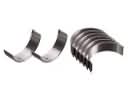 Lincoln Blackwood Rod Bearing
 Lincoln Blackwood Timing Chain
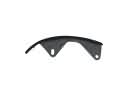 Lincoln Blackwood Timing Chain Guide
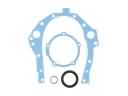 Lincoln Blackwood Timing Cover Gasket