
Popular OEM Lincoln Blackwood Parts
- Body & Hardware Parts View More >
- Electrical Parts View More >
- Air & Fuel Delivery Parts View More >
- Steering Parts View More >
- Emission Control & Exhaust Parts View More >
- Charging & Starting Parts View More >
- Engine Parts View More >
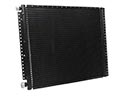
- Belts & Cooling Parts View More >
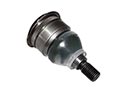
- Suspension Parts View More >
- Brakes Parts View More >
- A/C & Heating Parts View More >
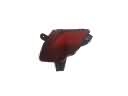
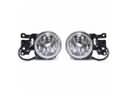
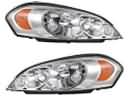
- Headlights & Lighting Parts View More >


Why Buy Genuine Lincoln Blackwood Parts From FordPartsDeal.com
FordPartsDeal.com offers a smart and convenient way to buy genuine parts online. We sell new OEM Lincoln Blackwood parts, including Transmission. Authorized dealers directly provide all the Lincoln Blackwood parts and assemblies to ensure the optimal quality and fit. We also provide all properly fitting Lincoln Blackwood parts, such as Driveline & Axles specific to your model. When you shop here, you get real Lincoln value at highly competitive prices. All our products come with the same Lincoln warranty available at other dealerships. Our easy-to-use catalog helps you quickly identify the right part for your car. You'll receive fast shipping from our warehouse network, keeping your Lincoln Blackwood running smoothly. Our staff consists of Lincoln professionals who are ready to assist you. We aim to treat each customer as if they were stepping out of a Lincoln showroom. VIN verification and our live support ensure that the part you order is the right Lincoln Blackwood part for your vehicle.
The production of the Lincoln Blackwood occurred between August 2001 and December 2002 to create the first luxury pickup truck section exclusively for Lincoln models. The Lincoln Blackwood was built from the Ford F-150 SuperCrew chassis and provided a 5.4-liter V8 engine developing 300 horsepower along with 360 lb-ft of torque that operated with a 4-speed automatic transmission for optimized shift quality and control. The 138.5-inch wheelbase and overall 220.2-inch length of the Blackwood ensure smoother rides and enhanced stability which provides convenience for different road surfaces. The Lincoln Blackwood contains an enclosed cargo compartment that utilizes black African wenge wood for both style and practicality because it includes full carpet areas and LED interior illumination. The wheels measuring 22 inches at their diameter create both a strong commanding presence while enhancing the handling performance. The Lincoln Blackwood standard seats use premium Connolly leather with dual-zone climate control features that guarantee passenger comfort at the top level. The company policy requires Lincoln vehicles to use genuine OEM parts since they guarantee performance excellence and vehicle reliability for all vehicles. The Lincoln Blackwood delivers commercial utility and elegant style to customers who require refined commercial vehicles.
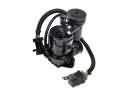
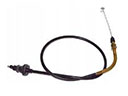
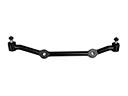
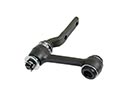
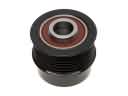
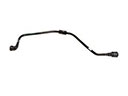
Lincoln Blackwood comes with group rear air suspension, engine ignition and brake hydraulics. In the back, the Blackwood can sag, be uneven, or have compressor run times. Leaks or a tired air suspension compressor will lower pressure and ride height on the Lincoln Blackwood. The bags, with air suspension compressor changes, must undergo smoke test, relay and fuse checks. Calibrate height settings and make sure no hose rubs on Blackwood. The Lincoln Blackwood can sputter at low rpm in order to be powerful and smooth. Due to poor idle with hesitation, it is a result of a deteriorating ignition coil or dirty plugs. Check the misfire counter, crossover coils, and grounding for cleanliness before replacement. Clean mass airflow sensor, replace it with quality plugs and retest the Blackwood under load. Under braking, worn or separated brake lines may become dislodged and catastrophically cut off pressure. The Lincoln Blackwood can lose this pedal, pull and trigger warning at highway speeds. Visually check routing and clips, drop and replace damaged brake lines, bleed and check firm grip. Secure the line with quality clamps, and add protective sleeves as well as ensuring the ABS is operational during a safe stop.
Lincoln Blackwood Parts and Q&A
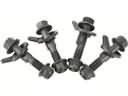
- Q: How to service the water pump on Lincoln Blackwood?A:In order to service the water pump, one will need to take off the engine cooling fan, fan shroud and drive belt. Removal of water pump pulley and pump bolts. Clean up the mounting surface and replace the O-ring seal with a new seal that has compatible coolant. Lastly, undo the uninstallation process in order to install.
- Q: How to service and repair the starter motor on Lincoln Blackwood?A:In order to fix the starter motor, loosen the battery ground, lift the car, and switch off the air suspension. Unscrew solenoid cover, disconnect electrical, and unscrew the starter motor. Install the starter again, reconnect the cables and install the cover over the solenoid. Last, re-attach the battery and put the vehicle down.
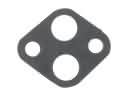
- Q: How to service and repair the lower intake manifold on Lincoln Blackwood?A:To fix the lower intake manifold, take off the upper intake manifold and un-hook several hoses and connectors. Installation: Take off the generator support bracket and the fuel injector connectors and then take off the lower intake manifold. Wipe the surfaces, replace the bolts and gaskets and reassemble all parts, completing with the upper intake manifold.


