FordParts
My Garage
My Account
Cart
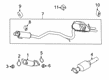
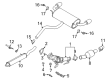
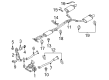
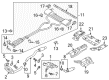
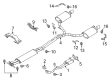
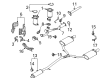
OEM Lincoln Exhaust Pipe
Exhaust Tail Pipe- Select Vehicle by Model
- Select Vehicle by VIN
Select Vehicle by Model
orMake
Model
Year
Select Vehicle by VIN
For the most accurate results, select vehicle by your VIN (Vehicle Identification Number).
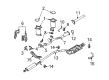
122 Exhaust Pipes found


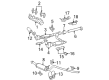
Lincoln Intermediate Pipe, Front Part Number: 6L3Z-5A212-J
$103.16 MSRP: $142.71You Save: $39.55 (28%)Ships in 1-2 Business DaysProduct Specifications- Other Name: Pipe - Exhaust Front; Exhaust Pipe; Direct-Fit Exhaust; Exhaust System Kit; Tail Pipe; Extension Pipe; Intermed Pipe
- Position: Front


Lincoln Exhaust Pipe Part Number: FL1Z-5201-B
$644.63 MSRP: $855.22You Save: $210.59 (25%)Ships in 1-3 Business DaysProduct Specifications- Other Name: Pipe - Exhaust; Resonator; Tail Pipe; Muffler; Resonator & Pipe


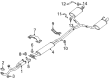
Lincoln Front Pipe Part Number: DE9Z-5G203-A
$676.91 MSRP: $898.06You Save: $221.15 (25%)Ships in 1-3 Business DaysProduct Specifications- Other Name: Tube Assembly; Exhaust Pipe
- Position: Front


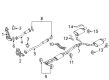
Lincoln Front Pipe Part Number: 7H6Z-5G274-A
$942.98 MSRP: $1251.04You Save: $308.06 (25%)Product Specifications- Other Name: Pipe - Exhaust; Exhaust Crossover Pipe; Exhaust Y Pipe; Exhaust Pipe
- Position: Front
- Replaces: 7H6Z-5G274-AB


Lincoln Front Pipe Part Number: AE5Z-5G203-B
$152.40 MSRP: $198.66You Save: $46.26 (24%)Product Specifications- Other Name: Tube Assembly; Exhaust Pipe
- Position: Front


Lincoln Exhaust Pipe, Front Part Number: 9A4Z-5G274-C
$258.44 MSRP: $339.85You Save: $81.41 (24%)Product Specifications- Other Name: Pipe - Exhaust; Exhaust Crossover Pipe, Front; Exhaust Y Pipe; Tail Pipe; Front Pipe
- Position: Front
- Replaces: 9A4Z-5G274-B


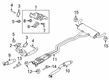
Lincoln Exhaust Pipe, Passenger Side Part Number: BA5Z-5G203-A
$521.87 MSRP: $686.27You Save: $164.40 (24%)Ships in 1-3 Business DaysProduct Specifications- Other Name: Tube Assembly; Exhaust Intermediate Pipe, Right; Flex Pipe; Flex Tube; Front Pipe
- Position: Passenger Side
- Replaces: AA5Z-5G203-B

Lincoln Exhaust Pipe Part Number: GL7Z-5201-A
$515.66 MSRP: $724.03You Save: $208.37 (29%)Ships in 1-3 Business DaysProduct Specifications- Other Name: Pipe - Exhaust; Resonator; Tail Pipe; Muffler; Resonator & Pipe
- Replaces: FL1Z-5201-A

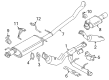
Lincoln Muffler W/Tpipe, Rear Part Number: 4L3Z-5230-A
$398.90 MSRP: $547.29You Save: $148.39 (28%)Product Specifications- Other Name: Muffler And Pipe Assembly - Rear; Exhaust Muffler; Direct-Fit Exhaust; Exhaust System Kit; Exhaust Pipe; Muffler
- Position: Rear
- Replaces: 4L3Z-5230-BB, 5L3Z-5230-MA, 6L3Z-5230-FA, 5L3Z-5230-BA, 6L3Z-5230-HA, 6L3Z-5230-DA, 8L3Z-5230-D, 8L3Z-5230-B

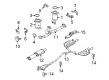
Lincoln Exhaust Pipe, Driver Side Part Number: K2GZ-5G203-A
$1098.30 MSRP: $1561.19You Save: $462.89 (30%)Ships in 1-3 Business DaysProduct Specifications- Other Name: Tube Assembly; Exhaust Intermediate Pipe, Left; Front Pipe; Intermediate Pipe
- Position: Driver Side


Lincoln Tail Pipe Part Number: 7L7Z-5201-BA
$412.44 MSRP: $579.10You Save: $166.66 (29%)Ships in 1-2 Business DaysProduct Specifications- Other Name: Pipe - Exhaust; Exhaust Pipe; Resonator; Muffler; Resonator & Pipe

Lincoln Catalytic Converter Part Number: LX6Z-5E212-M
$835.78 MSRP: $1122.83You Save: $287.05 (26%)Ships in 1-2 Business DaysProduct Specifications- Other Name: Converter Assembly; Converter

Lincoln Front Pipe Part Number: DE9Z-5G203-B
$651.38 MSRP: $864.18You Save: $212.80 (25%)Ships in 1-3 Business DaysProduct Specifications- Other Name: Tube Assembly; Exhaust Pipe
- Position: Front

Lincoln Exhaust Pipe Part Number: GD9Z-5G203-B
$712.80 MSRP: $945.67You Save: $232.87 (25%)Ships in 1-3 Business DaysProduct Specifications- Other Name: Tube Assembly; Flex Pipe; Flex Tube; Front Pipe


Lincoln Exhaust Pipe, Front Part Number: DA5Z-5G203-A
$676.91 MSRP: $898.06You Save: $221.15 (25%)Product Specifications- Other Name: Tube Assembly; Exhaust Intermediate Pipe, Front; Exhaust Crossover Pipe; Front Pipe
- Position: Front


Lincoln Exhaust Pipe, Driver Side Part Number: BA8Z-5G203-B
$571.81 MSRP: $751.94You Save: $180.13 (24%)Product Specifications- Other Name: Tube Assembly; Exhaust Intermediate Pipe, Left; Tail Pipe; Front Pipe
- Position: Driver Side
- Replaces: AA8Z-5G203-C

Lincoln Muffler W/Tpipe, Front Part Number: 4L3Z-5230-B
$514.16 MSRP: $676.12You Save: $161.96 (24%)Product Specifications- Other Name: Muffler And Pipe Assembly - Rear; Exhaust Muffler; Direct-Fit Exhaust; Exhaust System Kit; Exhaust Pipe; Muffler
- Position: Front
- Replaces: 5L3Z-5230-LA, 4L3Z-5230-AB, 6L3Z-5230-GA, 6L3Z-5230-CA, 8L3Z-5230-A, 8L3Z-5230-C


Lincoln Exhaust Pipe, Front Part Number: 9G1Z-5G274-D
Product Specifications- Other Name: Pipe - Exhaust; Exhaust Crossover Pipe, Front; Exhaust Y Pipe; Front Pipe
- Position: Front
- Replaces: 8G1Z-5G274-H


Lincoln Tail Pipe Extension Part Number: 7L3Z-5255-AB
Product Specifications- Other Name: Pipe - Exhaust; Exhaust Tail Pipe; Exhaust Tip; Extension
- Replaces: 6L3Z-5255-AA


Lincoln Intermediate Pipe, Front Part Number: 6L3Z-5A212-JC
Product Specifications- Other Name: Pipe - Exhaust Front; Exhaust Pipe; Direct-Fit Exhaust; Exhaust System Kit; Tail Pipe
- Manufacturer Note: Extension Pipes (5A212) And Mufflers (5230) Are To Be Replaced As A Set
- Position: Front
| Page 1 of 7 |Next >
1-20 of 122 Results
Lincoln Exhaust Pipe
If you own Lincoln and want to keep it in top shape, choosing OEM Exhaust Pipe is a smart move. They are precisely engineered and follow strict factory standards. They are made in advanced facilities that use cutting edge technology. Each part goes through thorough testing to confirm strength and safety, so you can trust it. FordPartsDeal.com gives you genuine Lincoln Exhaust Pipe at some of the affordable online prices without cutting quality. Every OEM Lincoln part includes the manufacturer's warranty, easy returns, and super-fast delivery. So why wait? Shop now and get your vehicle back to peak condition.
Lincoln Exhaust Pipe diverts the toxic engine gases in the short possible time, leaving cabins silent and the air healthier. A unique feature of Lincoln is the construction of cabins so quiet that you can hear your heartbeat and to support it with those assistants who drive, brake, and park when you are relaxing. Lincoln invests in silent glass, firewall insulated panels, and soft materials, such that when traveling long distances, it will feel that the distance is shorter than usual and never remains in a place where conversation must reach a yelling point. Lincoln updates the software regularly and includes lane maintaining updates, safer blind-spot notifications, and easier ActiveGlide updates that are delivered directly to the air with no headaches to the owner. Owners applaud the brand listening skills, incorporating feedback into annual updates that ensure screens are not cluttered, menus are simpler, and all buttons are in the right place. Training will add skills to the personnel on how to find solutions within a short time and the visits to the showroom become a short conversation and not a time-consuming task. The new Exhaust Pipe is fitted with a shot that connects to the mufflers and catalyst converters, thus tightening joints to prevent any traces of carbon monoxide. Internal mandrel folds keep the diameter the same between the engine outlet and tail tip to allow the gas to travel smoothly and reduce back-pressure to provide the V8 with a free exhale via the Exhaust Pipe. Lincoln covers the Exhaust Pipe with corrosion fighting alloys that shake off salt, gravel, and endless heat cycles on winter mornings. In case dents occur, the modular part of the system can be unclipped so that the owner can replace the parts, but not necessarily tear up the entire system.
Lincoln Exhaust Pipe Parts and Q&A
- Q: How to service the dual converter Exhaust Pipe on Lincoln Navigator?A:Service of the dual converter Y-pipe requires starting with raising and supporting the vehicle. First disconnect heated oxygen and catalyst monitor sensors before you take out and discard the catalytic converter-to-exhaust manifold nuts and loosen the clamp. The LH converter needs to be extracted from its position. The service process for the RH converter starts by taking out bolts and flag nuts then using a jack stand to support the muffler for safe detachments of isolators before eliminating bolt and isolator cap while extracting the RH converter. The threads of sensors require anti-seize lubricant prior to installation after which heated oxygen and catalyst monitor sensors need to be removed if needed. The fasteners need to stay loose until the whole assembly is constructed then start tightening from the front of the vehicle. The receding steps from removal will bring the installation process to a finish.
- Q: How to Ensure Proper Service and Repair of the Exhaust Pipe on a 3.5L Engine in a Lincoln MKZ?A:A proper exhaust Y-pipe service or repair of a 3.5L engine must include replacement fasteners with new gaskets alongside flange cleaning to achieve optimal sealing functionality. Start the service with the vehicle in neutral while resting on a hoist system. Unscrew and remove any 6 screws as well as the underbody shield. The repair process starts with removing and discarding two exhaust Y-pipe-to-resonator nuts and the gasket. Installation of new nuts follows next before torquing them to 40 Nm (30 ft. lbs.). You should first remove and throw away the 2 RH catalytic converter-to-exhaust Y-pipe nuts and replace them with new ones that you should tighten to 40 Nm (30 ft. lbs.). Start by removing the two LH catalytic converter-to-exhaust Y-pipe nuts followed by extraction of the exhaust Y-pipe as well as the gasket disposal. Installation of the exhaust Y-pipe requires three-stage nut tightening between the passenger side first to 5 Nm (45 inch lbs.) then the driver side to 40 Nm (30 ft. lbs.) before finishing with the passenger side at 40 Nm (30 ft. lbs.). During reverse installation procedure follow the removal steps while using fresh gaskets and nuts. The engine should be started to inspect exhaust leakage after completing the installation.


Related Lincoln Parts
 Lincoln Catalytic Converter
 Lincoln Muffler
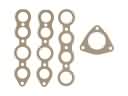 Lincoln Exhaust Manifold
 Lincoln Catalytic Converter Gasket
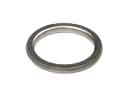 Lincoln Exhaust Flange Gasket
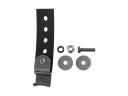 Lincoln Exhaust Hanger
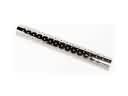 Lincoln Exhaust Heat Shield
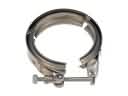 Lincoln Exhaust Manifold Clamp
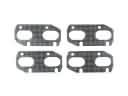 Lincoln Exhaust Manifold Gasket
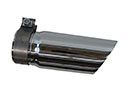 Lincoln Exhaust Tip
 Lincoln Muffler Strap
 Lincoln Tail Pipe