FordParts
My Garage
My Account
Cart
OEM Lincoln MKX Window Motor
Window Lift Motor- Select Vehicle by Model
- Select Vehicle by VIN
Select Vehicle by Model
orMake
Model
Year
Select Vehicle by VIN
For the most accurate results, select vehicle by your VIN (Vehicle Identification Number).
10 Window Motors found


Lincoln MKX Window Motor, Front Part Number: 7T4Z-7823395-B
$103.53 MSRP: $173.82You Save: $70.29 (41%)Ships in 1-3 Business Days

Lincoln MKX Window Motor, Front Passenger Side Part Number: 7T4Z-7823394-B
$87.96 MSRP: $144.73You Save: $56.77 (40%)Ships in 1-3 Business Days
Lincoln MKX Window Regulator, Passenger Side Part Number: FA1Z-5823200-D
$157.68 MSRP: $265.45You Save: $107.77 (41%)Ships in 1-3 Business Days
Lincoln MKX Window Motor, Passenger Side Part Number: FA1Z-5823394-A
$62.54 MSRP: $102.91You Save: $40.37 (40%)Ships in 1-3 Business DaysLincoln MKX Window Motor, Driver Side Part Number: FA1Z-5823395-A
$62.76 MSRP: $103.27You Save: $40.51 (40%)Ships in 1-3 Business Days
Lincoln MKX Window Motor, Driver Side Part Number: FA1Z-7823395-A
$62.87 MSRP: $103.45You Save: $40.58 (40%)Ships in 1-3 Business DaysLincoln MKX Window Motor, Passenger Side Part Number: FA1Z-7823394-A
$62.99 MSRP: $103.64You Save: $40.65 (40%)Ships in 1-3 Business Days
Lincoln MKX Window Motor, Front Driver Side Part Number: 7A1Z-5423395-A
$170.17 MSRP: $280.00You Save: $109.83 (40%)Ships in 1-3 Business DaysLincoln MKX Window Regulator, Driver Side Part Number: FA1Z-5823201-D
$136.37 MSRP: $220.00You Save: $83.63 (39%)Ships in 1-3 Business Days
Lincoln MKX Window Motor
OEM Window Motor boasts unmatched quality. Each part goes through full quality checks. They adhere to Lincoln's official factory standards. These steps remove flaws and inconsistencies. So you can get Window Motor with long life and a perfect fit. Come to our website and find genuine Lincoln MKX parts. We keep a wide inventory of OEM MKX parts at the highly affordable prices. It's easy to search, compare, and pick what you need. You'll love the clear info and simple checkout. We offer top-rated customer service, and we reply fast. We also ship promptly to ensure your order arrives on time.
Lincoln MKX Window Motor Parts and Q&A
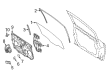
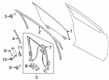
- Q: How to service and repair the front door Window Motor on Lincoln MKX?A:Service and repair operations on the front door window motor should start by taking out the front door speaker. Before cutting the Window Regulator cable you should support the window glass and making cable modifications should only happen when installing a brand new window regulator assembly. Reattach the window control switch after cutting the regulator cable from the window. To access the glass clamp bolts remove the access plugs and lower the window until the two holes become reachable, while taping the glass in place. Allow the regulator to rest when installing the glass clamp bolt since they should be torqued to 8 Nm (71 lb-in). Lower the regulator down to its stopping point within the track base. Remove the trim and detach the power mirror electrical connector before taking out the wiring harness pushpins from the door. Unplug the electrical connector found at the A-pillar and then remove the two bolts which secure the electrical harness grommet to the door. Entry through the speaker hole enables access to release the harness clip from inside to separate it from the door. Use the door gap between the weather strip to pull in the wiring harness after unclipping the weather strip. The installation requires tightening the three door latch screws to 12 Nm (9 lb-ft) while performing removal. Begin by removing the access plug on the side that latches and then unfasten both the outside door handle reinforcement screw and finally exercise care when extracting the outside door handle. Before installation insert the screw tightly with 8 Nm (71 lb-in). Disassemble the keypad before loosening the ten door module bolts which allow removal of the front door module together with a torque requirement of 9 Nm (80 lb-in). The reinstallation process should begin with returning components in the opposite order of removal while performing initialization on new front window motors along with de-initialization and then initialization on the original motor.

Related Lincoln MKX Parts
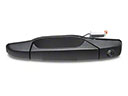 Lincoln MKX Exterior Door Handle
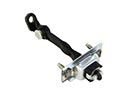 Lincoln MKX Door Check
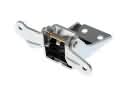 Lincoln MKX Door Hinge
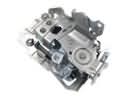 Lincoln MKX Door Latch Assembly
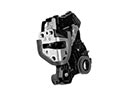 Lincoln MKX Door Lock
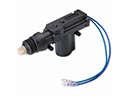 Lincoln MKX Door Lock Actuator
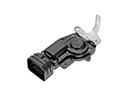 Lincoln MKX Door Lock Actuator Motor
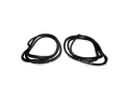 Lincoln MKX Door Seal
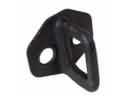 Lincoln MKX Front Door Striker
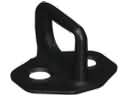 Lincoln MKX Rear Door Striker
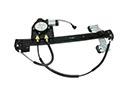 Lincoln MKX Window Regulator
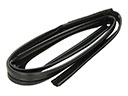 Lincoln MKX Window Run
Browse Lincoln MKX Window Motor by Years
2018 2017 2016 2015 2014 2013 2012 2011 2010 2009 2008 2007