FordParts
My Garage
My Account
Cart
OEM Lincoln MKX Window Regulator
Electric Power Window Regulator- Select Vehicle by Model
- Select Vehicle by VIN
Select Vehicle by Model
orMake
Model
Year
Select Vehicle by VIN
For the most accurate results, select vehicle by your VIN (Vehicle Identification Number).
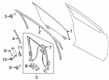
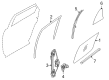
10 Window Regulators found


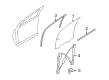
Lincoln MKX Window Regulator, Front Passenger Side Part Number: 7T4Z-7823200-A
$67.28 MSRP: $110.71You Save: $43.43 (40%)Ships in 1-2 Business Days
Lincoln MKX Window Regulator, Passenger Side Part Number: FA1Z-5823208-B
$105.38 MSRP: $176.91You Save: $71.53 (41%)Ships in 1-3 Business Days
Lincoln MKX Window Regulator, Passenger Side Part Number: FA1Z-5823200-D
$157.68 MSRP: $265.45You Save: $107.77 (41%)Ships in 1-3 Business DaysLincoln MKX Window Regulator, Front Driver Side Part Number: 7T4Z-7823201-A
$73.37 MSRP: $120.73You Save: $47.36 (40%)
Lincoln MKX Window Regulator, Rear Driver Side Part Number: 7T4Z-7827001-A
$74.15 MSRP: $122.00You Save: $47.85 (40%)Ships in 1-2 Business DaysLincoln MKX Window Regulator, Rear Passenger Side Part Number: 7T4Z-7827000-A
$77.35 MSRP: $127.27You Save: $49.92 (40%)
Lincoln MKX Window Regulator, Driver Side Part Number: FA1Z-5827009-C
$56.01 MSRP: $90.36You Save: $34.35 (39%)Ships in 1-3 Business DaysLincoln MKX Window Regulator, Passenger Side Part Number: FA1Z-5827008-C
$56.01 MSRP: $90.36You Save: $34.35 (39%)Ships in 1-3 Business DaysLincoln MKX Window Regulator, Driver Side Part Number: FA1Z-5823209-B
$109.66 MSRP: $176.91You Save: $67.25 (39%)Ships in 1-3 Business DaysLincoln MKX Window Regulator, Driver Side Part Number: FA1Z-5823201-D
$136.37 MSRP: $220.00You Save: $83.63 (39%)Ships in 1-3 Business Days
Lincoln MKX Window Regulator
OEM Window Regulator boasts unmatched quality. Each part goes through full quality checks. They adhere to Lincoln's official factory standards. These steps remove flaws and inconsistencies. So you can get Window Regulator with long life and a perfect fit. Come to our website and find genuine Lincoln MKX parts. We keep a wide inventory of OEM MKX parts at the highly affordable prices. It's easy to search, compare, and pick what you need. You'll love the clear info and simple checkout. We offer top-rated customer service, and we reply fast. We also ship promptly to ensure your order arrives on time.
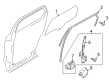
The Window Regulator utilized in Lincoln MKX automobiles is specifically responsible for pulling up and pulling down of the car's windows so as to provide comfort to the passengers. They are available in two models: some of these regulators can be run on an electric motor while others require manual control. Lincoln MKX has through the years implemented various Window Regulator designs such as scissor and cable styled pieces that conforms with superior standards with regards to the vehicle's fit and operation. Since they are used on a regular basis, Lincoln MKX Window Regulators can get spoilt and this results in the windows freezing up. Overcoming the issue of defective Window Regulators usually involves installing better quality regulators that will allow for the efficient running of the vehicle's windows thus increasing the convenience that comes with using the car. In this case, all of these components employ high grade materials to guarantee that the product's service life is long.
Lincoln MKX Window Regulator Parts and Q&A
- Q: How to service the rear door window regulator and motor on Lincoln MKX?A:The service of rear door window components begins with taking out the speaker unit from the door. Before cutting the window regulator cable it is important to support the window glass unless you plan to install a new window regulator assembly. Chose the window control switch as the first test to confirm that the window operates. After unplugging the access there you should lower the window glass and tape it in place before removing the glass clamp bolt. The regulator needs support before loosening the glass clamp bolt. When reinstalling tighten it to 9 Nm (80 lb-in). The technician should lower the regulator to its bottom position on the track stops before disconnecting the electrical slot at the B-pillar. Use the speaker hole for access to release the clip attaching the harness to your door by removing its two securing bolts from the electrical harness grommet. Guided by the Weather Strip you can unclip and insert the wiring harness into the opening between door weather strip and door. The three door latch screws need removal followed by tightening them to 9 lb-ft during reinstallation. Take out the access plug from the door latch side followed by unscrewing the outside door handle reinforcement screw then the handle itself. The screw should be secured to 8 Nm (71 lb-in) when reinstalling it. When installing the module rear door remove first the keypad from the door followed by removal of nine door module bolts after which you can take out the module moving its components then readjust the bolts to 9 Nm (80 lb-in) torque specification. You should perform the installation by reversing the removal steps.

Related Lincoln MKX Parts
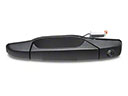 Lincoln MKX Exterior Door Handle
 Lincoln MKX Ashtray
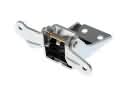 Lincoln MKX Door Hinge
 Lincoln MKX Door Latch Assembly
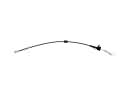 Lincoln MKX Door Latch Cable
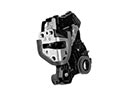 Lincoln MKX Door Lock
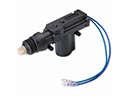 Lincoln MKX Door Lock Actuator
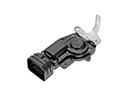 Lincoln MKX Door Lock Actuator Motor
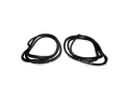 Lincoln MKX Door Seal
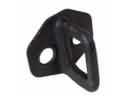 Lincoln MKX Front Door Striker
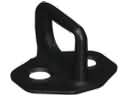 Lincoln MKX Rear Door Striker
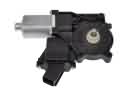 Lincoln MKX Window Motor
Browse Lincoln MKX Window Regulator by Years
2018
2017
2016
2015
2014
2013
2012
2011
2010
2009
2008
2007