
Popular OEM Lincoln MKX Parts
- Body & Hardware Parts View More >
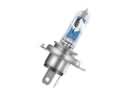
- Electrical Parts View More >
- Air & Fuel Delivery Parts View More >
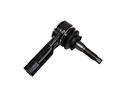
- Steering Parts View More >
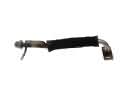
- Emission Control & Exhaust Parts View More >
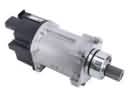
- Charging & Starting Parts View More >
- Engine Parts View More >
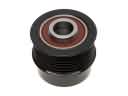
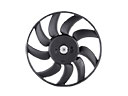
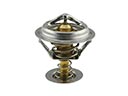
- Belts & Cooling Parts View More >
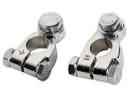
- Suspension Parts View More >
- Brakes Parts View More >
- A/C & Heating Parts View More >
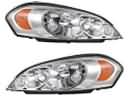
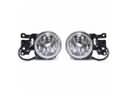
- Headlights & Lighting Parts View More >


Why Buy Genuine Lincoln MKX Parts From FordPartsDeal.com
FordPartsDeal.com offers a smart and convenient way to buy genuine parts online. We sell new OEM Lincoln MKX parts, including Transmission. Authorized dealers directly provide all the Lincoln MKX parts and assemblies to ensure the optimal quality and fit. We also provide all properly fitting Lincoln MKX parts, such as Driveline & Axles specific to your model. When you shop here, you get real Lincoln value at highly competitive prices. All our products come with the same Lincoln warranty available at other dealerships. Our easy-to-use catalog helps you quickly identify the right part for your car. You'll receive fast shipping from our warehouse network, keeping your Lincoln MKX running smoothly. Our staff consists of Lincoln professionals who are ready to assist you. We aim to treat each customer as if they were stepping out of a Lincoln showroom. VIN verification and our live support ensure that the part you order is the right Lincoln MKX part for your vehicle.
Lincoln launched the mid-size crossover SUV MKX as its first crossover model under strategic entry to the market through two generational releases from 2007 to 2018. Multiple customers have the option to choose between the front-wheel-drive and all-wheel-drive systems within the Lincoln MKX model range. The first generation received substantial improvements in 2008 and 2011 that enhanced its market competitiveness. Standard in the Lincoln MKX model is a 3.7-liter V6 engine that generates 303 horsepower which operates together with a six-speed 6F50 automatic transmission providing smooth gear changes and fast acceleration. The 2016 model of the Lincoln MKX receives its performance boost from the optional 2.7-liter twin-turbocharged V6 engine that produces 335 horsepower. Driving conditions affect the adaptive transmission capabilities which enhance the overall refined driving dynamics of the MKX. Occupants remain secured by safety features in the Lincoln MKX because the vehicle comes standard with traction and stability control and six airbags and antilock disc brakes. Test agencies evaluated the MKX with high crash safety scores because Lincoln places driver and passenger protection as a top priority. Both maintenance and improvements for the Lincoln MKX can be achieved by using real vehicle parts which meet Lincoln's exacting quality metrics to maintain vehicle performance and reliability.
Lincoln MKX questions category includes transmissions, drivetrain seal integrity, engine air-control, and the cooling system. Among the drivetrain issues, the MKX may exhibit red or brown fluid leakage at axles. Red color fluid implies the PTU, and brown color fluid implies it is the transmission. The typical causes are worn axle seals or a PTU cover seal Check the fluid color, clean the area, replace axle seals then check the levels. The throttle body of the engine system of the MKX can lose acceleration due to failure of the throttle body. The symptoms include jerking, warning lights, and stalling once in a while. Test the model with scan data, and exchange a new throttle body. Also internal failures of the water pumps applied in the MKX, which spill coolant into the engine oil. This pollutes lubrication and may cause destruction in bearings and chains. Follow-up by observing downstream oil condition, pressure, and cooling performance in hot condition. In case of contamination, change the water pump; change the oil and filter. Following repairs and reset adaptations do a road test with the MKX and reread any prior leaks or codes. Using quality Lincoln diagnostics to follow Lincoln service procedures can keep the Lincoln MKX reliable. It includes in its commercial version fault codes, freeze frames, and service dates in order to enhance MKX diagnostics in the future.
Lincoln MKX Parts and Q&A
- Q: How to service the LH catalytic converter on Lincoln MKX?A:In order to change the LH catalytic converter, position the car in neutral on a stand. Unplug catalyst monitor sensor, take off the exhaust Y-pipe and the support bracket bolts. Take out the four nuts and gasket and screw in new converter with new gasket and nuts involving tightening to 40 Nm.
- Q: How to remove and replace the front bumper cover on Lincoln MKX?A:To change the front bumper cover make sure in neutral on a hoist. Take out 2 bolts, 4 scrivets and 3 lower pin-like retainers. Take off 6 screws of the fender splash shields and 4 lower screws. Unhook all electrical connections, and take off the bumper cover. Installation To install the new one, reverse the steps.
- Q: How to service the alternator on Lincoln MKX?A:In order to service the alternator, disconnect the battery, dislodge the cooling fan and place the accessory drive belt out of the way. Uncouple the electrical connector of the generator, take out the nut of the generator stud and the generator. Use the same process, but reassemble all components with the appropriate amounts of torque.


