FordParts
My Garage
My Account
Cart
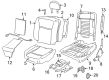
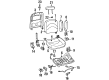
OEM Lincoln Town Car Seat Motor
Car Seat Motor- Select Vehicle by Model
- Select Vehicle by VIN
Select Vehicle by Model
orMake
Model
Year
Select Vehicle by VIN
For the most accurate results, select vehicle by your VIN (Vehicle Identification Number).
4 Seat Motors found


Lincoln Town Car Motor, Driver Side Part Number: 3W1Z-14547-C


Lincoln Town Car Motor, Passenger Side Part Number: 3W1Z-14547-A
Lincoln Town Car Motor, Driver Side Part Number: 3W1Z-14547-B
$86.10 MSRP: $136.73You Save: $50.63 (38%)
Lincoln Town Car Recline Motor Part Number: F3LY14547A
Lincoln Town Car Seat Motor
OEM Seat Motor boasts unmatched quality. Each part goes through full quality checks. They adhere to Lincoln's official factory standards. These steps remove flaws and inconsistencies. So you can get Seat Motor with long life and a perfect fit. Come to our website and find genuine Lincoln Town Car parts. We keep a wide inventory of OEM Town Car parts at the highly affordable prices. It's easy to search, compare, and pick what you need. You'll love the clear info and simple checkout. We offer top-rated customer service, and we reply fast. We also ship promptly to ensure your order arrives on time.
The Lincoln Town Car Seat Motor functions as an essential device because it enables users to make exact seat position modifications with methods for forward and backward shifting as well as height adjustments and lumbar support. Due to its reputation for reliability and performance the Lincoln Town Car Seat Motor functions with reversible electric motors powered by easily reachable switches that provide smooth functioning. The Seat Motor delivers essential benefits to different Town Car editions since it helps drivers stay alert while improving operational efficiency and safety. Premium Seat Motor versions have two notable capabilities: simplistic exit functions for better convenience and memory settings that keep driver-specific seat adjustments for multiple users. Additional comfort features include heating elements together with air conditioning systems in the Lincoln Town Car seats. The investment in a Seat Motor pays off through its safety and comfort benefits while producers set its replacement price between $50 and $340. Since its first production in 1981 through 2011 the Lincoln Town Car earned fame for luxury features and classic design through its Seat Motor which became an important component of its historic legacy. Through its status as a flagship model the Town Car maintains its position in the automotive market while the Seat Motor demonstrates Lincoln's dedication to innovation and quality that creates secure comfortable journeys.
Lincoln Town Car Seat Motor Parts and Q&A
- Q: How to Ensure Proper Functioning of the Seat Motor in a Lincoln Town Car?A:The power seat motor repair process starts with removing the seat together with its track assembly. Connectors for the seat track motor need to be removed for adjusting the seat track position through specified power and ground input at individual pins. To safely remove the seat track motor assembly it must be in the correct position; if it does not move manually rotate the drive tube when supplying power. Place the outboard track in its forward position to let two teeth along the retainer clip show and record both track C-channel positions on the plastic-coated slide before reinstallation. Begin by taking out the Driver Seat Module (DSM) when present after recording its connector positions while disconnecting the three memory position sensor electrical connectors. The necessary nuts and bolts require removal to separate the DSM with bracket together with wiring. To separate the drive tube from the seat track motor assembly you should remove the inboard seat track-to-upper support assembly lift link nuts and use locking pliers and a hammer when separation occurs. Start the seat track motor assembly removal process by removing the attached bolts and nuts from the seat track then gently unearth both support straps and outboard track. When these sensors exist they must be taken out by counterclockwise rotation. The memory seat position sensors should be set clockwise during installation to achieve correct alignment between the seat tracks so binding can be prevented. Secure the seat track motor assembly into position by placing the motor with the correct orientation and apply multi-purpose grease along its pivots. Seam the gears tightly together before installing the support straps directly on the height adjustment gears and placing the pinion cage into correct position. Position the outboard track then secure all components by tightening the bolts from the seat track motor assembly to the track at 12 Nm (106 lb-in) while the nuts reach 14 Nm (124 lb-in). Complete a second inspection of outboard track C-channel and plastic-coated slide index marks and resume the previous procedure if necessary. Secure the inboard track assembly with the drive tube touching the motor stub shaft and lift links properly engaged. Check that the alignment of index marks is correct after tightening inboard seat track-to-upper support assembly lift link nuts to 27 Nm (20 lb-ft). Mount the seat position sensor magnet assembly with a final torque value of 9 Nm (80 lb-in). The vehicle seat track should be positioned inside its mounting holes while maintaining free alignment between the pieces before linking memory seat components and installing the DSM. Complete the installation by fitting the seat while directing the driver seat from zero travel to maximum extent when memory seats are active.
- Q: How to Safely Service and Repair the Front Track Seat Motor While Ensuring Proper Functionality on Lincoln Town Car?A:The front seat track motor service and repair process requires safety glasses while working on vehicles that have supplemental restraint systems (SRS) to prevent injuries. A normal air bag warning lamp status under ON ignition will appear after removing the RCM fuse as a power-on check for system operation. To test movement activate the control switch while the seat positioned at the midpoint between front and rear vertical motors. A lack of movement indicates the seat should be checked for appropriate directional pressure on the cushion. A stationary seat demands replacement of the whole seat track structural unit. You must move the seat horizontally for access to all fasteners that connect it to the floor before taking out the seat and seat track. The operations for adjusting the seat track horizontally require disconnecting its electrical connector then applying specified power and ground to control pins for placement with two visible teeth adjacent to the outer retainer clip. When reinstalling the slide you will need the marked positions of both track C-channels which were previously noted on the plastic-coated slide. First remove the memory seat module with bracket and wiring along with locations of each connector. Then disconnect the three memory position sensor electrical connectors. Remove two memory seat module securing nuts followed by a single securing bolt and the two nuts at the lift links. A user needs to clamp the drive tube at the inboard track gear stub shaft using a hammer to separate it from the stub shafts. You must disassemble the outboard track assembly by first removing its retainer clip along with two bolts that retain the seat track motor assembly to the outboard track before carefully removing the complete unit with the pinion cage. Detach the two support straps with the seat track motor assembly from the upper support assembly while also taking out memory position sensors if equipped. Before assembly position the memory position sensors according to existing flat spot markings on the previous assembly. Fix the seat track motor assembly onto the upper support assembly while using grease on the motor pivots and inspecting for gear gap absence. Settle the support straps properly until they reach the height adjustment gears without any gaps. Position the pinion cage onto the outboard track after checking its index mark alignment with the C-channel and plastic-coated slide. Finally install it until all components touch each other. The assembly requires installation of two bolts to secure the seat track motor assembly with the outboard track which in turn requires the bracket and its two nuts then an outboard retainer clip. Recheck the index marks alignment before continuing with additional repetitions of previous procedures. When assembling combine the components of the seat track motor assembly with the upper support assembly and inboard track it is essential to achieve correct drive tube and lift links alignment. Use the same procedure to install the inboard track nuts on its upper support assembly lift links while verifying the index mark alignment one last time. The magnetic assembly must go on the pivot point before sliding it back into place while installing the bolt. The seat track should be placed into the vehicle with careful attention to hole alignment that avoids forced insertion. Install memory seat nuts along with components if present and be certain to connect all electrical parts correctly. The installation process requires seating the track followed by the seat with a subsequent power cycle of the SRS and the execution of full-range driver seat cycling for memory seats when relevant.


Related Lincoln Town Car Parts
 Lincoln Town Car Power Window Switch
 Lincoln Town Car Airbag
 Lincoln Town Car Crankcase Breather Hose
 Lincoln Town Car Door Jamb Switch
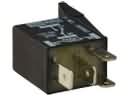 Lincoln Town Car Headlight Relay
 Lincoln Town Car Igniter
 Lincoln Town Car Ignition Coil Boot
 Lincoln Town Car Ignition Control Module
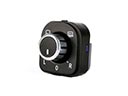 Lincoln Town Car Mirror Switch
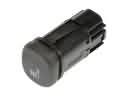 Lincoln Town Car Seat Heater Switch
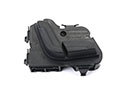 Lincoln Town Car Seat Switch
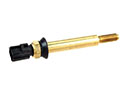 Lincoln Town Car Temperature Sender