FordParts
My Garage
My Account
Cart
OEM Mercury Sable Car Speakers
Audio Speakers- Select Vehicle by Model
- Select Vehicle by VIN
Select Vehicle by Model
orMake
Model
Year
Select Vehicle by VIN
For the most accurate results, select vehicle by your VIN (Vehicle Identification Number).
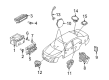
11 Car Speakers found


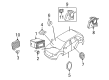
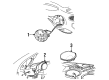
Mercury Sable Front Driver Speaker Part Number: 8L8Z-18808-BA
$44.75 MSRP: $64.02You Save: $19.27 (31%)Ships in 1-2 Business Days

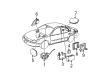
Mercury Sable Quarter Panel Speaker, Rear Part Number: 9U5Z-18808-A
$22.11 MSRP: $31.37You Save: $9.26 (30%)Ships in 1-3 Business Days


Mercury Sable Door Speaker, Rear Part Number: 7U5Z-18808-B
$22.81 MSRP: $32.35You Save: $9.54 (30%)Ships in 1-3 Business Days
Mercury Sable Front Driver Speaker Part Number: 8G1Z-18808-AA
$28.16 MSRP: $38.96You Save: $10.80 (28%)Ships in 1-2 Business Days
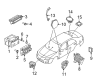
Mercury Sable Speaker, Passenger Side Part Number: F6DZ18808FB
$61.05 MSRP: $83.08You Save: $22.03 (27%)


Mercury Sable Rear Speaker Part Number: XF1Z-18808-AA

Mercury Sable Front Driver Speaker, Lower Part Number: YF1Z-18808-AB
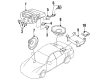
Mercury Sable Speaker, Passenger Side Part Number: F6DZ18808J

Mercury Sable Package Tray Speaker, Rear Part Number: 8G1Z-18808-BA
Mercury Sable Car Speakers
OEM Car Speakers boasts unmatched quality. Each part goes through full quality checks. They adhere to Mercury's official factory standards. These steps remove flaws and inconsistencies. So you can get Car Speakers with long life and a perfect fit. Come to our website and find genuine Mercury Sable parts. We keep a wide inventory of OEM Sable parts at the highly affordable prices. It's easy to search, compare, and pick what you need. You'll love the clear info and simple checkout. We offer top-rated customer service, and we reply fast. We also ship promptly to ensure your order arrives on time.
The Mercury Sable Car Speakers maintain a reputation for strong performance and reliability which makes them critical to sound quality enhancement for Mercury Sable vehicles. The speakers use high-quality components that combine paper and polypropylene which gives stronger bass and provide precise sound reproduction through silk or silk/polymer composite tweeters. The combination of component speakers extends beyond two distinct units because they include separate woofers, tweeters along with a crossover to effectively distribute frequencies for lower distortion levels that produce excellent sound quality. The speakers operate on various Sable models without problems which delivers users a direct path to better audio combined with safer and more effective driving conditions. Addition of Mercury Sable Car Speakers to the market owes to their innovative design which elevates tweeters above woofers for delivering optimal sound. The speakers incorporate precise engineering that simultaneously optimizes audio quality and protect driving safety because drivers retain roadway vision when hearing high-quality playback. The Mercury Sable keeps its position as a reliable automobile with five generations behind it because it has received ongoing recognition for its performance upgrades in addition to premium car speakers. The Mercury Sable Car Speakers serve as a benchmark for quality innovations which makes them vital equipment for Mercury model drivers who want to upgrade their vehicle sound systems.
Mercury Sable Car Speakers Parts and Q&A
- Q: How to Service the Front Door Car Speakers on Mercury Sable?A:Service to the front door speaker starts with removing the front door trim panel and then taking out the speaker grille cover. You need to detach the sail speaker by first taking out its two retaining screws and next disengaging the electrical connector before completing the speaker removal. The installation process starts by following the reverse steps used during removal thus securing the new speaker correctly.
- Q: How to remove and install a subwoofer car speakers on Mercury Sable?A:The first step for subwoofer speaker removal requires removal of the RM rear quarter trim panel followed by removing the speaker cushion. After disconnecting the electrical connector you need to unscrew four screws that secure the subwoofer speaker. You should follow the exact opposite steps during installation to replace the subwoofer speaker.


Related Mercury Sable Parts
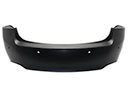 Mercury Sable Bumper Cover
 Mercury Sable Car Mirror
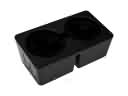 Mercury Sable Cup Holder
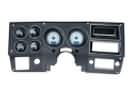 Mercury Sable Dash Panel
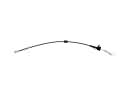 Mercury Sable Door Latch Cable
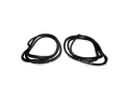 Mercury Sable Door Seal
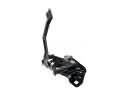 Mercury Sable Hood Latch
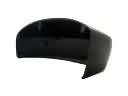 Mercury Sable Mirror Cover
 Mercury Sable Shift Indicator
 Mercury Sable Weather Strip
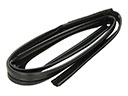 Mercury Sable Window Run
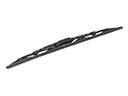 Mercury Sable Windshield Wiper