
Popular OEM Mercury Sable Parts
- Body & Hardware Parts View More >
- Electrical Parts View More >
- Interior & Exterior Trim Parts View More >
- Air & Fuel Delivery Parts View More >
- Steering Parts View More >
- Emission Control & Exhaust Parts View More >
- Charging & Starting Parts View More >
- Engine Parts View More >
- Belts & Cooling Parts View More >
- Suspension Parts View More >
- Brakes Parts View More >
- A/C & Heating Parts View More >


Why Buy Genuine Mercury Sable Parts From FordPartsDeal.com
FordPartsDeal.com offers a smart and convenient way to buy genuine parts online. We sell new OEM Mercury Sable parts, including Headlights & Lighting. Authorized dealers directly provide all the Mercury Sable parts and assemblies to ensure the optimal quality and fit. We also provide all properly fitting Mercury Sable parts, such as Transmission, Driveline & Axles specific to your model. When you shop here, you get real Mercury value at highly competitive prices. All our products come with the same Mercury warranty available at other dealerships. Our easy-to-use catalog helps you quickly identify the right part for your car. You'll receive fast shipping from our warehouse network, keeping your Mercury Sable running smoothly. Our staff consists of Mercury professionals who are ready to assist you. We aim to treat each customer as if they were stepping out of a Mercury showroom. VIN verification and our live support ensure that the part you order is the right Mercury Sable part for your vehicle.
Mercury offered the Sable as the 1986 model to serve as a successor to the Mercury Marquis under their transition into the mid-size sedan segment. Between 1986 and 2005 Mercury Sable models provided buyers two engine choices which included both a 2.5L I4 and a 3.0L V6. The last generation Sable models included a 3.8L V6 engine together with a four-speed automatic transmission as standard equipment. Car buyers who chose later models with the 3.8L V6 engine received sufficient power outputs of 140 horsepower along with 215 lb-ft torque which supported handling in mid-size sedan competition. In 2008 Mercury Sable producers added the 3.5L V6 engine that delivered 263 horsepower and 265 lb-foot torque power alongside a six-speed automatic transmission for better driving performance and efficiency. Ford produced the Mercury Sable at their Atlanta and Chicago Assembly facilities to maintain uniform product manufacturing. Pretty standard choice made it possible for customers to acquire the Mercury Sable as a sedan with four doors or a wagon with five doors based on their market needs. The Mercury Sable manufacturing follow precise quality procedures through components constructed exclusively for the model that met stringent durability along with performance protocols. Owners who can readily access the wide selection of original Mercury Sable components evidences Mercury's dedication to engineering excellence alongside delivering customer satisfaction.
Mercury Sable issues group into HVAC controls, body latching, and engine sealing. In HVAC, failing blower motor resistor causes random fan speed swings. The Sable may constantly change airflow while temperatures stay correct. Inspect the resistor connector behind the glove box, then replace the blower motor resistor. Verify grounds, check fuses, and confirm stable blower operation after repair. In the body system, a stuck trunk latch solenoid prevents secure closure. The Sable trunk will not latch, or pops open on bumps. Confirm power and cable routing, then fit a new trunk latch solenoid. Scan the climate module and body control for codes on the Sable. In the engine bay, a leaking oil pan gasket leaves oil drips and smells. The Mercury Sable may show smoke near the exhaust after longer drives. Clean the pan rail, replace the oil pan gasket, and torque evenly. Verify crankcase ventilation and recheck after a heat soak. Follow Mercury service procedures for wiring and torque values. Finish with a road test so the Sable cools well and seals dry. Document results and schedule periodic inspections to keep the Mercury Sable dependable.
Mercury Sable Parts and Q&A
- Q: How to service the LH catalytic converter on Mercury Sable?A:In order to service the LH catalytic converter, place the vehicle in neutral on a hoist. Disconnect the catalyst monitor sensor, Y-pipe of exhaust and the support bracket bolts. Install new catalytic converter nuts and studs and screw them to a given torque. Reinstall using a new gasket.
- Q: How to service the upper intake manifold on Mercury Sable?A:In order to maintain the upper intake manifold, un-screw the battery ground cable and unscrew the air cleaner outlet pipe. Take out different cables and sensors and take out the upper intake manifold. Wipe down surfaces, check gaskets and refasten the manifold, screwing the bolts in phases. Reassemble all parts and cables and complete.
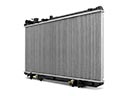
- Q: How to service and repair the water pump on Mercury Sable?A:To replace the water pump empty the cooling system, take off the water pump pulley, disconnect the inlet hose and crankshaft position sensor. Take out water pump, clean surface and fit the new water pump in that order with tightening bolts. Reconnect parts and recharge the cooling fluid.


