FordParts
My Garage
My Account
Cart
OEM Mercury Villager Vapor Canister
Fuel Vapor Canister- Select Vehicle by Model
- Select Vehicle by VIN
Select Vehicle by Model
orMake
Model
Year
Select Vehicle by VIN
For the most accurate results, select vehicle by your VIN (Vehicle Identification Number).
2 Vapor Canisters found

Mercury Villager Vapor Canister Part Number: F8XZ-9D653-AA

Mercury Villager Vapor Canister Part Number: F6XZ-9D653-AA
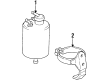
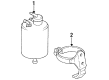
Mercury Villager Vapor Canister
OEM Vapor Canister boasts unmatched quality. Each part goes through full quality checks. They adhere to Mercury's official factory standards. These steps remove flaws and inconsistencies. So you can get Vapor Canister with long life and a perfect fit. Come to our website and find genuine Mercury Villager parts. We keep a wide inventory of OEM Villager parts at the highly affordable prices. It's easy to search, compare, and pick what you need. You'll love the clear info and simple checkout. We offer top-rated customer service, and we reply fast. We also ship promptly to ensure your order arrives on time.
The Mercury Villager line used the evaporative emissions control or commonly known as EVAP system with the Vapor Canister distinguished for its dependability and functionality in number of Villager commodities. Used to capture nitric oxide that would otherwise be released in the atmosphere the Vapor Canister captures fuel vapors from the fuel tank to be used for fuel combustion within the engine. Besides increasing the efficiency of the Mercury Villager, this process has a somewhat considerable impact on the improvement of environmental safety as a result of the decrease in pollution. In its production years, the Mercury Villager came with variou Vapor Canisters Styles some of which came with filter replacement features and special electronic devices including canister vent solenoids, fuel tank pressure sensors among others. These innovations sustain the features of the Vapor Canister in delivering optimal performance and meeting very set emissions without compromising on toxic constituents. A part of the Mercury division, the Mercury Villager has gone through two generations begun in 1992, with improvement in performance and manufacture of auto parts like the Vapor Canister. Due to its versatility when supporting various models of Villager cars, it is highly valued in the automotive market, especially as regards the reliability and safe operation of vehicles. Mercury, which is a practical element of the car in the first place, has another important function, namely the one of a cleaner as the Villager Vapor Canister can significantly improve the quality of air. Indeed, the Mercury Villager Vapor Canister has received ample attestations that can uphold the Mercury's tradition of quality and breakthrough in automotive construction.
Mercury Villager Vapor Canister Parts and Q&A
- Q: How to Service and Repair the Vapor Canister on Mercury Villager?A:A single step to begin servicing or repairing the evaporative emission control canister includes disconnecting the battery ground cable for safety because electrical sparks jeopardize the fuel vapors that exist in the area. You need to lift the vehicle before removing the EVAP emissions canister shield by unfastening pin-type retainers along with bolts and screws. The technician should disconnect EVAP canister vapor hoses and the water separator hose before removing the EVAP canister by unscrewing its bolts. The last step of the installation process requires disconnecting the electrical connection from the EVAP canister vent control valve. The installation requires performing the evaporative emission system leak test along with the evaporative emission repair verification drive cycle to verify proper system functionality after completing the reverse procedure.

Related Mercury Villager Parts
 Mercury Villager Catalytic Converter
 Mercury Villager EGR Valve
 Mercury Villager EGR Valve Gasket
 Mercury Villager Exhaust Flange Gasket
 Mercury Villager Exhaust Heat Shield
 Mercury Villager Exhaust Manifold
 Mercury Villager Exhaust Manifold Gasket
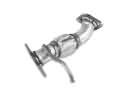 Mercury Villager Exhaust Pipe
 Mercury Villager Muffler
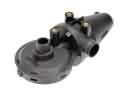 Mercury Villager PCV Valve