FordParts
My Garage
My Account
Cart
OEM Mercury Villager Exhaust Manifold
Engine Exhaust Manifold- Select Vehicle by Model
- Select Vehicle by VIN
Select Vehicle by Model
orMake
Model
Year
Select Vehicle by VIN
For the most accurate results, select vehicle by your VIN (Vehicle Identification Number).
6 Exhaust Manifolds found


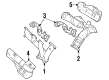
Mercury Villager Exhaust Manifold, Front Part Number: XF5Z-9431-BA
Mercury Villager Exhaust Manifold, Front Part Number: XF5Z-9431-AA
Mercury Villager Exhaust Manifold, Rear Part Number: XF5Z-9430-AA

Mercury Villager Exhaust Manifold Part Number: F6XZ9430AA
Mercury Villager Exhaust Manifold Part Number: F4XY9431A
Mercury Villager Exhaust Manifold, Front Part Number: 1F5Z-9431-AA
Mercury Villager Exhaust Manifold
OEM Exhaust Manifold boasts unmatched quality. Each part goes through full quality checks. They adhere to Mercury's official factory standards. These steps remove flaws and inconsistencies. So you can get Exhaust Manifold with long life and a perfect fit. Come to our website and find genuine Mercury Villager parts. We keep a wide inventory of OEM Villager parts at the highly affordable prices. It's easy to search, compare, and pick what you need. You'll love the clear info and simple checkout. We offer top-rated customer service, and we reply fast. We also ship promptly to ensure your order arrives on time.
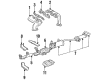
One of Mercury Villager Exhaust Manifold is a part widely recognized for its dependability and effectiveness; it is an important factor for channeling hot gaseous emissions from the engine to the exhaust. This kind of design doesn't only boost the functioning of the engine but at the same time reduces emissions of bad effects in the environment while being one of the important factors for efficiency and safety for Mercury Villager vehicles. Available in many versions suitable for different models of Mercury Villager, the Exhaust Manifold is usually made of such materials as cast iron or stainless steel to provide durability and resistance to wear. Its attributes include different tubes, the number of which corresponds to the number of cylinders of the engine, thus allowing to improve the exhaust gases circulation, and reducing the back pressure. This is especially crucial for the preservation of the generic health of the engine because the well-functioning exhaust manifold has a role of keeping of performance hitches and possible exhaust leakage, which may be hazardous to health. Second generation Mercury Villager was launched in 1997 as a facelift of the first generation models and some of the improvements carried over were the Exhaust Manifold. Additional features of the Mercury Villager Exhaust Manifold are its capacity to increase the speed of the exhaust gases to increase efficiency. The features of high reliability, fairly good performance and numerous new solutions underline the unique position of Mercury Villager Exhaust Manifold in automotive industry and guarantee that the Mercury Villager will be one of the most reliable vehicles on the roads for families and singles.
Mercury Villager Exhaust Manifold Parts and Q&A
- Q: How to service the RH exhaust manifold on Mercury Villager?A:Service of the RH exhaust manifold begins with disconnecting both the battery ground cable and battery junction box electrical connectors. Start by taking out the air cleaner assembly while positioning the battery junction box away by removing its bolts and unclipping the retainer. You should remove the exhaust heat shield through bolt removal. The removal process starts by unscrewing the bolts which connect RH exhaust manifold to engine lifting eye bracket. Remove the three LH exhaust manifold to RH exhaust manifold nuts. Raising the vehicle enables you to remove the exhaust manifold heat shield through bolt removal from three locations. The two-step method for exhaust manifold nuts removal must be performed in specified sequence before you lower the vehicle to extract the exhaust manifold. When you lift the vehicle for the second time you should get rid of the exhaust manifold gasket. NEW exhaust manifold gaskets should be positioned before lowering the vehicle to fit the exhaust manifold into its location. The technician should install exhaust manifold nuts in their specified sequence before installing the exhaust manifold heat shield by ensuring proper positioning plus bolting it to three points. Return the vehicle to the lower position so you can install three LH exhaust manifold to RH exhaust manifold nuts before placing and installing the RH exhaust manifold to engine lifting eye bracket with its bolts. Position the exhaust heat shield properly then bolt it into place. The battery junction box requires reinstallation by placing it correctly before clipping it into position and securing the bolts. After finishing reinstall the air cleaner assembly proceed to connect the battery junction box electrical connectors along with reconnecting the battery ground cable.
- Q: How to service and repair the LH exhaust manifold on Mercury Villager?A:Service and repair of the LH exhaust manifold requires beginning with radiator Fan Motor shroud removal followed by disconnecting HO2S electrical connector. Service the exhaust manifold heat shield by extracting its bolts then position the oil level indicator tube to the side. To proceed further detach the A/C compressor Drive Belt by loosening both the tensioner bolt and the belt tension adjuster bolt. You must first separate the A/C compressor while uninstalling four bolts from its base. Follow the series of steps to remove the LH exhaust manifold nuts with a two-step procedure before elevating the vehicle to remove the engine splash shield. First remove the engine splash shield and exhaust heat shield by undoing all bolts connecting them to the exhaust manifold. Next remove the exhaust manifold to outlet pipe nuts by taking out the bolts. You should begin by disassembling the RH exhaust manifold to engine lifting eye hook bracket by removing the bolts before taking out the three nuts that eventually lead to the exhaust manifold removal. Discard the exhaust manifold gasket. Begin by placing the new exhaust manifold gasket before setting up the exhaust manifold in place using three securing nuts. Install the RH exhaust manifold to engine lifting eye hook bracket with the bolts before securing the exhaust heat shield to its proper position using the bolts. After installing the outlet pipe nuts to the exhaust manifold follow the protocol of engine splash shield installation before lowering the vehicle. Begin by installing the specified sequence of LH exhaust manifold nuts then place and bolt down the A/C compressor to the seal location. After repositioning the drive belt of the A/C compressor you should adjust its tension. You must install the exhaust manifold heat shield while correctly positioning the oil level indicator tube and connect the HO2S electrical connector before reinstalling the radiator fan motor and shroud.


Related Mercury Villager Parts
 Mercury Villager Catalytic Converter
 Mercury Villager EGR Valve
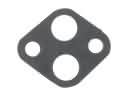 Mercury Villager EGR Valve Gasket
 Mercury Villager Exhaust Flange Gasket
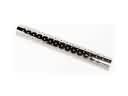 Mercury Villager Exhaust Heat Shield
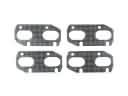 Mercury Villager Exhaust Manifold Gasket
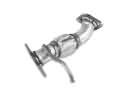 Mercury Villager Exhaust Pipe
 Mercury Villager Muffler
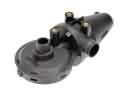 Mercury Villager PCV Valve
 Mercury Villager Vapor Canister