My Garage
Cart
Make sure this part fits

Ford 5F2Z-14A664-AA
Clockspring

2004-2007 Ford 5F2Z14A664AA

Customer Questions & Expert Answers (4)
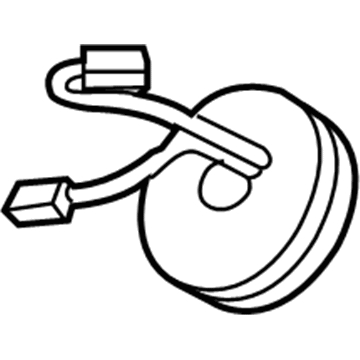
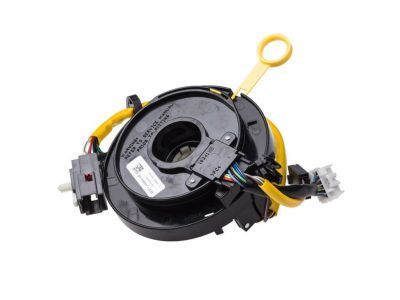
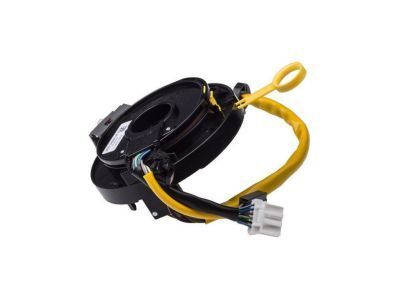
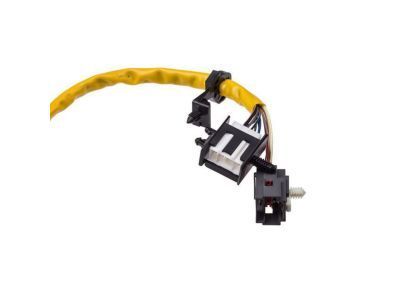
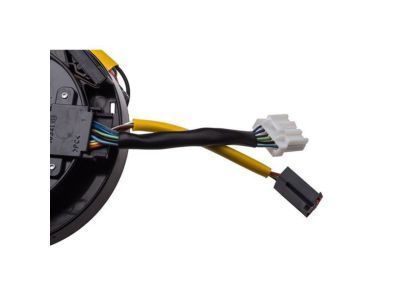
Ford 5F2Z-14A664-AA Clockspring
  • Part Description
    Cover And Contact Plate Assembly; Air Bag Clockspring
  • Base No.
    14A664
  • Replaces
    3F2Z-14A664-AA
  • Manufacturer
    Ford
Make sure this part fits
$278.68 MSRP: $409.22
You Save: $130.54 (32%)
Currently Unavailable

Due to manufacturer supply shortage, this item isn't currently available for ordering.

  • Related Parts
  • Product Specifications
  • Vehicle Fitment
  • Customer Questions & Expert Answers
  • Product Specifications

    BrandGenuine Ford
    Base No.14A664
    Manufacturer Part Number5F2Z-14A664-AA
    Part DescriptionCover And Contact Plate Assembly; Air Bag Clockspring
    Item Dimensions8.4 x 6.2 x 3.1 inches
    Item Weight0.90 Pounds
    ConditionNew
    Fitment TypeDirect Replacement
    Replaces3F2Z-14A664-AA
    ManufacturerFord
    SKU5F2Z-14A664-AA
    WarrantyThis genuine Ford part is guaranteed by Ford's factory warranty.
    Shipping & ReturnShipping Policy Return Policy
    Warning: California's Proposition 65
  • Vehicle Fitment

    Year Make Model Trim Engine
    2004-2007 Ford FreestarBase, Limited, S, SE, SEL, SES6 Cyl 3.9 L GAS, 6 Cyl 4.2 L GAS
    2004-2007 Mercury MontereyBase, Convenience, Luxury, Premier6 Cyl 4.2 L GAS
  • Customer Questions & Expert Answers

    Q:
    Do you think this 5F2Z-14A664-AA will fit my car? Posted by FordPartsDeal Specialist
    A:
    Select Your Vehicle model to verify if part number 5F2Z-14A664-AA fits your car.
    Posted by FordPartsDeal Specialist
    Q:
    What Precautions Should Be Taken When Servicing the Clock Spring Assembly on Ford Freestar? Posted by Customer
    A:
    Safety glasses ensure your protection during Clock Spring assembly service because they reduce accident-related injuries from deploying air bags and you should always position air bag modules with their trim cover directed away from your body. It is mandatory to wash your hands until all sodium hydroxide particles are removed after completing deployment. The air bag module connectors should never be probed and discolored or damaged trim covers need replacement over painting them. First disable system power while keeping the road wheels pointed directly forward before removing both the steering wheel and the three column screws securing the opening cover. Start by pulling the trim panel from the top before you remove the two steering column reinforcement screws alongside the lower steering column reinforcement cover. Begin by removing the tilt column handle and the three steering column shroud screws located at the bottom part. Afterward detach the bottom steering column shroud. The ignition lock cylinder needs removal so start by setting its position to RUN then push the tab while pulling it outward. To proceed with the ignition lock replacement it is necessary to remove the PATS transceiver screw and the PATS transceiver in addition to the lower instrument cluster finish panel, the upper steering column shroud and the PATS transceiver screw. Two masking tape strips should be applied to the Clock Spring to stop accidental movement. First disconnect the electrical connectors of the Clock Spring then detach the wire harness and take the Clock Spring off the steering column. Installation requires centering the Clock Spring through step-by-step clockwise rotation of the rotor which creates resistance approximately three turns from that point. Insert the Clock Spring onto the steering column so the three retainers properly snap while guiding the wire harness into its designated holders. Connect the electrical connectors while also installing the warning switch and extract the pin from new Clock Springs before installation. The procedure requires reinstalling the PATS transceiver along with its screw while you replace the upper steering column shroud and lower instrument cluster finish panel, ignition lock cylinder, lower steering column shroud and tight the three lower screws to 12 Nm (9 lb-ft). Complete the installation by placing the steering wheel and lower steering column opening cover along with its three lower screws followed by installing the tilt column handle and steering column reinforcement with two screws tightened to 12 Nm (9 lb-ft) then plug in the system power.
    Posted by FordPartsDeal Specialist
    Q:
    What Safety Precautions Should Be Taken When Servicing the Clock Spring Assembly on Mercury Monterey? Posted by Customer
    A:
    It is crucial to use safety glasses during Clock Spring assembly servicing because deployment risks will be minimized and live air bag modules should always be handled with the trim cover facing away from your body. Thorough handwashing is needed to eliminate remaining sodium hydroxide residue after release of air bag. air bag module connectors must never be probed and customers should obtain new air bag modules when trim covers become damaged or discolored instead of conducting repairs. A thorough inspection of SRS operation without faults should be performed to return the vehicle to its customer. The system dampening process must be completed while making sure wheels face forward before removing the wheel. You must remove the three screws on the steering column opening cover and then extract the trim panel while detaching both steering column reinforcement screws and lower cover. After removing the lower shroud screws of three and the tilt column handle, detach the lower steering column shroud. After setting the cylinder to RUN position use the tab to push and extract the lock cylinder. To reach the transceiver you need to uninstall the lower instrument cluster finish panel, upper steering column shroud, PATS transceiver screw, as well as the transceiver unit itself. Two strips of masking tape must be applied to the Clock Spring to stop unintentional rotation when it will be reused. Disconnect the Clock Spring electrical connectors before detaching the wire harness which allows you to slide off the Clock Spring from its position on the steering column. To install the Clock Spring maintain inner housing stability while rotating the rotor counterclockwise until resistance occurs then finish with a clockwise rotation of three turns. The Clock Spring should match the steering column position with its retainers snapping into correct placement after you also put the wire harness into the designated holders. The electrical connectors need to be connected while implementing the key-in-ignition warning switch and uninstalling the retaining pin for new Clock Springs. Reposition the PATS transceiver and its screw along with the upper shroud and lower instrument cluster finish panel before setting the ignition lock cylinder to its full position while maintaining alignment. Fasten the lower shroud after installing three lower screws and the tilt column handle and steering column reinforcement and two reinforcement screws must be tightened to 12 Nm (9 lb-ft). Circular installation ends with the lower opening cover tight with three lower screws at 12 Nm torque value and subsequent wheel attachment followed by system power restoration.
    Posted by FordPartsDeal Specialist
    Q:
    What should be done if reusing the clockspring for the 2007 Ford Freestar? Posted by Customer
    A:
    Apply two strips of masking tape to prevent accidental rotation.
    Posted by FordPartsDeal Specialist
    See expert answers on similar Clock Spring
    If you have any questions about this product, please don't hesitate to ask us. We will be happy to help you!

OEM Ford 5F2Z-14A664-AA, Excellent Performance and Perfect Fitment

To ensure reliability, purchase Ford part # 5F2Z-14A664-AA Clockspring. It is sometimes referred to as Ford Clock Spring. For those Ford owners who aspire to maintain their vehicles in optimal shape, opting for OEM parts is a wise choice. Precisely engineered, these components adhere to stringent factory guidelines and are produced in state-of-the-art facilities using cutting-edge technologies. Moreover, they are subjected to thorough testing to certify their resilience and safety, thereby making them a dependable option for Ford owners.

FordPartsDeal.com is a leading supplier of genuine Ford parts such as Ford 5F2Z14A664AA Clockspring. A vast selection of genuine Ford parts is available on our website, all offered at discounted prices. Every OEM Ford part is covered by the manufacturer's warranty, which also applies to our hassle-free return policy. Enjoy fast delivery service, ensuring you get your parts when you need them. Your shopping experience here is guaranteed to be pleasurable. For detailed Ford parts information, click here.
Choose FordPartsDeal for discounted prices, exceptional service and fast delivery