
Popular OEM Ford Freestar Parts
- Body & Hardware Parts View More >
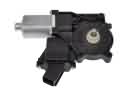
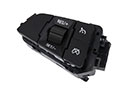
- Electrical Parts View More >
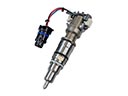
- Air & Fuel Delivery Parts View More >
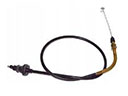
- Steering Parts View More >
- Emission Control & Exhaust Parts View More >
- Charging & Starting Parts View More >
- Engine Parts View More >
- Belts & Cooling Parts View More >
- Suspension Parts View More >
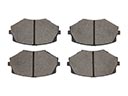
- Brakes Parts View More >
- A/C & Heating Parts View More >
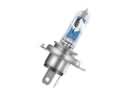
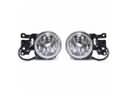
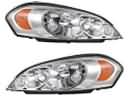
- Headlights & Lighting Parts View More >


Why Buy Genuine Ford Freestar Parts From FordPartsDeal.com
FordPartsDeal.com offers a smart and convenient way to buy genuine parts online. We sell new OEM Ford Freestar parts. Authorized dealers directly provide all the Ford Freestar parts and assemblies to ensure the optimal quality and fit. We also provide all properly fitting Ford Freestar parts, such as Transmission specific to your model. When you shop here, you get real Ford value at highly competitive prices. All our products come with the same Ford warranty available at other dealerships. Our easy-to-use catalog helps you quickly identify the right part for your car. You'll receive fast shipping from our warehouse network, keeping your Ford Freestar running smoothly. Our staff consists of Ford professionals who are ready to assist you. We aim to treat each customer as if they were stepping out of a Ford showroom. VIN verification and our live support ensure that the part you order is the right Ford Freestar part for your vehicle.
The Ford Freestar entered the automotive market in 2004 to replace the Windstar and presented itself as a minivan for seven passengers through SE, SEL and Limited trim versions. The interior of the Ford Freestar reached 135.7 cubic feet because of its 201-inch length which provided three rows of folding passenger seats. The powertrain development for the Ford Freestar involved creating new V6 engines which consisted of a 3.9-liter engine rated at 193 horsepower for U.S. markets. The original 3.0/3.8-liter engine power unit suffered a replacement from the development team who also re-engineered the 3.8-liter version to enhance performance. The transmission system received an upgrade during development to ensure more reliable performance which delivered improved driving dynamics together with smoother transmission shifts. Standard front airbags together with optional side airbags became part of the safety package which earned the vehicle a five-star front crash rating. The Ford Freestar featured various durability improvements, including stronger components in key areas like suspension and towing capability. Original Ford Freestar auto parts fulfill factory requirements to ensure correctness in performance and installation which is critical for preserving vehicle reliability together with comfort functions. Even though Ford stopped manufacturing the Freestar in 2007 because of market competition its exceptional quality alongside professional handling continues to make it stand out.
Ford Freestar issues group into engine management, HVAC electrical, and ignition performance. In engine management, the Freestar may stumble or misfire during takeoff. Excess exhaust flow from a plugged EGR orifice upsets combustion and trims on the Ford Freestar. Clean the intake passages, then confirm balanced flow across the bank. Check for vacuum leaks around the intake gaskets and PCV hoses. Perform a smoke test if trims remain high at idle. Persistent roughness on the Freestar often traces to a failing ignition coil pack or weak DPFE readings. Replace the ignition coil pack as needed, and validate EGR control under load. HVAC electrical concerns affect the Ford Freestar blower speeds and cabin comfort. A failed blower motor resistor removes lower speeds, leaving only high. Inspect the connector for heat damage, then replace the blower motor resistor and test each setting. Confirm blower ground and fuse integrity before resistor replacement. For powertrain smoothness, the Freestar also benefits from cleared codes and battery voltage checks. Clear codes, then monitor fuel trims and misfire counters during drive. Reinspect connectors for corrosion and loose terminals after heat cycles. Finish by road testing the Ford Freestar, verifying stable idle and proper fan operation.
Ford Freestar Parts and Q&A
- Q: How to service and repair the ignition coil on Ford Freestar?A:To service the ignition coil, disconnection of battery ground, removal of cowl panel grille, and disconnection of wiper motor. Take out the panel bolts of the cowl top (tighten to 6 Nm), disconnect ignition coil connector and spark plug wires, and take off ignition coil bolts (tighten to 7 Nm) and replace.
- Q: How to Service the Air Filter Element on Ford Freestar?A:In order to service the air cleaner, remove the outlet pipe by unclamping and disconnection of crankcase vent tube. Unplug the MAF sensor, and pull off the air cleaner cover with your hands. Change air cleaner element, fitting it correctly with notches and reverse the process of removal to install it back.
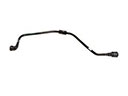
- Q: How to Service and Repair the EGR Valve System Module on Ford Freestar?A:The EGR system module can be repaired, and to do so, the vehicle has to be hoisted, in neutral and the battery disconnected. Disassemble nuts on EGR tube making sure to tight 40 Nm when reattaching. Unscrew electrical and vacuum terminals, change the gasket, and use new tight 25 Nm bolts to fix the module. Turn the process around to complete.


