
Popular OEM Mercury Monterey Parts
- Body & Hardware Parts View More >
- Electrical Parts View More >
- Air & Fuel Delivery Parts View More >
- Steering Parts View More >
- Emission Control & Exhaust Parts View More >
- Charging & Starting Parts View More >
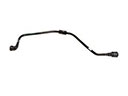
- Engine Parts View More >
- Belts & Cooling Parts View More >
- Suspension Parts View More >
- Brakes Parts View More >
- A/C & Heating Parts View More >
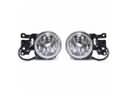
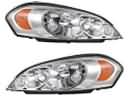
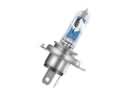
- Headlights & Lighting Parts View More >


Why Buy Genuine Mercury Monterey Parts From FordPartsDeal.com
FordPartsDeal.com offers a smart and convenient way to buy genuine parts online. We sell new OEM Mercury Monterey parts. Authorized dealers directly provide all the Mercury Monterey parts and assemblies to ensure the optimal quality and fit. We also provide all properly fitting Mercury Monterey parts, such as Transmission specific to your model. When you shop here, you get real Mercury value at highly competitive prices. All our products come with the same Mercury warranty available at other dealerships. Our easy-to-use catalog helps you quickly identify the right part for your car. You'll receive fast shipping from our warehouse network, keeping your Mercury Monterey running smoothly. Our staff consists of Mercury professionals who are ready to assist you. We aim to treat each customer as if they were stepping out of a Mercury showroom. VIN verification and our live support ensure that the part you order is the right Mercury Monterey part for your vehicle.
The Mercury Monterey minivan served the Mercury division between 2004 and 2007. This vehicle utilizes its powerful 4.2L V6 engine to deliver more than 201 horsepower accompanied by 263 lb-ft of torque with appropriate handling control from its four-speed automatic transmission system. The Mercury Monterey utilizes either rear-wheel drive (RWD) or all-wheel drive (AWD) systems, built on the Ford U2 platform, to deliver versatile driving capabilities. The Mercury Monterey design comes in three different trim options starting from Convenience and advancing to Luxury and topping out at Premier. Standard safety equipment on higher trims of the Convenience model includes antilock brakes and side-curtain airbags that are optional in base model versions. Inside the Monterey passengers find an interface with uncluttered dashboard styling along with leather seating components and chairs in the back rows which provide flexibility to the passenger compartment. Users can store various items in the Mercury Monterey because its maximum cargo capacity extends to 134 cubic feet. Maintaining the performance and reliability of the Mercury Monterey demands owners to use original manufacturer parts. Users of the Mercury Monterey can easily acquire authentic vehicle parts which deliver the same premium standards as the manufacturer and maintain the car's lifespan.
Mercury Monterey concerns group into transmission drive, engine sensing, and braking electronics. In the drivetrain, the Monterey can lose motion from a failed torque converter spline. Symptoms include sudden neutral, slipping on takeoff, and metal in fluid. Verify line pressure, scan for ratio errors, and inspect debris in the pan. Replace the torque converter and update calibrations, then road test the Monterey. Engine stalling on the Monterey often traces to a weak crankshaft position sensor or vacuum leaks. Expect cutouts during acceleration, a long crank, and a stored sync code. Check sensor waveform, inspect connectors, and confirm crank reluctor integrity. Fit a new crankshaft position sensor and relearn idle on the Monterey. For braking, premature wear and warning lamps affect the Monterey ABS system. Low fluid or a failed ABS sensor can disable stability functions. Measure pad thickness, test wheel speed signals, and bleed the hydraulic system. Replace any damaged ABS sensor and clear faults after a short drive. Use Mercury service data for torque specs and software updates. Regular inspections help the Mercury Monterey avoid repeat failures. After repairs, it should start cleanly, stop straight, and shift smoothly. Follow Mercury technical bulletins for updated procedures.
Mercury Monterey Parts and Q&A
- Q: How to Service the Air Filter Element on Mercury Monterey?A:In order to service air cleaner element, unscrew the crankcase vent tube and brake aspirator tube. Unscrew clamps to unscrew air cleaner outlet pipe, and then unscrew MAF sensor. Take off the air cleaner cover and element and make sure that during replacement the alignment notches are correctly aligned.
- Q: How to service the auxiliary blower motor resistor on Mercury Monterey?A:To service the auxiliary blower motor resistor, start by removing the LH quarter trim panel. Disconnect the electrical connector and unscrew the resistor. Once the screws are removed, take out the resistor. To install, simply reverse the steps taken during removal.
- Q: How to service and repair the ignition coil on Mercury Monterey?A:Disconnection of battery ground, removal of cowl panel and wiper motor connector and removal of cowl lower panel to service the ignition coil. Unscrew the ignition coil connector and spark plug wires and strip out the ignition coil bolts. Installation: Re-installation The process is reversed and bolts tightened to torque.


