My Garage
Cart
Make sure this part fits

Ford 3W1Z-11691-AA
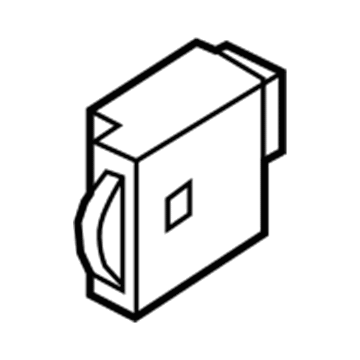
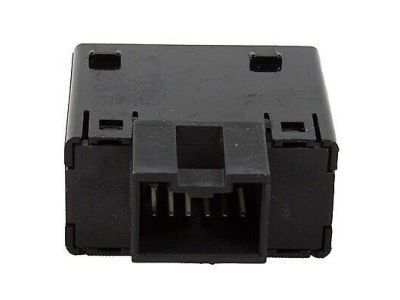
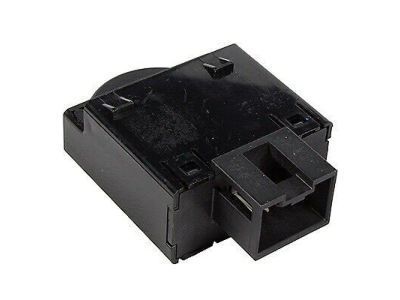
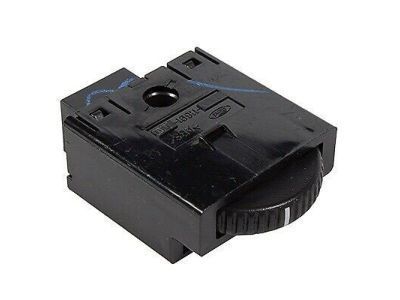
Dimmer Switch

2003-2011 Ford 3W1Z11691AA

Customer Questions & Expert Answers (17)
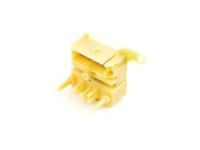
Ford 3W1Z-11691-AA Dimmer Switch
  • Part Description
    Resistor Assembly; Headlight Dimmer Switch
  • Base No.
    11691
  • Manufacturer
    Ford
Make sure this part fits
Currently Unavailable

Due to manufacturer supply shortage, this item isn't currently available for ordering.

  • Related Parts
  • Product Specifications
  • Vehicle Fitment
  • Customer Questions & Expert Answers
  • Product Specifications

    BrandGenuine Ford
    Base No.11691
    Manufacturer Part Number3W1Z-11691-AA
    Part DescriptionResistor Assembly; Headlight Dimmer Switch
    Other NamesInstrument Light Rheostat
    Manufacturer NoteThumbwheel design
    Item Weight0.30 Pounds
    ConditionNew
    Fitment TypeDirect Replacement
    ManufacturerFord
    SKU3W1Z-11691-AA
    WarrantyThis genuine Ford part is guaranteed by Ford's factory warranty.
    Shipping & ReturnShipping Policy Return Policy
    Warning: California's Proposition 65
  • Vehicle Fitment

    Year Make Model Trim Engine
    2003-2011 Ford Crown VictoriaBase, LWB, LX, LX Sport, Police Interceptor, S, Special Edition8 Cyl 4.6 L CNG, 8 Cyl 4.6 L FLEX, 8 Cyl 4.6 L GAS
    2003-2011 Lincoln Town CarCartier, Cartier L, Designer Series, Executive, Executive L, Executive Protection Series, Protection Series, Signature, Signature L, Signature Limited, Ultimate, Ultimate L8 Cyl 4.6 L FLEX, 8 Cyl 4.6 L GAS
    2003-2011 Mercury Grand MarquisGS, GSL, Limited Edition, LS, LSE, Ultimate Edition8 Cyl 4.6 L FLEX, 8 Cyl 4.6 L GAS
    2003-2004 Mercury MarauderBase8 Cyl 4.6 L GAS
  • Customer Questions & Expert Answers

    Q:
    Will this 3W1Z-11691-AA work in my car? Posted by FordPartsDeal Specialist
    A:
    Select Your Vehicle model to verify if part number 3W1Z-11691-AA fits your car.
    Posted by FordPartsDeal Specialist
    Q:
    How to service and repair the instrument panel dimmer switch on Ford Crown Victoria? Posted by Customer
    A:
    The first step of service and repair work requires disconnecting electrical connectors from the headlamp switch before removing it. You should liberate the retaining tabs before taking out the instrument panel dimmer switch. The new switch installation requires use of the reversed removal steps.
    Posted by FordPartsDeal Specialist
    Q:
    How to Address Issues with the Dimmer Switch on a Lincoln Town Car? Posted by Customer
    A:
    The first step for servicing and repairing the headlamp dimmer switch requires a battery disconnection. The first step to remove the ignition switch lock cylinder is to use an ignition key to turn it to "RUN" position before using a punch to push the release tab while pulling the cylinder out. Service and repair of the headlamp dimmer switch begins with disconnecting the battery before taking off the tilt wheel handle and shank. Next, use two hands to push sides of the upper shroud and unfasten the three screws from the lower shroud. Three electrical connectors need removal from the multifunction switch before removing its two mounting screws. The installation ends by performing the reverse steps of removal.
    Posted by FordPartsDeal Specialist
    Q:
    How to service the instrument panel dimmer switch on Mercury Marauder? Posted by Customer
    A:
    The first step when servicing the instrument panel dimmer switch requires a disconnection of the battery ground cable. The first step involves disconnecting the headlamp switch while detaching the electrical connectors from it. The instrument panel dimmer switch can be taken out after releasing its retaining tabs. The installation of the instrument panel dimmer switch requires following the opposite steps from the removal process.
    Posted by FordPartsDeal Specialist
    Q:
    How to service and repair the instrument panel dimmer switch on Mercury Grand Marquis? Posted by Customer
    A:
    Starting service and maintenance on the instrument panel dimmer switch requires disconnecting the battery ground cable. Start by disconnecting both electrical connectors to the headlamp switch and continuing with its disconnection from the housing. You should release the retaining tabs to take out the instrument panel dimmer switch. The new switch installation requires following the reverse steps of removal.
    Posted by FordPartsDeal Specialist
    Q:
    How to service and repair the headlamp dimmer switch on Lincoln Town Car? Posted by Customer
    A:
    Grounding out the battery is the first step to work on the headlamp dimmer switch for repair purposes. The service begins with removing the tilt release lever/handle from the system. The service of the headlamp dimmer switch requires technicians to first uninstall both steering column shrouds by removing three screws after pressing inward on their sides. Tighten these screws to 2 Nm (18 inch lbs) before reinstalling. First disconnect the multi-function switch electrical connectors, proceed by removing the two screws then fasten the switch to 3 Nm (27 inch lbs) torque during assembly. The completion of the process requires performing the removal method in reverse order.
    Posted by FordPartsDeal Specialist
    Q:
    How to service and repair the headlamp dimmer switch and steering column multifunction switch on Mercury Grand Marquis? Posted by Customer
    A:
    A mandatory first step in servicing the steering column multifunction switch along with the headlamp dimmer switch is to disable the supplemental restraint system (SRS). First deploy the ignition switch lock cylinder to RUN in position and utilize the appropriate tool to push on the release tab while drawing the lock cylinder away from the housing. After removing the tilt release lever you must push the sides of the upper steering column shroud to allow its release. Tighten the three upper and lower steering column shrouds using a torque of 2 Nm (18 inch lbs.) after completing the installation. First disconnect the three electrical multi-function switch connectors before removing its attachment screws while reinstalling them tight to 3 Nm (27 inch lbs.). Follow up with the reverse order of removal to complete the operation while powering up the SRS system.
    Posted by FordPartsDeal Specialist
    Q:
    What should be done after removing the multi-function switch for the 2008 Lincoln Town Car? Posted by Customer
    A:
    Reverse the removal procedure to complete the installation.
    Posted by FordPartsDeal Specialist
    See expert answers on similar Dimmer Switch
    Q:
    What should be done with the electrical connectors for the 2008 Ford Crown Victoria? Posted by Customer
    A:
    Disconnect the three electrical connectors from the multi-function switch.
    Posted by FordPartsDeal Specialist
    See expert answers on similar Dimmer Switch
    Q:
    How do you secure the upper and lower steering column shrouds for the 2006 Lincoln Town Car? Posted by Customer
    A:
    Remove the three screws securing them and ensure to tighten them to 2 Nm (18 inch lbs.) upon reinstallation.
    Posted by FordPartsDeal Specialist
    See expert answers on similar Dimmer Switch
    Q:
    What should be done after removing the instrument panel finish panel for the 2007 Lincoln Town Car? Posted by Customer
    A:
    Next, release the three retaining tabs to detach the instrument panel dimmer switch.
    Posted by FordPartsDeal Specialist
    See expert answers on similar Dimmer Switch
    Q:
    What should be done after removing the instrument cluster finish panel for the 2009 Lincoln Town Car? Posted by Customer
    A:
    Release the three retaining tabs to detach the instrument panel dimmer switch.
    Posted by FordPartsDeal Specialist
    See expert answers on similar Dimmer Switch
    Q:
    What position should the transmission selector lever be in for the 2005 Lincoln Town Car? Posted by Customer
    A:
    The transmission selector lever should be in the 1 position.
    Posted by FordPartsDeal Specialist
    See expert answers on similar Dimmer Switch
    Q:
    How do you install the new switch for the 2006 Mercury Grand Marquis? Posted by Customer
    A:
    Reverse the removal procedure.
    Posted by FordPartsDeal Specialist
    See expert answers on similar Dimmer Switch
    Q:
    What is the next step after removing the screws from the steering column shrouds for the 2009 Mercury Grand Marquis? Posted by Customer
    A:
    Disconnect the three electrical connectors from the multifunction switch.
    Posted by FordPartsDeal Specialist
    See expert answers on similar Dimmer Switch
    Q:
    How many screws secure the multifunction switch for the 2007 Mercury Grand Marquis? Posted by Customer
    A:
    There are two screws securing the switch.
    Posted by FordPartsDeal Specialist
    See expert answers on similar Dimmer Switch
    Q:
    What should be removed to access the instrument panel dimmer switch for the 2004 Lincoln Town Car? Posted by Customer
    A:
    Remove the screws securing the instrument cluster finish panel and disconnect the electrical connectors.
    Posted by FordPartsDeal Specialist
    See expert answers on similar Dimmer Switch
    If you have any questions about this product, please don't hesitate to ask us. We will be happy to help you!

OEM Ford 3W1Z-11691-AA, Excellent Performance and Perfect Fitment

To ensure reliability, purchase Ford part # 3W1Z-11691-AA Dimmer Switch. It is sometimes referred to as Ford Dimmer Switch. For those Ford owners who aspire to maintain their vehicles in optimal shape, opting for OEM parts is a wise choice. Precisely engineered, these components adhere to stringent factory guidelines and are produced in state-of-the-art facilities using cutting-edge technologies. Moreover, they are subjected to thorough testing to certify their resilience and safety, thereby making them a dependable option for Ford owners.

FordPartsDeal.com is a leading supplier of genuine Ford parts such as Ford 3W1Z11691AA Dimmer Switch. A vast selection of genuine Ford parts is available on our website, all offered at discounted prices. Every OEM Ford part is covered by the manufacturer's warranty, which also applies to our hassle-free return policy. Enjoy fast delivery service, ensuring you get your parts when you need them. Your shopping experience here is guaranteed to be pleasurable. For detailed Ford parts information, click here.
Choose FordPartsDeal for discounted prices, exceptional service and fast delivery