FordParts
My Garage
My Account
Cart
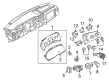
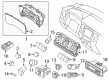
OEM Ford Dimmer Switch
Light Dimmer Switch- Select Vehicle by Model
- Select Vehicle by VIN
Select Vehicle by Model
orMake
Model
Year
Select Vehicle by VIN
For the most accurate results, select vehicle by your VIN (Vehicle Identification Number).
87 Dimmer Switches found


Ford Dimmer Switch Part Number: 7L1Z-11691-BA
$29.38 MSRP: $41.67You Save: $12.29 (30%)Ships in 1-3 Business DaysProduct Specifications- Other Name: Resistor Assembly; Instrument Panel Dimmer Switch; Headlight Dimmer Switch; Instrument Light Rheostat; Rheostat
- Manufacturer Note: BLACK


Ford Headlamp Switch Part Number: FL3Z-11654-BA
$64.75 MSRP: $106.55You Save: $41.80 (40%)Ships in 1-2 Business DaysProduct Specifications- Other Name: Switch Assembly - Headlamps; Headlight Switch; Multi Purpose Switch
- Manufacturer Note: BLACK


Ford Headlamp Switch Part Number: GJ5Z-11654-A
$69.62 MSRP: $114.55You Save: $44.93 (40%)Ships in 1-3 Business DaysProduct Specifications- Other Name: Switch Assembly - Lighting; Headlight Switch; Multi Purpose Switch
- Replaces: F1EZ-11654-A, SW-7463


Ford Headlamp Switch Part Number: CV6Z-11654-K
$69.62 MSRP: $114.55You Save: $44.93 (40%)Product Specifications- Other Name: Switch Assembly - Lighting; Headlight Switch; Multi Purpose Switch


Ford Headlamp Switch Part Number: 9C2Z-11654-AA
$28.63 MSRP: $45.45You Save: $16.82 (38%)Product Specifications- Other Name: Switch Assembly - Headlamps; Headlight Switch; Multi Purpose Switch
- Manufacturer Note: BLACK


Ford Headlamp Switch Part Number: DG9Z-11654-BA
$55.25 MSRP: $90.91You Save: $35.66 (40%)Product Specifications- Other Name: Switch Assembly - Headlamps; Headlight Switch; Multi Purpose Switch
- Manufacturer Note: BLACK


Ford Headlamp Switch Part Number: AG1Z-11654-DA
$45.80 MSRP: $72.73You Save: $26.93 (38%)Product Specifications- Other Name: Switch Assembly - Headlamps; Headlight Switch; Multi Purpose Switch
- Manufacturer Note: BLACK


Ford Dimmer Switch Part Number: BC3Z-11691-AA
$29.38 MSRP: $41.67You Save: $12.29 (30%)Ships in 1-3 Business DaysProduct Specifications- Other Name: Resistor Assembly; Instrument Light Rheostat


Ford Instrument Light Rheostat Part Number: 9C2Z-11691-AA
$29.38 MSRP: $41.67You Save: $12.29 (30%)Product Specifications- Other Name: Resistor Assembly; Instrument Panel Dimmer Switch; Rheostat
- Manufacturer Note: BLACK


Ford Instrument Light Rheostat Part Number: F3DZ-11691-A
$57.61 MSRP: $79.70You Save: $22.09 (28%)Ships in 1-2 Business DaysProduct Specifications- Other Name: Resistor Assembly
- Manufacturer Note: Rotary thumb wheel switch - instr. pnl lighting - #FODB-AB, F2DB-AA, F3DB-AA, PMF2DB-AA,
- Replaces: F2DZ-5404338-H, F2DZ-5404338-J, F2DZ-5404338-L, F2DZ-5404338-D, F2DZ-5404338-C, F2DZ-11691-A, F2DZ-5404338-G, F2DZ-5404338-B, F2DZ-5404338-E, F2DZ-5404338-F, F2DZ-5404338-K

Ford Headlamp Switch Part Number: NL1Z-11654-AB
$72.14 MSRP: $114.55You Save: $42.41 (38%)Ships in 1-2 Business DaysProduct Specifications- Other Name: Switch Assembly - Headlamps
- Replaces: NL1Z-11654-AA


Ford Dimmer Switch Part Number: AR3Z-11691-AA
Product Specifications- Other Name: Resistor Assembly; Instrument Light Rheostat
- Manufacturer Note: BLACK


Ford Dimmer Switch Part Number: 6E5Z-11691-AA
Product Specifications- Other Name: Resistor Assembly; Headlight Dimmer Switch; Instrument Light Rheostat
- Manufacturer Note: Switch - Dimmer


Ford Dimmer Switch Part Number: 3W1Z-11691-AA
Product Specifications- Other Name: Resistor Assembly; Headlight Dimmer Switch; Instrument Light Rheostat
- Manufacturer Note: Thumbwheel design


Ford Headlamp Switch Part Number: D2BZ-11654-A
$46.60 MSRP: $72.73You Save: $26.13 (36%)Product Specifications- Other Name: Switch Assembly - Headlamps; Headlight Switch; Multi Purpose Switch


Ford Headlamp Switch Part Number: 9R3Z-11654-CA
$62.75 MSRP: $99.64You Save: $36.89 (38%)Product Specifications- Other Name: Switch Assembly - Headlamps; Headlight Switch; Multi Purpose Switch
- Manufacturer Note: BLACK


Ford Dimmer Switch Part Number: 9L3Z-11691-AA
Product Specifications- Other Name: Resistor Assembly; Instrument Light Rheostat
- Manufacturer Note: BLACK


Ford Dimmer Switch Part Number: 9E5Z-11691-AA
Product Specifications- Other Name: Resistor Assembly; Instrument Light Rheostat


Ford Instrument Light Rheostat Part Number: 7L5Z-11691-AA
Product Specifications- Other Name: Resistor Assembly; Headlight Dimmer Switch; Rheostat


Ford Dimmer Switch Part Number: 7C3Z-11691-AA
Product Specifications- Other Name: Resistor Assembly; Instrument Panel Dimmer Switch; Instrument Light Rheostat; Rheostat
- Manufacturer Note: BLACK
| Page 1 of 5 |Next >
1-20 of 87 Results
Ford Dimmer Switch
If you own Ford and want to keep it in top shape, choosing OEM Dimmer Switch is a smart move. They are precisely engineered and follow strict factory standards. They are made in advanced facilities that use cutting edge technology. Each part goes through thorough testing to confirm strength and safety, so you can trust it. FordPartsDeal.com gives you genuine Ford Dimmer Switch at some of the affordable online prices without cutting quality. Every OEM Ford part includes the manufacturer's warranty, easy returns, and super-fast delivery. So why wait? Shop now and get your vehicle back to peak condition.
Ford Dimmer Switch enables drivers to alternate between high and low beam light in real time to have a better view of the night. Even in the year 1903, Ford converted the moving assembly line to a juggernaut in production that reduced the building time and provided dependable vehicles to average families. Ford would later introduce EcoBoost engines that were as mean as big blocks but sipped like thirsty camels and proved that thrift and punch can coexist on the same block. Ford added SYNC voice control to the list of things that could be done at a single spoken order, thus music, maps, and calls were added to ensure drivers put their hands on the steer and looked ahead. Safety tech was next because Ford packaged Co-Pilot360 auto braking, lane keeping, and blind spot warnings before the same repeated itself with zero tailpipe trucks such as the F-150 Lightning to demonstrate that innovation does not give up. Constructed of robust contacts and minimal tolerances, the Dimmer Switch controls the cabin brightness and tells the headlamps to dip or lift in milliseconds even on rutted roads or a sudden change of weather, straining the eyes to remain keen and stress levels low. The Dimmer Switch maintains the same wiring logic in sedans, SUVs, and pickups and therefore a switch between rigs never alters the fingertip beat. The Dimmer Switch is covered with durable plastics that protect it against grit and the slider of this switch is not sticky like other sliders because of its low-friction surface that has lasted many years because night commuters use it. Intelligent positioning allows drivers to activate the Dimmer Switch without searching and reduces distraction and protects all people on the road at night.
Ford Dimmer Switch Parts and Q&A
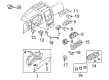
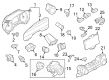
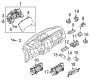
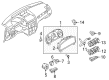
- Q: How to service and repair the instrument panel dimmer switch on Ford Explorer?A:The first step to operate on the instrument panel dimmer switch requires removing the driver side register. Start by removing the headlamp switch together with the bezel as a single unit while also disconnecting all electrical connections. Freeing the two tabs enables the removal of the instrument panel dimmer switch. Follow the opposite steps of removal to install the new switch.
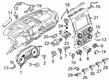
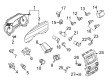
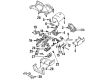
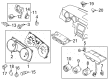
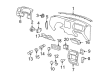
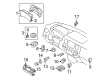
- Q: How to service the instrument panel dimmer switch on Ford Ranger?A:A service procedure for the instrument panel dimmer switch requires battery disconnection. First disconnect the battery before starting the procedure. Then remove the center instrument panel finish panel by disassembling screws and unplugging electrical components. You need to remove screws to take away the hood latch release handle followed by removing screws to remove the instrument panel steering column cover. Proceed with removing the reinforcement bolts which secure the steering column opening in the instrument panel. The gear shift lever must be put out of the way when it is a column design. The instrument panel finish panel should be pulled out from its position by removing the screws and disconnecting the headlamp and dimmer switch electrical connectors. Follow the removal of the dimmer switch by unscrewing it. Follow the exact opposite of the uninstallation process to reset the instrument.


Related Ford Parts
 Ford Bumper
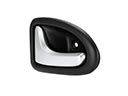 Ford Interior Door Handle
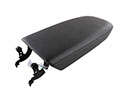 Ford Armrest
 Ford Car Mirror
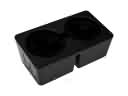 Ford Cup Holder
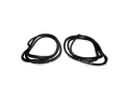 Ford Door Seal
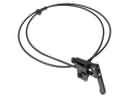 Ford Hood Release Cable
 Ford Seat Cushion
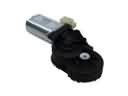 Ford Seat Motor
 Ford Shift Indicator
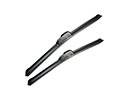 Ford Wiper Blade
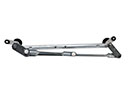 Ford Wiper Pivot
Browse Ford Dimmer Switch by Models
Ranger Bronco Mustang Explorer Focus Fusion F-150 Maverick Escape Edge Expedition Fiesta Taurus Thunderbird Flex Transit Connect Bronco Sport Explorer Sport Trac Crown Victoria EcoSport C-Max Contour Explorer Sport Freestar Mustang Mach-E Police Interceptor Utility Windstar F-350 Super Duty Police Interceptor Sedan E-150 E-250 E-350 Super Duty E-Transit F-150 Lightning F-250 Super Duty Police Responder Hybrid Special Service Police Sedan SSV Plug-In Hybrid Transit-150 Transit-250 Transit-350 Transit-350 HD