FordParts
My Garage
My Account
Cart
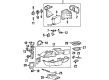
OEM 2000 Lincoln Town Car Evaporator
A/C Evaporator Core- Select Vehicle by Model
- Select Vehicle by VIN
Select Vehicle by Model
orMake
Model
Year
Select Vehicle by VIN
For the most accurate results, select vehicle by your VIN (Vehicle Identification Number).
1 Evaporator found

 Product Specifications
- Other Name: Evaporator Assembly; A/C Evaporator Core Repair Kit; A/C Evaporator; Housing Assembly; Case Assembly; Case; Housing
- Manufacturer Note: FROM 5/1/01
- Position: Driver Side
- Base No.: 19A553
- Condition: New
- Fitment Type: Direct Replacement
- SKU: 1W1Z-19850-CA
- Warranty: This genuine part is guaranteed by Ford's factory warranty.
2000 Lincoln Town Car Evaporator
If you're seeking quality and affordability, look no further than our extensive inventory of genuine 2000 Lincoln Town Car Evaporator available at FordPartsDeal.com. You can confidently purchase our OEM 2000 Lincoln Town Car Evaporator as they are supported by the manufacturer's warranty and our hassle-free return policy, alongside the benefit of our fast delivery service.
2000 Lincoln Town Car Evaporator Parts Q&A
- Q: How to service and repair the A/C evaporator core on 2000 Lincoln Town Car?A: To fix the A/C evaporator core, you need to disconnect the battery, evacuate the refrigerant and disassemble a number of parts, including the RH cowl vent screen, fender apron and the blower motor. Change the evaporator core, re-assemble parts and reconnect all wiring. Lastly, evacuate, recharge and refill the cooling system.
Related 2000 Lincoln Town Car Parts
 2000 Lincoln Town Car Blend Door Actuator
 2000 Lincoln Town Car Blower Motor
 2000 Lincoln Town Car Blower Motor Resistor
 2000 Lincoln Town Car Heater Core
 2000 Lincoln Town Car A/C Accumulator
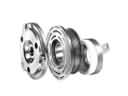 2000 Lincoln Town Car A/C Clutch
 2000 Lincoln Town Car A/C Compressor
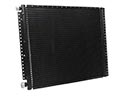 2000 Lincoln Town Car A/C Condenser
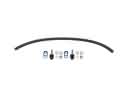 2000 Lincoln Town Car A/C Hose
 2000 Lincoln Town Car A/C System Valve Core
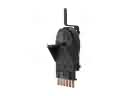 2000 Lincoln Town Car Blower Control Switches
 2000 Lincoln Town Car HVAC Pressure Switch