FordParts
My Garage
My Account
Cart
OEM 2001 Ford Windstar Automatic Transmission Shifter
AT Shifter- Select Vehicle by Model
- Select Vehicle by VIN
Select Vehicle by Model
orMake
Model
Year
Select Vehicle by VIN
For the most accurate results, select vehicle by your VIN (Vehicle Identification Number).
1 Automatic Transmission Shifter found

2001 Ford Windstar Shift Lever Part Number: XF2Z-7210-AA
Product Specifications- Other Name: Shaft - Gear Change; Automatic Transmission Selector Handle; Gear Shift Assembly
- Manufacturer Note: Incl. knob and wire assy
- Base No.: 7210
- Item Weight: 0.80 Pounds
- Condition: New
- Fitment Type: Direct Replacement
- SKU: XF2Z-7210-AA
- Warranty: This genuine part is guaranteed by Ford's factory warranty.
2001 Ford Windstar Automatic Transmission Shifter
If you're seeking quality and affordability, look no further than our extensive inventory of genuine 2001 Ford Windstar Automatic Transmission Shifter available at FordPartsDeal.com. You can confidently purchase our OEM 2001 Ford Windstar Automatic Transmission Shifter as they are supported by the manufacturer's warranty and our hassle-free return policy, alongside the benefit of our fast delivery service.
2001 Ford Windstar Automatic Transmission Shifter Parts Q&A
- Q: How to service and repair the automatic transmission shifter on 2001 Ford Windstar?A: The first step for automatic transmission shifter servicing and repair is to remove back up power to stop accidental air bag deployment. You must disconnect the battery ground cable and wait for a minimum of one minute while disconnecting any present auxiliary batteries. Two screws on the instrument panel engine compartment holding the lower steering column opening cover need removal before separating the finish panels on both left-hand and right-hand sides. You must remove three screws which connect the instrument panel opening cover reinforcement to the steering column opening brace. Lift and set aside the selector lever indicator cable by first removing its screw and then disconnecting it from the system. To remove the ignition switch lock cylinder start by putting the switch into the RUN position followed by using the release pin and extract it from the slot. Tilt wheel handle and shank should be removed before disassembling the three screws which secure the lower steering column shroud. The process of column lowering starts with removing four nuts along with the bracket to enable removal of the upper steering column shroud. Pull apart the transmission control switch (TCS) harness connector before dividing the TCS harness between the locators and the gearshift lever cover. The installation requires disposal of the previous gearshift lever pin alongside removal of the gearshift lever. The final steps for installation require the opposite order of removal procedures.
Related 2001 Ford Windstar Parts
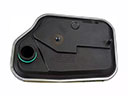 2001 Ford Windstar Automatic Transmission Filter
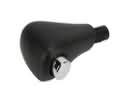 2001 Ford Windstar Automatic Transmission Shift Levers
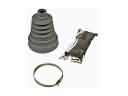 2001 Ford Windstar CV Boot
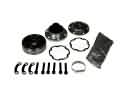 2001 Ford Windstar CV Joint
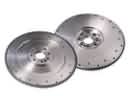 2001 Ford Windstar Flywheel
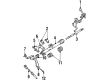
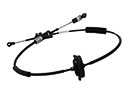 2001 Ford Windstar Shift Cable
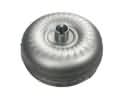 2001 Ford Windstar Torque Converter
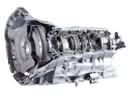 2001 Ford Windstar Transmission Assembly
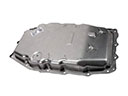 2001 Ford Windstar Transmission Pan