FordParts
My Garage
My Account
Cart
OEM 2002 Ford Windstar Shift Cable
Transmission Shift Cable- Select Vehicle by Model
- Select Vehicle by VIN
Select Vehicle by Model
orMake
Model
Year
Select Vehicle by VIN
For the most accurate results, select vehicle by your VIN (Vehicle Identification Number).
1 Shift Cable found

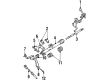
2002 Ford Windstar Cable Assembly Part Number: XF2Z-7E395-AA
$106.81 MSRP: $155.47You Save: $48.66 (32%)Product Specifications- Other Name: Cable Assembly - Selector Lever Control; Automatic Transmission Shifter Cable
- Replaces: F58Z-7E395-A
- Base No.: 7E395
- Item Weight: 3.20 Pounds
- Item Dimensions: 11.2 x 11.7 x 9.2 inches
- Condition: New
- Fitment Type: Direct Replacement
- SKU: XF2Z-7E395-AA
- Warranty: This genuine part is guaranteed by Ford's factory warranty.
2002 Ford Windstar Shift Cable
If you're seeking quality and affordability, look no further than our extensive inventory of genuine 2002 Ford Windstar Shift Cable available at FordPartsDeal.com. You can confidently purchase our OEM 2002 Ford Windstar Shift Cable as they are supported by the manufacturer's warranty and our hassle-free return policy, alongside the benefit of our fast delivery service.
2002 Ford Windstar Shift Cable Parts Q&A
- Q: How to service and repair the Shift Cable and bracket on 2002 Ford Windstar?A: Service and repair operations on the shift cable and bracket require the gearshift lever to be positioned in D position first. The shift cable must be removed first from the steering column, then shifted to the shift assembly arm, and lastly from the steering column bracket. The rubber grommet passes through the bulkhead opening while you place the air inlet cover to the side through clamp removal. Remove the existing shift cable assembly together with its bracket when no replacement shift cable is needed by disconnecting from the manual control lever while pushing out the lock tab to free the bracket and pulling out the complete assembly from the vehicle. Extract the nut as well as the bolts and shift cable bracket from the setup. Remove the entire assembly of shift cable and bracket from the vehicle if they need to be taken out jointly. Install the air inlet cover by first reversing the removal steps while adjusting the shift cable before attachment.
Related 2002 Ford Windstar Parts
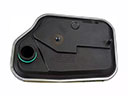 2002 Ford Windstar Automatic Transmission Filter
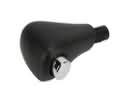 2002 Ford Windstar Automatic Transmission Shift Levers
 2002 Ford Windstar Automatic Transmission Shifter
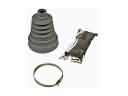 2002 Ford Windstar CV Boot
 2002 Ford Windstar CV Joint
 2002 Ford Windstar Flywheel
 2002 Ford Windstar Torque Converter
 2002 Ford Windstar Transmission Assembly
 2002 Ford Windstar Transmission Pan