FordParts
My Garage
My Account
Cart
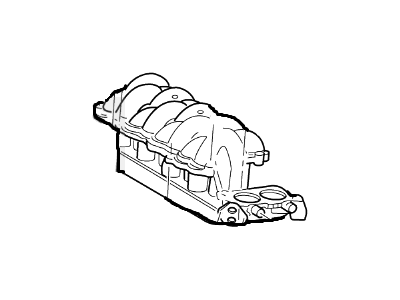
OEM 2002 Lincoln Continental Intake Manifold
Engine Intake Manifold- Select Vehicle by Model
- Select Vehicle by VIN
Select Vehicle by Model
orMake
Model
Year
Select Vehicle by VIN
For the most accurate results, select vehicle by your VIN (Vehicle Identification Number).
1 Intake Manifold found
2002 Lincoln Continental Manifold Part Number: YF3Z-9424-AA
Product Specifications- Other Name: Manifold Assembly - Inlet; Intake Manifold
- Base No.: 9424
- Item Weight: 29.40 Pounds
- Item Dimensions: 17.8 x 16.3 x 13.3 inches
- Condition: New
- Fitment Type: Direct Replacement
- SKU: YF3Z-9424-AA
- Warranty: This genuine part is guaranteed by Ford's factory warranty.
2002 Lincoln Continental Intake Manifold
If you're seeking quality and affordability, look no further than our extensive inventory of genuine 2002 Lincoln Continental Intake Manifold available at FordPartsDeal.com. You can confidently purchase our OEM 2002 Lincoln Continental Intake Manifold as they are supported by the manufacturer's warranty and our hassle-free return policy, alongside the benefit of our fast delivery service.
2002 Lincoln Continental Intake Manifold Parts Q&A
- Q: How to install the intake manifold on 2002 Lincoln Continental?A: Before mounting the intake manifold start by positioning new intake manifold gaskets and verify the fuel injector orientation through the orientation clips to maintain stability. Tighten the four bolts on the combined fuel manifold and fuel injectors unit. The installation requires a combination of the throttle body gasket and throttle body which should be bolted in using 9 Nm torque (80 inch lbs.) followed by a 90-degree rotation. The installation requires new idle air control gasket and valve while completing this task by tightening the bolt up to 9 Nm (80 inch lbs.) and adding another 90° rotation. Insert the EGR gasket before placing the valve into position and perform a two-step bolt tightening procedure where you start at 20 Nm (15 ft. lbs.) before proceeding with an extra 90°. Begin by placing the intake manifold to its position then install all bolts and studs in place before performing the tightness in correct sequence. The next step includes the installation of engine wiring harness holders on intake manifold studs together with connecting vacuum lines and EGR tube to the EGR valve and finally connecting engine control sensor wiring to idle air control valve, throttle position sensor, mass airflow sensor and all eight fuel injectors. The engine harness covers receive installation before EGR vacuum regulator solenoid gets its electrical connector and vacuum lines connected. Similarly, the heater water hose and main evaporative emissions return line and vacuum line with electrical connector need to connect to fuel injection pressure sensor. The installer should mount the chassis vacuum supply tube together with the positive crankcase ventilation tube and engine vacuum supply line before installing the accelerator cable bracket while connecting the accelerator cable and speed control actuator cable. The snow shield should be installed and fastened in place through a bolt and pushpin and the mass air flow sensor connector needs to be connected. Insert new O-ring seals on the water bypass tube while keeping the seal whole to avoid coolant leakage during operation. The cylinder head O-ring sealing surfaces must receive cleaning treatment followed by premium coolant E2FZ-19549-AA (green) or equivalent fluid matching Ford specification ESE-M97B44-A and water to coat the sealing O-rings. Place water bypass tube support braces over the intake manifold inner studs and install both the water bypass tube and bypass tube along with two studs. Install the bolts and nuts to the generator mounting bracket then connect the generator electrical connector before positioning the bracket. Fasten the generator battery lead with a nut and bolt then apply the engine control sensor wiring to the engine coolant temperature sensor before finally connecting the hoses to the bypass tube. The two nuts which retain the engine control sensor wiring must be installed on the valve cover before you connect the fuel line as well as the air cleaner outlet tube and battery ground cable. The operation concludes when you install the starter along with ignition coils and perform both cooling system fill-ups and bleeding procedures.


