FordParts
My Garage
My Account
Cart
OEM 2002 Mercury Cougar Clock Spring
Spiral Cable Clock Spring- Select Vehicle by Model
- Select Vehicle by VIN
Select Vehicle by Model
orMake
Model
Year
Select Vehicle by VIN
For the most accurate results, select vehicle by your VIN (Vehicle Identification Number).
1 Clock Spring found


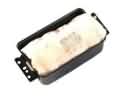
2002 Mercury Cougar Clockspring Part Number: F8RZ-14A664-AA
Product Specifications- Other Name: Cover And Contact Plate; Air Bag Clockspring; Cover And Contact Plate Assembly
- Base No.: 14A664
- Item Weight: 0.60 Pounds
- Condition: New
- Fitment Type: Direct Replacement
- SKU: F8RZ-14A664-AA
- Warranty: This genuine part is guaranteed by Ford's factory warranty.
2002 Mercury Cougar Clock Spring
If you're seeking quality and affordability, look no further than our extensive inventory of genuine 2002 Mercury Cougar Clock Spring available at FordPartsDeal.com. You can confidently purchase our OEM 2002 Mercury Cougar Clock Spring as they are supported by the manufacturer's warranty and our hassle-free return policy, alongside the benefit of our fast delivery service.
2002 Mercury Cougar Clock Spring Parts Q&A
- Q: How to Safely and Effectively Service the Clock Spring on 2002 Mercury Cougar?A: The procedure to handle the air bag sliding contact begins with safety measures by waiting one minute after removing the battery cables and then disconnecting the electronic air bag control module or supplement restraint system electrical connectors to stop accidental air bag deployment. Wear safety glasses always while handling an air bag module and refrain from using radio keycode savers for any air bag system repairs. Carry live air bags while keeping the bag along with trim cover facing away from your body when placing it on an upward-oriented surface. Hand washing with soap and water will eliminate the remaining sodium hydroxide deposits after air bag deployment. Replacement of a new component remains the only method for repair but return to the previous component when the new component fails to solve the problem and run diagnostic tests again. You should never touch the air bag connectors while avoiding any modules with damaged covers or deployment doors and discolored appearances. Start the removal sequence by switching off the battery ground cable then making the steering wheel straight and taking out the steering column lower and upper shrouds. The procedure advances by unscrewing the steering wheel before separating electrical connectors while removing the sliding contact electric connector from the steering column and releasing the multifunction switch from retaining tangs. You can remove an air bag sliding contact by using a thin bladed screwdriver to release its three retaining tangs then pulling out the electrical connectors through the column aperture. The sliding contact requires central alignment by rotating the inner rotor counterclockwise past the first stop position followed by clockwise rotation until the alignment marks match and the locking tab fits into position. The correct following of centralizing procedure will protect the component from failure. Connect the electrical connectors into the sliding contact by threading them adequately through the column aperture and securing the retaining tangs correctly. The installation process starts with multifunction switch installation before you connect electrical connectors to the steering column and finish by reinstalling the steering wheel together with upper shroud and lower shroud.
Related 2002 Mercury Cougar Parts
 2002 Mercury Cougar Air Bag
 2002 Mercury Cougar Air Bag Control Module
 2002 Mercury Cougar Air Bag Sensor
 2002 Mercury Cougar Antenna
 2002 Mercury Cougar Cruise Control Servo
 2002 Mercury Cougar Engine Control Module
 2002 Mercury Cougar Horn
 2002 Mercury Cougar Knock Sensor
 2002 Mercury Cougar Seat Motor
 2002 Mercury Cougar Turn Signal Flasher
 2002 Mercury Cougar Window Switch
 2002 Mercury Cougar Wiper Switch