My Garage
Cart

OEM 2001 Mercury Cougar Clock Spring

Spiral Cable Clock Spring
  • Select Vehicle by Model
  • Select Vehicle by VIN
Select Vehicle by Model
Make
Model
Year
or
Select Vehicle by VIN
For the most accurate results, select vehicle by your VIN (Vehicle Identification Number).

1 Clock Spring found

  • 2001 Mercury Cougar Clock Spring - F8RZ-14A664-AA
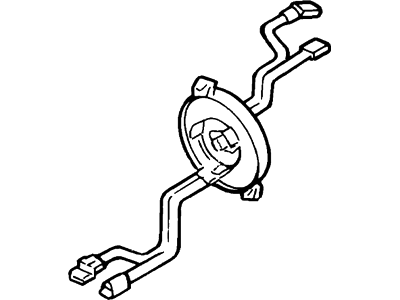
    2001 Mercury Cougar Clock Spring Diagram - F8RZ-14A664-AA
    View related parts
    Product Specifications
    • Other Name: Cover And Contact Plate; Air Bag Clockspring; Cover And Contact Plate Assembly
    • Base No.: 14A664
    • Item Weight: 0.60 Pounds
    • Condition: New
    • Fitment Type: Direct Replacement
    • SKU: F8RZ-14A664-AA
    • Warranty: This genuine part is guaranteed by Ford's factory warranty.
    More Info
    Fits the following 2001 Mercury Cougar Submodels:
    • Base, S, V6 | 4 Cyl 2.0 L GAS, 6 Cyl 2.5 L GAS

2001 Mercury Cougar Clock Spring

If you're seeking quality and affordability, look no further than our extensive inventory of genuine 2001 Mercury Cougar Clock Spring available at FordPartsDeal.com. You can confidently purchase our OEM 2001 Mercury Cougar Clock Spring as they are supported by the manufacturer's warranty and our hassle-free return policy, alongside the benefit of our fast delivery service.

2001 Mercury Cougar Clock Spring Parts Q&A

  • Q: How to Service and Repair the Clock Spring Assembly or Spiral Cable on 2001 Mercury Cougar?
    A: The procedure to work on the Clock Spring assembly or spiral cable starts with following all safety instructions which require waiting one minute past battery cable disconnect before removing electronic air bag control module or supplemental restraint system electrical connectors to avoid unintentional air bag deployment. When performing work on the air bag system workers must always wear safety glasses and should never use radio keycode savers during the process. Position a live air bag with its bag and trim cover facing away from your body at a surface which has the trim cover mounted upwards. Cleaning with soap and water should follow the deployment phase to eliminate residual sodium hydroxide from skin. The first step involves disconnecting the ground battery wire and steering wheel adjustment before taking out the steering column lower and upper shrouds. Follow this by removing the steering wheel and disconnecting all electrical connectors where you will detach both the sliding contact electrical connector and multifunction switch after depressing the retaining tangs. The three retaining tangs of the air bag sliding contact need a thin-bladed screwdriver to release them before feeding electrical connectors through the column aperture for complete sliding contact removal. Follow this procedure when installing by rotating the inner rotor counterclockwise completely until it stops before clockwise rotation to 2.75 turns for proper alignment between marking points leading to tab insertion. The failure of components can be prevented by following the correct centralization procedures. Put together the sliding contact while making sure the retaining tangs securely fit into place before placing the multifunction switches on their appropriate spots until the tangs lock. Complete the electrical connection to the steering column and attach the steering wheel before reattaching both shrouds of the steering column.