FordParts
My Garage
My Account
Cart
OEM 2003 Ford Excursion Differential
Front Differential- Select Vehicle by Model
- Select Vehicle by VIN
Select Vehicle by Model
orMake
Model
Year
Select Vehicle by VIN
For the most accurate results, select vehicle by your VIN (Vehicle Identification Number).
4 Differentials found


2003 Ford Excursion Differential Case Part Number: F75Z-4204-BA
$156.68 MSRP: $216.75You Save: $60.07 (28%)Ships in 1-2 Business DaysProduct Specifications- Other Name: Case - Differential; Differential
- Base No.: 4204
- Item Weight: 23.50 Pounds
- Item Dimensions: 12.5 x 12.7 x 8.2 inches
- Condition: New
- Fitment Type: Direct Replacement
- SKU: F75Z-4204-BA
- Warranty: This genuine part is guaranteed by Ford's factory warranty.
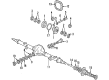
2003 Ford Excursion Differential Assembly Part Number: BC3Z-4026-A
$585.34 MSRP: $800.46You Save: $215.12 (27%)Ships in 1-3 Business DaysProduct Specifications- Other Name: Differential Case; Differential
- Replaces: F81Z-4204-AA
- Base No.: 4026
- Item Weight: 42.60 Pounds
- Condition: New
- Fitment Type: Direct Replacement
- SKU: BC3Z-4026-A
- Warranty: This genuine part is guaranteed by Ford's factory warranty.

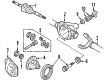
2003 Ford Excursion Differential Case Part Number: F81Z-3204-AA
Product Specifications- Other Name: Kit; Differential; Case
- Manufacturer Note: Case kit, differential
- Item Weight: 15.00 Pounds
- Condition: New
- Fitment Type: Direct Replacement
- SKU: F81Z-3204-AA
- Warranty: This genuine part is guaranteed by Ford's factory warranty.

2003 Ford Excursion Ring & Pinion, Front Part Number: E3TZ-3204-D
Product Specifications- Other Name: Housing; Differential Carrier, Front; Ring And Pinion; Differential; Differential Case; Case
- Position: Front
- Item Weight: 13.30 Pounds
- Condition: New
- Fitment Type: Direct Replacement
- SKU: E3TZ-3204-D
- Warranty: This genuine part is guaranteed by Ford's factory warranty.
2003 Ford Excursion Differential
If you're seeking quality and affordability, look no further than our extensive inventory of genuine 2003 Ford Excursion Differential available at FordPartsDeal.com. You can confidently purchase our OEM 2003 Ford Excursion Differential as they are supported by the manufacturer's warranty and our hassle-free return policy, alongside the benefit of our fast delivery service.
2003 Ford Excursion Differential Parts Q&A
- Q: How to service and repair the differential carrier of a Dana S135 rear drive axle on 2003 Ford Excursion?A: The first step for servicing the Dana S135 rear drive axle differential carrier involves steam cleaning its axle assembly so abrasive dirt does not accelerate wear. After setting the parking brake and wheel chocking you should drain the axle lubricant into a suitable container through the drain plug before cleaning and reinstalling it in place. To commence differential carrier repair of the Dana S135 unit you must disconnect the rear anti-lock brake sensor electrical connector then index-mark the driveshaft before removing it along with loosening the pinion hex nut. Strikings the axle shaft flange directly with steel hammers needs to be avoided to prevent cracking while prying away the flange from the hub also leads to sealing surface damage so mark the axle shaft for the right orientation when reinstalling. Set aside the axle shafts while removing all housing retention bolts except the two upper ones keeping records of their lengths and positions. To prevent the carrier from falling place it onto the jack and remove it from the axle housing by inserting a proper jack beneath the carrier then removing all bolts before fully separating the carrier 25.4 - 50.8 mm (1 - 2 inches) from the axle housing. Emulsion cleaners or petroleum-based solvents will be used to clean components while avoiding alkaline solutions and parts should receive a light application of both rust inhibitor and clean lubricant before storage in wax paper. The gear set must be inspected for pitting and scoring as well as wear and damage while checking splines for wear and assessing the axle flange O-ring. Examine interior limits of the axle housing after cleaning the sealing surfaces while verifying that threads do not show damage and there is no bending fatigue present. Before taking apart the differential case and ring gear consult the instructions. A continuous bead of Ford Gasket Maker F8AZ-19B508-AB should be applied onto the axle housing mounting flange and bolt hole area before two bolts are inserted 180 degrees apart to stop the carrier assembly from rotating. Begin by securing the carrier on the jack and then position it into the axle housing before you clean the bolt threads and apply Threadlock 262 E2FZ-19554-B product followed by bolt installation after removal of alignment studs which should happen only when several bolts are already in place. Move on to install the axle shafts after performing bolt cross tightening and reintalling the driveshaft together with the rear anti-lock brake sensor electrical connector. The technician should remove the axle's fill plug and add Motorcraft SAE 80W-90 Premium Rear Axle Lubricant XY-80W90-QL until the liquid reaches the fill hole. After that, clean the fill plug before reinstalling it along with wheel chock removal and parking brake release.
Related 2003 Ford Excursion Parts
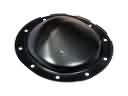 2003 Ford Excursion Differential Cover
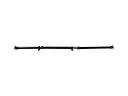 2003 Ford Excursion Drive Shaft
 2003 Ford Excursion ABS Reluctor Ring
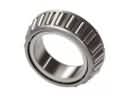 2003 Ford Excursion Differential Bearing
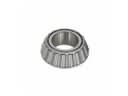 2003 Ford Excursion Differential Pinion Bearing
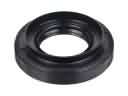 2003 Ford Excursion Differential Seal
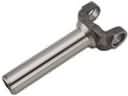 2003 Ford Excursion Driveshaft Yokes
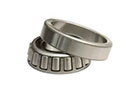 2003 Ford Excursion Pinion Bearing
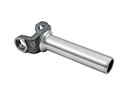 2003 Ford Excursion Slip Yoke
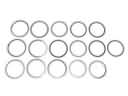 2003 Ford Excursion Transfer Case Shim
 2003 Ford Excursion Universal Joint