FordParts
My Garage
My Account
Cart
OEM Ford Excursion Differential
Front Differential- Select Vehicle by Model
- Select Vehicle by VIN
Select Vehicle by Model
orMake
Model
Year
Select Vehicle by VIN
For the most accurate results, select vehicle by your VIN (Vehicle Identification Number).
4 Differentials found


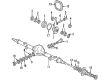
Ford Excursion Differential Case Part Number: F75Z-4204-BA
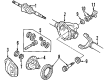
$156.67 MSRP: $216.74You Save: $60.07 (28%)Ships in 1-2 Business DaysFord Excursion Differential Assembly Part Number: BC3Z-4026-A
$577.72 MSRP: $783.08You Save: $205.36 (27%)Ships in 1-3 Business Days
Ford Excursion Ring & Pinion, Front Part Number: E3TZ-3204-D

Ford Excursion Differential Case Part Number: F81Z-3204-AA
Ford Excursion Differential
OEM Differential boasts unmatched quality. Each part goes through full quality checks. They adhere to Ford's official factory standards. These steps remove flaws and inconsistencies. So you can get Differential with long life and a perfect fit. Come to our website and find genuine Ford Excursion parts. We keep a wide inventory of OEM Excursion parts at the highly affordable prices. It's easy to search, compare, and pick what you need. You'll love the clear info and simple checkout. We offer top-rated customer service, and we reply fast. We also ship promptly to ensure your order arrives on time.
Ford Excursion Differential Parts and Q&A
- Q: How to service and repair the differential carrier on Ford Excursion?A:The first step when working on differential carrier service includes axle assembly cleaning through steam application to stop abrasive dirt from damaging the equipment. Prior to draining axle lubricant into a proper receptacle use the drain plug to empty the fluid before reinstalling the drain plug. The service starts by disconnecting the rear ABS electrical connector and marking and severing the driveshaft before placing it to the side of work area. Proceed to loosen the hex nut when you need to disassemble the pinion drive. Making contact between a steel hammer and Axle Shaft flange must be avoided to prevent cracking while keeping the hub sealing surface intact by marking the axle shaft flange for orientation prior to installation. Separate the axle shafts while leaving two top carrier-to-axle housing retaining bolts intact and note the length and position of each bolt. Place the jack under the carrier to support it while you pop off the remaining retaining bolts after which you can disconnect the carrier from the axle housing at least 25.4 - 50.8 mm (1 - 2 inches) clearance. Prior to storage you should clean and dry the components with emulsion cleaners or petroleum-based solvents and avoid alkaline solutions before applying rust inhibitor or clean lubricant coatings evenly. Wrap each component in wax paper when storing them. The gear set should undergo an examination for pitting while also checking for scoring and wear and damage. At the same time inspect the splines for wear and cracking and distortion. Examine the flange O-ring of the axle while cleaning interior sections of the housing along with all sealing surfaces and threads inside carrier mounting bolt holes. Also check for damaged or damaged threads and bending fatigue. Obtain instructions about differential case and ring gear procedures before you disassemble the carrier. Before fitting the axle housing start by placing continuous strips of Ford Gasket Maker F8AZ-19B508-AB or equivalent on the mounting flange seal and bolt areas. Then put two mounting studs through the axle housing that are placed 180 degrees from each other to stop carrier assembly rotation. Secure the carrier onto the jack before placing it in the axle housing and clean the bolt threads before applying Threadlock 262 E2FZ-19554-B or equivalent and installing the bolts while removing the alignment studs only after installing multiple bolts in a cross-pattern. hang the axle shafts in place followed by refitting the driveshaft and rear anti-lock brake sensor electrical connector before removing the fill plug to complete axle lubrication using Motorcraft SAE 80W-90 Premium Rear Axle Lubricant XY-80W90-QL or equivalent until it reaches the fill hole. After plug replacement install the fill plug while cleaning it and remove wheel chocks followed by releasing the parking brake.

Related Ford Excursion Parts
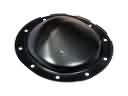 Ford Excursion Differential Cover
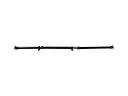 Ford Excursion Drive Shaft
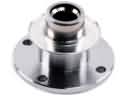 Ford Excursion CV Joint Companion Flange
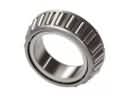 Ford Excursion Differential Bearing
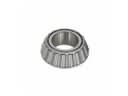 Ford Excursion Differential Pinion Bearing
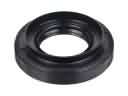 Ford Excursion Differential Seal
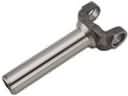 Ford Excursion Driveshaft Yokes
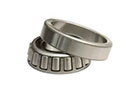 Ford Excursion Pinion Bearing
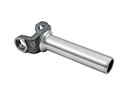 Ford Excursion Slip Yoke
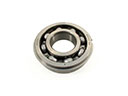 Ford Excursion Transfer Case Bearing
 Ford Excursion Transfer Case Shim
 Ford Excursion Universal Joint
Browse Ford Excursion Differential by Years
2005
2004
2003
2002
2001
2000