FordParts
My Garage
My Account
Cart
OEM 2003 Ford Expedition Timing Cover
Engine Timing Cover- Select Vehicle by Model
- Select Vehicle by VIN
Select Vehicle by Model
orMake
Model
Year
Select Vehicle by VIN
For the most accurate results, select vehicle by your VIN (Vehicle Identification Number).
3 Timing Covers found


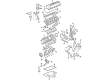
2003 Ford Expedition Timing Cover, Front Part Number: 2L7Z-6019-AA
Product Specifications- Other Name: Cover - Cylinder Front; Front Cover
- Manufacturer Note: DOHC
- Position: Front
- Base No.: 6019
- Item Weight: 7.60 Pounds
- Item Dimensions: 24.9 x 20.8 x 8.9 inches
- Condition: New
- Fitment Type: Direct Replacement
- SKU: 2L7Z-6019-AA
- Warranty: This genuine part is guaranteed by Ford's factory warranty.


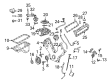
2003 Ford Expedition Timing Cover, Front Part Number: 2L1Z-6019-AA
Product Specifications- Other Name: Cover - Cylinder Front; Engine Timing Cover
- Manufacturer Note: Includes gaskets and idler pulley
- Position: Front
- Base No.: 6019
- Item Weight: 11.60 Pounds
- Item Dimensions: 23.5 x 23.6 x 3.1 inches
- Condition: New
- Fitment Type: Direct Replacement
- SKU: 2L1Z-6019-AA
- Warranty: This genuine part is guaranteed by Ford's factory warranty.

2003 Ford Expedition Timing Cover, Front Part Number: 2L1Z-6019-BA
Product Specifications- Other Name: Cover - Cylinder Front; Engine Timing Cover; Front Cover
- Position: Front
- Base No.: 6019
- Item Weight: 11.40 Pounds
- Item Dimensions: 25.6 x 21.6 x 8.5 inches
- Condition: New
- Fitment Type: Direct Replacement
- SKU: 2L1Z-6019-BA
- Warranty: This genuine part is guaranteed by Ford's factory warranty.
2003 Ford Expedition Timing Cover
If you're seeking quality and affordability, look no further than our extensive inventory of genuine 2003 Ford Expedition Timing Cover available at FordPartsDeal.com. You can confidently purchase our OEM 2003 Ford Expedition Timing Cover as they are supported by the manufacturer's warranty and our hassle-free return policy, alongside the benefit of our fast delivery service.
2003 Ford Expedition Timing Cover Parts Q&A
- Q: How to service and repair the engine front timing cover on 2003 Ford Expedition?A: The first step to service or repair the engine front cover requires users to switch off the air suspension control to stop air spring inflation or deflation processes. The service starts with removing the valve covers followed by the cooling fan after which you should remove the bolts and coolant pump pulley and the power steering pump. The service begins by taking off the crankshaft front oil seal and disconnecting the Camshaft Position (CMP) sensor electrical connector followed by removing the CMP sensor bolt. After lifting and supporting the vehicle you should drain engine oil by extracting the drain plug. Start by disconnecting the electrical connector of the A/C compressor followed by relocating the harness after unclipping its routing system. After disengaging several fasteners the A/C compressor can be safely placed to one side. The Crankshaft Position (CKP) sensor removal consists of disconnecting its electrical connector followed by bolt removal. First remove the four power steering and transmission cooler tube brackets along with their attached bolts to lower the vehicle. Start by removing drive belt idler pulleys through their corresponding bolts and then proceed to take off the nuts and two radio interference capacitors. You must remove 15 fasteners and the engine front cover and gaskets while preventing the usage of harmful scraping tools or metal scrapers on sealing surfaces because you will use a plastic scraping tool for cleaning. Place an object over the oil pan opening to block foreign debris while cleaning the gasket mating surfaces with silicone gasket remover as well as metal surface prep. Install the engine front cover gaskets by applying silicone gasket and sealant on contact surfaces between the cylinder head and cylinder block as well as the oil pan and cylinder block. The technician should position the cover onto its dowels after gasket installation then proceed with loose bolt installation. Tighten all Romeo engine (4.6L) engine front cover fasteners to 25 Nm (18 ft. lbs.). When working on the Windsor engine (5.4L) your fastening order should be first 1 through 5 at 25 Nm (18 ft. lbs.) followed by 6 and 7 at 48 Nm (35 ft. lbs.) and finally 8 through 15 at 48 Nm (35 ft. lbs.). The radio frequency interference capacitors need installation along with nuts before moving on to drive belt idler pulleys and their bolts. Secure the water pump pulley to stop rotation before you install the coolant pump pulley along with its bolts. Firmly lift the car for a second time before installing loose bolts but tightening them according to this procedure: first add 20 Nm force (15 ft.lbs) then turn the bolts 90 degrees further. Attentively install the transmission cooler tube with a 40 Nm torque value for 5.4L engines alongside powering up the steering tube bracket and tightening nuts to 11 Nm (8 ft. lbs.) for the 4.6L engine. The procedure consists of mounting the CKP sensor with its bolt followed by attaching the electrical connector after installing a new crankshaft front oil seal. The power steering pump should be reinstalled together with the A/C compressor and its fasteners and harness routing clip and A/C compressor electrical connector. After installing the drain plug and new engine oil filter the vehicle should be lowered before installing the CMP sensor along with its bolt while also connecting the CMP sensor electrical connector. The cooling fan installation procedure is followed by clean engine oil addition to the power unit before cooling system fill-up or A/C system charging. Air suspension switch activation depends on the presence of clean engine oil and proper LH and RH valve cover installation.
Related 2003 Ford Expedition Parts
 2003 Ford Expedition Timing Chain
 2003 Ford Expedition Crankshaft Seal
 2003 Ford Expedition Cylinder Head
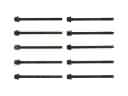 2003 Ford Expedition Cylinder Head Bolts
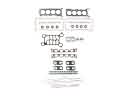 2003 Ford Expedition Cylinder Head Gasket
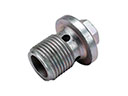 2003 Ford Expedition Drain Plug
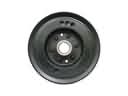 2003 Ford Expedition Harmonic Balancer
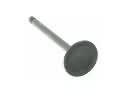 2003 Ford Expedition Intake Valve
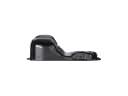 2003 Ford Expedition Oil Pan
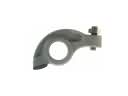 2003 Ford Expedition Rocker Arm
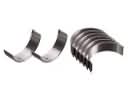 2003 Ford Expedition Rod Bearing
 2003 Ford Expedition Valve Cover Gasket