FordParts
My Garage
My Account
Cart
OEM 2005 Ford Crown Victoria Oil Pan
Oil Drain Pan- Select Vehicle by Model
- Select Vehicle by VIN
Select Vehicle by Model
orMake
Model
Year
Select Vehicle by VIN
For the most accurate results, select vehicle by your VIN (Vehicle Identification Number).
1 Oil Pan found


2005 Ford Crown Victoria Oil Pan Part Number: 3W7Z-6675-BC
$87.79 MSRP: $127.78You Save: $39.99 (32%)Product Specifications- Other Name: Pan Assembly - Engine Oil; Engine Oil Pan
- Replaces: 3W7Z-6675-BB
- Base No.: 6675
- Item Weight: 12.30 Pounds
- Item Dimensions: 8.7 x 22.5 x 12.4 inches
- Condition: New
- Fitment Type: Direct Replacement
- SKU: 3W7Z-6675-BC
- Warranty: This genuine part is guaranteed by Ford's factory warranty.
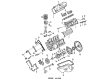
2005 Ford Crown Victoria Oil Pan
If you're seeking quality and affordability, look no further than our extensive inventory of genuine 2005 Ford Crown Victoria Oil Pan available at FordPartsDeal.com. You can confidently purchase our OEM 2005 Ford Crown Victoria Oil Pan as they are supported by the manufacturer's warranty and our hassle-free return policy, alongside the benefit of our fast delivery service.
2005 Ford Crown Victoria Oil Pan Parts Q&A
- Q: How to service and repair the oil pan on 2005 Ford Crown Victoria?A: Begin service or repair of the oil pan only after disabling any fire suppression system that exists in the vehicle. The vehicle needs to sit on a hoist with neutral gear selected before removing the front crossmember. You should disconnect the transmission cooler tubes by removing both bolt and nut before setting them aside. After oil draining complete the reinstallation of the drain plug. The sequence of bolt removal enables installing new bolts to the oil pan before separation of the pan and gasket occurs. The mating surfaces should be cleaned and inspected by replacing metal scrapers or abrasive tools with a plastic scraping tool to avoid scratching which causes leaks. The oil pan needs to be fixed within four minutes before cleaning the sealed area with metal surface cleaner followed by a complete drying process. Silicone gasket with sealant should be applied to both the rear oil seal retainer-to-cylinder block and engine front cover-to-cylinder block joint surfaces. After installing the oil pan gasket together with the oil pan tighten the bolts first at 20 Nm (15 lb-ft) torque then continue torquing 60 degrees more. Install transmission cooler tubes by fitting them with bolt and nut followed by front crossmember reinstallation. Start the engine with clean oil inside while inspecting the vehicle for any fluid leakage. The procedure to repower the fire suppression system should be executed.
Related 2005 Ford Crown Victoria Parts
 2005 Ford Crown Victoria Crankshaft Pulley
 2005 Ford Crown Victoria Crankshaft Seal
 2005 Ford Crown Victoria Dipstick Tube
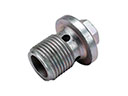 2005 Ford Crown Victoria Drain Plug
 2005 Ford Crown Victoria Engine Mount
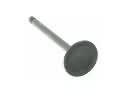 2005 Ford Crown Victoria Intake Valve
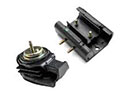 2005 Ford Crown Victoria Motor And Transmission Mount
 2005 Ford Crown Victoria Oil Pan Gasket
 2005 Ford Crown Victoria Oil Pump
 2005 Ford Crown Victoria Rod Bearing
 2005 Ford Crown Victoria Timing Chain Tensioner
 2005 Ford Crown Victoria Timing Cover