My Garage
Cart
Make sure this part fits

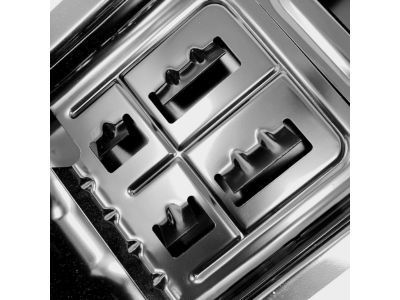
Ford 3W7Z-6675-BC
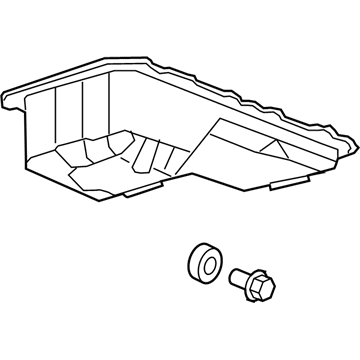
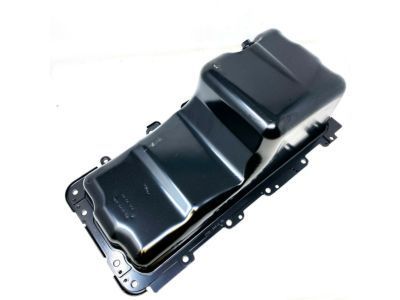
Oil Pan

2003-2011 Ford 3W7Z6675BC

Customer Questions & Expert Answers (8)
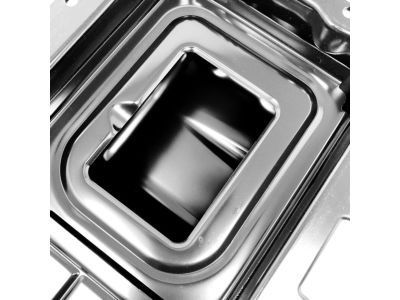
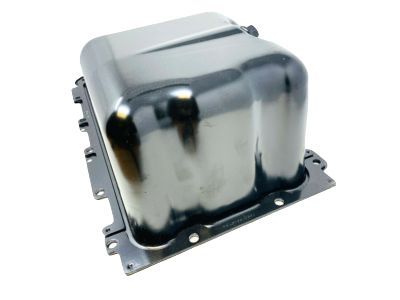
Ford 3W7Z-6675-BC Oil Pan
  • Part Description
    Pan Assembly - Engine Oil; Engine Oil Pan
  • Base No.
    6675
  • Replaces
    3W7Z-6675-BB
  • Manufacturer
    Ford
Make sure this part fits
$87.79 MSRP: $127.78
You Save: $39.99 (32%)
1
ADD TO CART
  • Related Parts
  • Product Specifications
  • Vehicle Fitment
  • Customer Questions & Expert Answers
  • Product Specifications

    BrandGenuine Ford
    Base No.6675
    Manufacturer Part Number3W7Z-6675-BC
    Part DescriptionPan Assembly - Engine Oil; Engine Oil Pan
    Item Dimensions8.7 x 22.5 x 12.4 inches
    Item Weight12.30 Pounds
    ConditionNew
    Fitment TypeDirect Replacement
    Replaces3W7Z-6675-BB
    ManufacturerFord
    SKU3W7Z-6675-BC
    WarrantyThis genuine Ford part is guaranteed by Ford's factory warranty.
    Shipping & ReturnShipping Policy Return Policy
    Warning: California's Proposition 65
  • Vehicle Fitment

    Year Make Model Trim Engine
    2003-2011 Ford Crown VictoriaBase, Fleet, LWB, LX, LX Sport, Police Interceptor, S, Special Edition8 Cyl 4.6 L CNG, 8 Cyl 4.6 L FLEX, 8 Cyl 4.6 L GAS
    2003-2011 Lincoln Town CarCartier, Cartier L, Designer Series, Executive, Executive L, Executive Protection Series, Protection Series, Signature, Signature L, Signature Limited, Ultimate, Ultimate L8 Cyl 4.6 L FLEX, 8 Cyl 4.6 L GAS
    2003-2011 Mercury Grand MarquisGS, GSL, Limited Edition, LS, LSE, Ultimate Edition8 Cyl 4.6 L FLEX, 8 Cyl 4.6 L GAS
    2003-2004 Mercury MarauderBase8 Cyl 4.6 L GAS
  • Customer Questions & Expert Answers

    Q:
    Will this 3W7Z-6675-BC work in my car? Posted by FordPartsDeal Specialist
    A:
    Select Your Vehicle model to verify if part number 3W7Z-6675-BC fits your car.
    Posted by FordPartsDeal Specialist
    Q:
    How to service and repair the oil pan on Ford Crown Victoria? Posted by Customer
    A:
    Begin service or repair of the oil pan only after disabling any fire suppression system that exists in the vehicle. The vehicle needs to sit on a hoist with NEUTRAL gear selected before removing the front crossmember. You should disconnect the transmission cooler tubes by removing both bolt and nut before setting them aside. After oil draining complete the reinstallation of the drain plug. The sequence of bolt removal enables installing new bolts to the oil pan before separation of the pan and gasket occurs. The mating surfaces should be cleaned and inspected by replacing metal scrapers or abrasive tools with a plastic scraping tool to avoid scratching which causes leaks. The oil pan needs to be fixed within four minutes before cleaning the sealed area with metal surface cleaner followed by a complete drying process. Silicone gasket with sealant should be applied to both the rear oil seal retainer-to-cylinder block and engine front cover-to-cylinder block joint surfaces. After installing the oil pan gasket together with the oil pan tighten the bolts first at 20 Nm (15 lb-ft) torque then continue torquing 60 degrees more. Install transmission cooler tubes by fitting them with bolt and nut followed by front crossmember reinstallation. Start the engine with clean oil inside while inspecting the vehicle for any fluid leakage. The procedure to repower the fire suppression system should be executed.
    Posted by FordPartsDeal Specialist
    Q:
    How to service and repair the oil pan on Lincoln Town Car? Posted by Customer
    A:
    The vehicle maintenance starts by placing it in NEUTRAL gear and hoisting it before beginning. The front crossmember must be removed first before you detach the bolt and nut from the transmission cooler tubes. Place these tubes next to the work area. Place the drain plug on the engine before tightening it to 23 Nm (17 lb-ft). After unclipping both pin-type wire harness retainers from the oil pan you must remove the oil pan bolts in the proper sequence to separate the oil pan and gasket. The gasket mating surfaces should get cleaned only with plastic scraping tools for their inspection after old sealant removal. Any unsecured sealant must be removed and the cleaning area requires silicone gasket remover and metal surface prep according to packaging guidelines to stop future oil leakage. Sealant should be used at the rear seal retainer-to-cylinder block interface as well as the engine front cover-to-cylinder block junction. Place the oil pan gasket and oil pan together before inching the bolts to 20 Nm (177 lb-in) and adding another 60 degrees of rotation to each bolt. Reinstall the two pin-type wire harness retainers to the oil pan while putting the transmission tubes into position before tightening the bolt to 15 Nm (133 lb-in) and the nut to 9 Nm (80 lb-in). Reinstall the front crossmember while filling the engine with clean oil followed by starting the engine then searching for any leakage.
    Posted by FordPartsDeal Specialist
    Q:
    How to Properly Maintain and Fix the Oil Pan on a Lincoln Town Car? Posted by Customer
    A:
    Start servicing or repairing the oil pan only after the vehicle enters NEUTRAL position on a hoist. Cushion the transmission cooler tubes to the side before disconnecting both components from the front crossmember. You should drain all engine oil followed by plugging the hole and torquing it to 23 Nm (17 lb-ft). The two pin-type wire harness retainers must be unfastened from the oil pan so you can remove the oil pan bolts using a precise sequence. This enables you to remove the oil pan with its gasket. Sand the mating surfaces with a plastic scraping tool instead of metal scrappers because abrasives create leak-causing scratches. The sealant needs to get secured within four minutes to function otherwise cleaning the sealing area must occur using silicone gasket remover and metal surface prep according to packaging instructions to stop future oil leakage. Apply the sealant between the rear seal retainer and cylinder block surface and at the front engine cover mating with the cylinder block. The oil pan gasket and oil pan need installation before bolt tightening begins at 20 Nm (177 lb-in) followed by an additional 60-degree rotation. Reinstall both pin-type wire harness retainers on the oil pan while positioning transmission cooler tubes before securing the bolt at 15 Nm and nut at 9 Nm. Place the engine oil before starting up the engine while checking for fluid leakage.
    Posted by FordPartsDeal Specialist
    Q:
    How to service the oil pan safely and effectively on Mercury Grand Marquis? Posted by Customer
    A:
    Before working on the oil pan service it is essential to depower the fire suppression system to prevent serious personal injury. The front crossmember must be removed following a hoisting operation of the vehicle which should be currently in NEUTRAL gear. Disconnect both the bolt and the nut before setting the transmission cooler tubes to one side. The engine drain plug requires installation by tightening it to 23 Nm (17 lb-ft). Remove the two pin-type wire harness retainers before removing bolts from their specified sequence to detach the oil pan gasket together with the pan. Install the gasket surfaces by using a plastic scraping tool instead of metal scrapers or abrasive tools to remove sealant residue before inspection. The correct application of silicone gasket at the rear seal retainer-to-cylinder block joint together with engine front cover-to-cylinder block interface should occur within a 4-minute timeframe to prevent oil leakage. Start by installing the oil pan gasket together with the oil pan before proceeding to tighten bolts first to 20 Nm (177 lb-in) and further rotating them by 60 degrees. Reinstall wire harness retainers then place transmission cooler tubes next to each other before installing the bolt and nut which requires torque to 15 Nm (133 lb-in) and the nut requires 9 Nm (80 lb-in). The last step includes filling the engine with fresh oil and beginning the engine to inspect for fluid escapes followed by fire suppression system repowering according to all warning guidelines.
    Posted by FordPartsDeal Specialist
    Q:
    How to service and repair the oil pan on Mercury Grand Marquis? Posted by Customer
    A:
    Start by taking out the crossmember and bolt and nut before you can set the transmission cooler tubes in position for service and repair of the oil pan. To stop oil drainage first finish by installing the drain plug. Follow the prescribed bolt order to detach the oil pan which includes removing it along with its gasket. Before assembly remove all old sealant material while using only a plastic scraping tool to prevent creating leaks through surface scratches. When the oil pan stays unsecured for longer than four minutes, users must remove old sealant from the surface before cleaning it with metal surface cleaner until complete dryness occurs. Silicone gasket materials should be applied to both sections including the rear oil seal retainer-to-cylinder block interface and the engine front cover-to-cylinder block juncture. Start by installing the oil pan gasket together with the oil pan before gradually tightening all bolts to 20 Nm (15 lb-ft) then turning them another 60 degrees. First install the bolt and nut before placing the front crossmember back while also putting transmission cooler tubes in their position. After filling the engine with clean engine oil users should start up the engine to verify that the system has no leaks.
    Posted by FordPartsDeal Specialist
    Q:
    How to service and repair the oil pan on Mercury Marauder? Posted by Customer
    A:
    Straying past the oil pan for service or repair begins by taking out crossmember No. 2 and transmission cooler tube retainers before setting aside all cooler tubes. The oil drain process must be followed by tightening the drain plug. The next step requires removing the specified order of oil pan bolts followed by removing both the pan and its gasket. Use a plastic scraping tool instead of metal scrapers along with abrasive tools to clean mating surfaces since they cause scratches which produce leaks. The oil pan must be installed within four minutes or removal and cleaning of the sealant area with metal surface cleaner should occur before allowing it to dry completely. Silicone gasket and sealant need to be applied between the rear oil seal retainer-to-cylinder block surface and the engine front cover-to-cylinder block mating surface. When mounting the oil pan with its gasket install the bolt loosely while performing a two-step tightening process to reach 20 Nm (15 lb-ft) and an additional 60-degree rotation. Fitting the retainers to both transmission cooler tubes should be followed by the reinstallation of crossmember No. 2. After adding clean engine oil begin the engine while checking for any fluid leakage from the system.
    Posted by FordPartsDeal Specialist
    Q:
    How should the oil pan bolts be removed for the 2008 Ford Crown Victoria? Posted by Customer
    A:
    Remove the oil pan bolts in the specified sequence and take off the oil pan along with the gasket.
    Posted by FordPartsDeal Specialist
    See expert answers on similar Oil Pan
    If you have any questions about this product, please don't hesitate to ask us. We will be happy to help you!

OEM Ford 3W7Z-6675-BC, Excellent Performance and Perfect Fitment

To ensure reliability, purchase Ford part # 3W7Z-6675-BC Oil Pan. It is sometimes referred to as Ford Oil Pan. For those Ford owners who aspire to maintain their vehicles in optimal shape, opting for OEM parts is a wise choice. Precisely engineered, these components adhere to stringent factory guidelines and are produced in state-of-the-art facilities using cutting-edge technologies. Moreover, they are subjected to thorough testing to certify their resilience and safety, thereby making them a dependable option for Ford owners.

FordPartsDeal.com is a leading supplier of genuine Ford parts such as Ford 3W7Z6675BC Oil Pan. A vast selection of genuine Ford parts is available on our website, all offered at discounted prices. Every OEM Ford part is covered by the manufacturer's warranty, which also applies to our hassle-free return policy. Enjoy fast delivery service, ensuring you get your parts when you need them. Your shopping experience here is guaranteed to be pleasurable. For detailed Ford parts information, click here.
Choose FordPartsDeal for discounted prices, exceptional service and fast delivery