FordParts
My Garage
My Account
Cart
OEM 2006 Ford E-150 Seat Belt
Seat Safety Belt- Select Vehicle by Model
- Select Vehicle by VIN
Select Vehicle by Model
orMake
Model
Year
Select Vehicle by VIN
For the most accurate results, select vehicle by your VIN (Vehicle Identification Number).
12 Seat Belts found


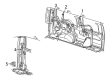
2006 Ford E-150 Lap & Shoulder Belt, Front Passenger Side Part Number: 6C2Z-15611B08-BA
$186.68 MSRP: $271.73You Save: $85.05 (32%)Ships in 1-3 Business DaysProduct Specifications- Other Name: Seat Belt Assembly; Seat Belt Lap and Shoulder Belt, Front Right
- Manufacturer Note: (-E*)
- Position: Front Passenger Side
- Replaces: 4C2Z-15611B08-AAC, 4C2Z-15611B08-AAD, 2C2Z-15611B08-AAC, 2C2Z-15611B08-AAD, 6C2Z-15611B08-AAA
- Base No.: 611B08
- Item Weight: 3.20 Pounds
- Item Dimensions: 10.5 x 6.3 x 4.1 inches
- Condition: New
- Fitment Type: Direct Replacement
- SKU: 6C2Z-15611B08-BA
- Warranty: This genuine part is guaranteed by Ford's factory warranty.


2006 Ford E-150 Rear Seat, Outer Passenger Side Part Number: 6C2Z-16611B68-HA
$127.36 MSRP: $176.19You Save: $48.83 (28%)Ships in 1-2 Business DaysProduct Specifications- Other Name: Seat Belt Assembly; Seat Belt Lap and Shoulder Belt, Rear Right Outer
- Manufacturer Note: (-E*)
- Position: Rear Outer Passenger Side
- Replaces: 6C2Z-16611B68-BAA
- Base No.: <611B68
- Item Weight: 4.40 Pounds
- Item Dimensions: 6.3 x 4.6 x 10.9 inches
- Condition: New
- Fitment Type: Direct Replacement
- SKU: 6C2Z-16611B68-HA
- Warranty: This genuine part is guaranteed by Ford's factory warranty.

 Product Specifications
- Other Name: Seat Belt Assembly; Seat Belt Lap and Shoulder Belt, Rear Right Outer; Lap & Shoulder Belt
- Manufacturer Note: (-E*)
- Position: Rear Outer Passenger Side
- Replaces: 6C2Z-16611B68-CAA, 3C2Z-16611B68-CAA
- Base No.: 611B68
- Item Weight: 5.60 Pounds
- Condition: New
- Fitment Type: Direct Replacement
- SKU: 6C2Z-16611B68-JA
- Warranty: This genuine part is guaranteed by Ford's factory warranty.

2006 Ford E-150 Lap & Shoulder Belt, Front Driver Side Part Number: 6C2Z-15611B09-BA
$193.41 MSRP: $281.53You Save: $88.12 (32%)Product Specifications- Other Name: Seat Belt Assembly; Seat Belt Lap and Shoulder Belt, Front Left
- Manufacturer Note: (-E*)
- Position: Front Driver Side
- Replaces: 2C2Z-15611B09-AAD, 2C2Z-15611B09-AAC, 6C2Z-15611B09-AAA, XC2Z-15611B09-AAC, XC2Z-15611B09-AAA
- Base No.: 611B09
- Item Weight: 3.60 Pounds
- Item Dimensions: 8.1 x 6.0 x 16.8 inches
- Condition: New
- Fitment Type: Direct Replacement
- SKU: 6C2Z-15611B09-BA
- Warranty: This genuine part is guaranteed by Ford's factory warranty.
- Product Specifications
- Other Name: Seat Belt Assembly; Seat Belt Lap and Shoulder Belt, Rear Left Outer; Lap & Shoulder Belt
- Manufacturer Note: (-W*)
- Position: Rear Outer Driver Side
- Replaces: 6C2Z-16611B69-BAB
- Base No.: <611B68
- Item Weight: 0.80 Pounds
- Condition: New
- Fitment Type: Direct Replacement
- SKU: 6C2Z-16611B69-EB
- Warranty: This genuine part is guaranteed by Ford's factory warranty.
 Product Specifications
- Other Name: Seat Belt Assembly; Seat Belt Lap and Shoulder Belt, Rear Left Outer; Lap & Shoulder Belt
- Manufacturer Note: (-E*)
- Position: Rear Outer Driver Side
- Replaces: 6C2Z-39611B69-AAA, 3C2Z-39611B69-AAA
- Base No.: 611B69
- Item Weight: 3.70 Pounds
- Condition: New
- Fitment Type: Direct Replacement
- SKU: 6C2Z-39611B69-BA
- Warranty: This genuine part is guaranteed by Ford's factory warranty.
- Product Specifications
- Other Name: Seat Belt Assembly; Seat Belt Lap and Shoulder Belt, Rear Right Outer; Lap & Shoulder Belt
- Manufacturer Note: (-E*)
- Position: Rear Outer Passenger Side
- Replaces: 6C2Z-16611B68-EAA
- Base No.: <611B68
- Item Weight: 4.00 Pounds
- Item Dimensions: 6.3 x 4.7 x 15.2 inches
- Condition: New
- Fitment Type: Direct Replacement
- SKU: 6C2Z-16611B68-LA
- Warranty: This genuine part is guaranteed by Ford's factory warranty.
- Product Specifications
- Other Name: Seat Belt Assembly; Seat Belt Lap and Shoulder Belt, Rear Right Outer; Lap & Shoulder Belt
- Manufacturer Note: (-E*)
- Position: Rear Outer Passenger Side
- Replaces: 3C2Z-39611B68-AAA, 6C2Z-39611B68-AAA
- Base No.: 611B68
- Item Weight: 4.00 Pounds
- Item Dimensions: 6.0 x 4.6 x 11.2 inches
- Condition: New
- Fitment Type: Direct Replacement
- SKU: 6C2Z-39611B68-BA
- Warranty: This genuine part is guaranteed by Ford's factory warranty.
 Product Specifications
- Other Name: Seat Belt Assembly; Seat Belt Lap and Shoulder Belt, Rear Left Outer; Lap & Shoulder Belt
- Manufacturer Note: (-E*)
- Position: Rear Outer Driver Side
- Replaces: 3C2Z-16611B69-BAA, 6C2Z-16611B69-BAA
- Base No.: 611B69
- Item Weight: 0.80 Pounds
- Condition: New
- Fitment Type: Direct Replacement
- SKU: 6C2Z-16611B69-EA
- Warranty: This genuine part is guaranteed by Ford's factory warranty.
- Product Specifications
- Other Name: Seat Belt Assembly; Seat Belt Lap and Shoulder Belt, Rear Left Outer; Lap & Shoulder Belt
- Manufacturer Note: (-E*)
- Position: Rear Outer Driver Side
- Replaces: 3C2Z-16611B69-AAA, 6C2Z-16611B69-AAA
- Base No.: 611B69
- Item Weight: 3.80 Pounds
- Condition: New
- Fitment Type: Direct Replacement
- SKU: 6C2Z-16611B69-DA
- Warranty: This genuine part is guaranteed by Ford's factory warranty.
- Product Specifications
- Other Name: Seat Belt Assembly; Seat Belt Lap and Shoulder Belt, Rear Right Outer; Lap & Shoulder Belt
- Manufacturer Note: (-E*)
- Position: Rear Outer Passenger Side
- Replaces: 6C2Z-16611B68-DAA
- Base No.: <611B68
- Item Weight: 3.40 Pounds
- Condition: New
- Fitment Type: Direct Replacement
- SKU: 6C2Z-16611B68-KA
- Warranty: This genuine part is guaranteed by Ford's factory warranty.
- Product Specifications
- Other Name: Seat Belt Assembly; Seat Belt Lap and Shoulder Belt, Rear Left Outer; Lap & Shoulder Belt
- Manufacturer Note: (-E*)
- Position: Rear Outer Driver Side
- Replaces: 3C2Z-16611B69-CAA, 6C2Z-16611B69-CAA
- Base No.: 611B69
- Item Weight: 4.20 Pounds
- Item Dimensions: 4.8 x 5.0 x 13.0 inches
- Condition: New
- Fitment Type: Direct Replacement
- SKU: 6C2Z-16611B69-FA
- Warranty: This genuine part is guaranteed by Ford's factory warranty.
2006 Ford E-150 Seat Belt
If you're seeking quality and affordability, look no further than our extensive inventory of genuine 2006 Ford E-150 Seat Belt available at FordPartsDeal.com. You can confidently purchase our OEM 2006 Ford E-150 Seat Belt as they are supported by the manufacturer's warranty and our hassle-free return policy, alongside the benefit of our fast delivery service.
2006 Ford E-150 Seat Belt Parts Q&A
- Q: How to Fix a Rotated Seat Belt Tongue on 2006 Ford E-150?A: A rotated seat belt tongue requires you to first grasp the tongue and pull on nearest belt webbing until an upper slot with narrow and longer dimensions reveals itself. When working among the upper sections of the tongue slot you should rotate and fold the belt webbing until all twists disappear. Pull the belt webbing excess through the upper slot of the tongue. The second application of this method must focus on untwisting the lower and larger slot which extends across the longer section of the tongue. After assembly the seat belt needs to mirror the given design.
Related 2006 Ford E-150 Parts
 2006 Ford E-150 ABS Pump And Motor Assembly
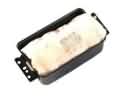 2006 Ford E-150 Air Bag
 2006 Ford E-150 Air Bag Control Module
 2006 Ford E-150 Antenna Base
 2006 Ford E-150 Body Control Module
 2006 Ford E-150 Brake Light Switch
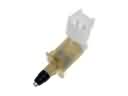 2006 Ford E-150 Door Jamb Switch
 2006 Ford E-150 Headlight Switch
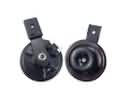 2006 Ford E-150 Horn
 2006 Ford E-150 Instrument Cluster
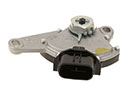 2006 Ford E-150 Neutral Safety Switch
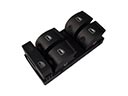 2006 Ford E-150 Window Switch