FordParts
My Garage
My Account
Cart
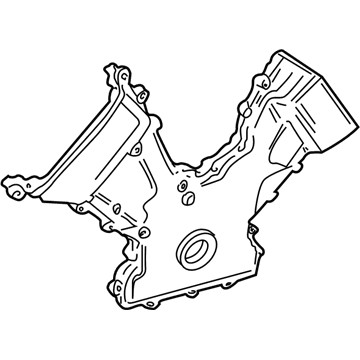
OEM 2006 Lincoln LS Timing Cover
Engine Timing Cover- Select Vehicle by Model
- Select Vehicle by VIN
Select Vehicle by Model
orMake
Model
Year
Select Vehicle by VIN
For the most accurate results, select vehicle by your VIN (Vehicle Identification Number).
1 Timing Cover found
2006 Lincoln LS Timing Cover, Front Part Number: 2W9Z-6019-AA
Product Specifications- Other Name: Cover - Cylinder Front; Engine Timing Cover; Front Cover
- Position: Front
- Base No.: 6019
- Item Weight: 6.90 Pounds
- Item Dimensions: 9.1 x 17.0 x 3.1 inches
- Condition: New
- Fitment Type: Direct Replacement
- SKU: 2W9Z-6019-AA
- Warranty: This genuine part is guaranteed by Ford's factory warranty.
2006 Lincoln LS Timing Cover
If you're seeking quality and affordability, look no further than our extensive inventory of genuine 2006 Lincoln LS Timing Cover available at FordPartsDeal.com. You can confidently purchase our OEM 2006 Lincoln LS Timing Cover as they are supported by the manufacturer's warranty and our hassle-free return policy, alongside the benefit of our fast delivery service.
2006 Lincoln LS Timing Cover Parts Q&A
- Q: How to service and repair the engine front timing cover to prevent engine failure on 2006 Lincoln LS?A: Service and repair work on the engine front cover requires a clean environment to avoid foreign substances from entering oil or coolant passages thereby causing engine failure. Initiate the operation by draining the cooling system's juice and removing the ground wire from the battery and emptying all engine oil from its receptacle. Start by detaching the left-hand and right-hand valve covers before proceeding to take off the engine cooling fan assembly and accessory drive belt idler pulley and crankshaft front seal and A/C compressor. You must detach the lower radiator hose together with the upper radiator hose, heater hose and every oil cooler hose that exists. A blocked bolt becomes accessible when you remove the stud bolt along with the four power steering pump bolts from the assembly. Position the power steering pump to the side. First disconnect the coolant pump pulley bolts and pulley before moving onto the five bolts of the power steering pump bracket and then unfastening the wiring harness clips. Torque out the engine front cover bolts in compliance with the specified order to detach the engine front cover. Apply new gaskets by cleaning all sealing surfaces with metal surface cleaner and plastic scraping tool. Use silicone gasket and sealant in the attached areas and install the engine front cover with loose bolt installation initially at 5 Nm (44 inch lbs.) followed by final tightening at 10 Nm (89 inch lbs.). First secure the power steering pump with four bolts that reach 25 Nm torque (18 ft. lbs.) before installing the five-power steering pump bracket bolts which need the same torque setting (25 Nm). Next, install the wiring harness clips, attach the power steering pump bracket and clamp the pump to its correct position with the same bolt settings at 25 Nm. The engine requires installation of lower radiator and upper radiator and heater hoses while securing the lower radiator hose bracket nut to 10 Nm (89 inch lbs.). The A/C compressor along with the crankshaft front seal and accessory drive belt idler pulley and engine cooling fan assembly should be installed followed by both right-hand and left-hand valve covers. The procedure requires clean engine oil followed by battery cable reinstallation and power steering system filling with subsequent bleeding and specific engine cooling system filling and bleeding to prevent engine damage. A complete A/C system evacuation then recharging process follows as the conclusion.


