FordParts
My Garage
My Account
Cart
OEM 2006 Mercury Grand Marquis Timing Cover
Engine Timing Cover- Select Vehicle by Model
- Select Vehicle by VIN
Select Vehicle by Model
orMake
Model
Year
Select Vehicle by VIN
For the most accurate results, select vehicle by your VIN (Vehicle Identification Number).
1 Timing Cover found


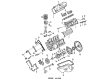 Product Specifications
- Other Name: Cover - Cylinder Front; Engine Timing Cover; Front Cover
- Manufacturer Note: Includes 6020 gaskets & 6B209 tensioner.
- Position: Front
- Base No.: 6019
- Item Weight: 11.40 Pounds
- Item Dimensions: 17.6 x 17.2 x 5.8 inches
- Condition: New
- Fitment Type: Direct Replacement
- SKU: 6W7Z-6019-AA
- Warranty: This genuine part is guaranteed by Ford's factory warranty.
2006 Mercury Grand Marquis Timing Cover
If you're seeking quality and affordability, look no further than our extensive inventory of genuine 2006 Mercury Grand Marquis Timing Cover available at FordPartsDeal.com. You can confidently purchase our OEM 2006 Mercury Grand Marquis Timing Cover as they are supported by the manufacturer's warranty and our hassle-free return policy, alongside the benefit of our fast delivery service.
2006 Mercury Grand Marquis Timing Cover Parts Q&A
- Q: How to Service and Repair the Engine Front Timing Cover on 2006 Mercury Grand Marquis?A: The first step toward servicing or repairing the engine front cover demands a deactivation of fire suppression systems when present along with hoisting the vehicle to the neutral position. At first remove fuel system pressure and disconnect grounding battery cable then take off both valve covers. The coolant pump and crankshaft front seal must be removed while you take out the four bolts from the power steering pump along with its position on standby. First drain engine oil through the oil drain plug of the pan before removing the four pan-to-engine front cover attaching bolts. The process for limousines starts by removing shield-retaining bolts then proceeding to remove the belt idler pulley bolt along with the pulley itself. Deinstall the specified bolts and stud bolts which allow the engine front cover to detach from the dowel. Use a plastic scraping tool to clean the sealing surface while applying metal surface cleaner but prevent the use of metal scrapers or abrasive tools. The proper exterior seal of the front engine cover requires secure tightening within four minutes; otherwise, seal areas need cleaning up before allowing drying. Sealant should be applied on the cylinder head-to-block and oil pan-to-cylinder block surfaces before installing the engine front cover that is loosely fitted with bolts. Follow the specified order for fastening by starting with engine front cover fasteners at 25 Nm (18 ft. lbs.), then proceeding to tighten the idler pulley bolt to the same torque value. The shield requires installation for limousines before completing the bolt tightening process to 25 Nm (18 ft. lbs.). The four front oil pan bolts must be installed loosely before you torque them to 20 Nm (15 ft. lbs.) initially followed by another 60 degrees of turn. The power steering pump must be in position before tightening the four bolts to 25 Nm (18 ft. lbs.). Place a new front oil seal of the crankshaft together with a new coolant pump and valve covers as replacements. Turn on the battery ground cable while filling the engine with pure engine oil. The system should get its power supply restarted when it has fire suppression.
Related 2006 Mercury Grand Marquis Parts
 2006 Mercury Grand Marquis Cam Gear
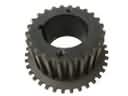 2006 Mercury Grand Marquis Crankshaft Gear
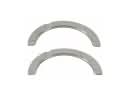 2006 Mercury Grand Marquis Crankshaft Thrust Washer Set
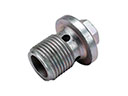 2006 Mercury Grand Marquis Drain Plug
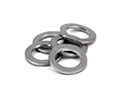 2006 Mercury Grand Marquis Drain Plug Washer
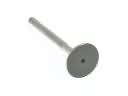 2006 Mercury Grand Marquis Exhaust Valve
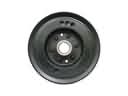 2006 Mercury Grand Marquis Harmonic Balancer
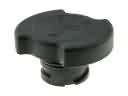 2006 Mercury Grand Marquis Oil Filler Cap
 2006 Mercury Grand Marquis Rod Bearing
 2006 Mercury Grand Marquis Timing Chain Tensioner
 2006 Mercury Grand Marquis Valve Cover Gasket
 2006 Mercury Grand Marquis Valve Stem Seal