FordParts
My Garage
My Account
Cart
OEM 2007 Ford Explorer Sport Trac A/C Accumulator
Accumulator- Select Vehicle by Model
- Select Vehicle by VIN
Select Vehicle by Model
orMake
Model
Year
Select Vehicle by VIN
For the most accurate results, select vehicle by your VIN (Vehicle Identification Number).
1 A/C Accumulator found

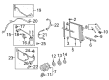
2007 Ford Explorer Sport Trac Drier Part Number: JU2Z-19C836-B
Product Specifications- Other Name: Accumulator Assembly - Air Conditioning; A/C Accumulator; Drier Desiccant Element; A/C Receiver Drier; Accumulator
- Replaces: 7L2Z-19C836-B, 6L2Z-19C836-A, 8L2Z-19C836-A, 7L2Z-19C836-A, YF-3330, YF-3492, YF-3284
- Condition: New
- Fitment Type: Direct Replacement
- SKU: JU2Z-19C836-B
- Warranty: This genuine part is guaranteed by Ford's factory warranty.
2007 Ford Explorer Sport Trac A/C Accumulator
If you're seeking quality and affordability, look no further than our extensive inventory of genuine 2007 Ford Explorer Sport Trac A/C Accumulator available at FordPartsDeal.com. You can confidently purchase our OEM 2007 Ford Explorer Sport Trac A/C Accumulator as they are supported by the manufacturer's warranty and our hassle-free return policy, alongside the benefit of our fast delivery service.
2007 Ford Explorer Sport Trac A/C Accumulator Parts Q&A
- Q: How to Service the A/C Accumulator in the HVAC System on 2007 Ford Explorer Sport Trac?A: First step in service of the suction accumulator of the HVAC system is to recover refrigerant. Disassemble the PCM and the low-side service port stem bracket bolt and part ways with the connector of A/C cycling switch. Take out suction accumulator and its fittings, dropping O-ring seals. Install new seals and lubricate the system and charge.
Related 2007 Ford Explorer Sport Trac Parts
 2007 Ford Explorer Sport Trac A/C Clutch
 2007 Ford Explorer Sport Trac A/C Compressor
 2007 Ford Explorer Sport Trac A/C Compressor Cut-Out Switches
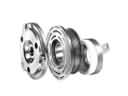
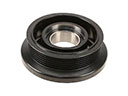 2007 Ford Explorer Sport Trac A/C Idler Pulley
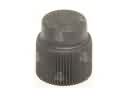 2007 Ford Explorer Sport Trac A/C Service Cap
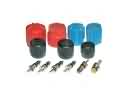 2007 Ford Explorer Sport Trac A/C System Valve Core
 2007 Ford Explorer Sport Trac Blend Door Actuator
 2007 Ford Explorer Sport Trac Blower Motor
 2007 Ford Explorer Sport Trac Blower Motor Resistor
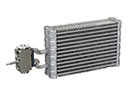 2007 Ford Explorer Sport Trac Evaporator
 2007 Ford Explorer Sport Trac Heater Core
 2007 Ford Explorer Sport Trac HVAC Pressure Switch