FordParts
My Garage
My Account
Cart
OEM 2008 Ford Focus Clock Spring
Spiral Cable Clock Spring- Select Vehicle by Model
- Select Vehicle by VIN
Select Vehicle by Model
orMake
Model
Year
Select Vehicle by VIN
For the most accurate results, select vehicle by your VIN (Vehicle Identification Number).
1 Clock Spring found


2008 Ford Focus Clockspring Part Number: 8L8Z-14A664-A
$130.13 MSRP: $200.82You Save: $70.69 (36%)Ships in 1-3 Business DaysProduct Specifications- Other Name: Cover And Contact Plate Assembly; Air Bag Clockspring
- Base No.: 14A664
- Item Weight: 1.20 Pounds
- Item Dimensions: 14.1 x 7.1 x 5.2 inches
- Condition: New
- Fitment Type: Direct Replacement
- SKU: 8L8Z-14A664-A
- Warranty: This genuine part is guaranteed by Ford's factory warranty.
2008 Ford Focus Clock Spring
If you're seeking quality and affordability, look no further than our extensive inventory of genuine 2008 Ford Focus Clock Spring available at FordPartsDeal.com. You can confidently purchase our OEM 2008 Ford Focus Clock Spring as they are supported by the manufacturer's warranty and our hassle-free return policy, alongside the benefit of our fast delivery service.
2008 Ford Focus Clock Spring Parts Q&A
- Q: How Should the Clock Spring Be Serviced and Repaired to Ensure Safety and Proper Functionality on 2008 Ford Focus?A: Every service or repair operation on the Clock Spring assembly requires eye protection to avoid severe injuries. The restraints control module (RCM) fuse removal combined with an ON ignition switch will activate the air bag warning indicator as part of normal operation but does not mean an SRS fault exists. The SRS must be checked for faults and proper operation before the vehicle gets released to the public. When repairing the Clock Spring users must install a new component yet they should retest and reinstall the original part if problems continue. Start the safety air bag process by taking out the driver air bag module while you drop the steering wheel and set the tilt lock mechanism. The removal of the steering wheel requires straight wheels because damage to the Clock Spring may occur. You must release the shroud upper tabs then take away the three screws from the lower shroud before using the tilt column lever to remove the lower shroud. Unplug the electrical connector of the Clock Spring while removing the two screws which support its structure. The procedure for Clock Spring installation requires leaving the anti-rotation key intact when fitting the steering wheel to avoid damaging the Clock Spring when it is out of alignment. Secure the Clock Spring by applying two screws and then reconnect its electrical connector. Reintroduce the lower steering column shroud using its three screws followed by lowering the steering column until you reach the end point and implement the tilt column locking lever. Join both pieces of the steering column shroud together by interlocking them. The performance life span of the Clock Spring becomes shortened whenever there is incorrect centralization thus a repetitive centralization should be performed to ensure proper functioning. Proceed to install the steering wheel when a new Clock Spring exists and the anti-rotation key has not been removed. To install the Clock Spring inner rotor correctly after taking out the anti-rotation key you should continue turning it counterclockwise until you meet light resistance. The four clockwise rotations of the inner rotor must occur from the 12 o'clock position while the wiring and connector stay in that place. Correct positioning can be confirmed when the Clock Spring rotor window faces the 4 o'clock position while the yellow indicator becomes visible and the inner and outer rotor arrows match at 6 o'clock position along with the inner rotor, wiring and connector remaining at 12 o'clock position. Mount the steering wheel once you verify that the road wheels are pointed forward. Reinstallation of the driver air bag module should be followed by new Clock Spring installation. Then remove the anti-rotation key to finish the process.
Related 2008 Ford Focus Parts
 2008 Ford Focus Ignition Switch
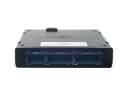 2008 Ford Focus Body Control Module
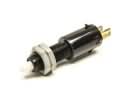 2008 Ford Focus Brake Light Switch
 2008 Ford Focus Headlight Switch
 2008 Ford Focus Speedometer
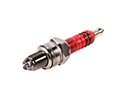 2008 Ford Focus Spark Plug
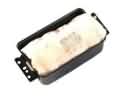 2008 Ford Focus Air Bag
 2008 Ford Focus Air Bag Control Module
 2008 Ford Focus Air Bag Sensor
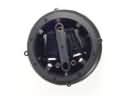 2008 Ford Focus Mirror Actuator
 2008 Ford Focus Occupant Detection Sensor
 2008 Ford Focus Temperature Sender