My Garage
Cart

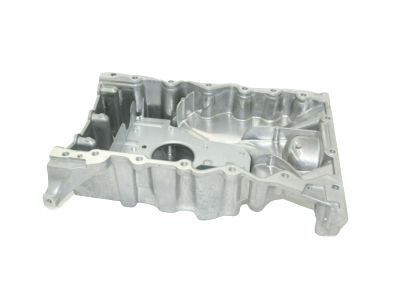
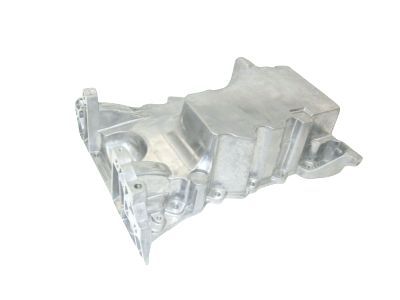
OEM 2009 Ford Edge Oil Pan

Oil Drain Pan
  • Select Vehicle by Model
  • Select Vehicle by VIN
Select Vehicle by Model
Make
Model
Year
or
Select Vehicle by VIN
For the most accurate results, select vehicle by your VIN (Vehicle Identification Number).

1 Oil Pan found

  • 2009 Ford Edge Oil Pan - 7T4Z-6675-A
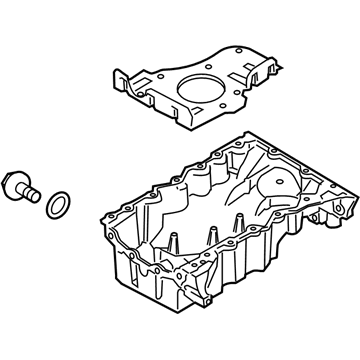
    2009 Ford Edge Oil Pan Diagram - 7T4Z-6675-A
    View related parts

    2009 Ford Edge Oil Pan Part Number: 7T4Z-6675-A

    $130.68 MSRP: $201.67
    You Save: $70.99 (36%)
    Ships in 1-3 Business Days
    ADD TO CART
    Product Specifications
    • Other Name: Pan Assembly - Engine Oil; Engine Oil Pan
    • Manufacturer Note: Use RTV Silicone Sealer In Place Of Gasket For This Application. Refer To Workshop Manual For Specification
    • Base No.: 6675
    • Item Weight: 15.00 Pounds
    • Item Dimensions: 7.7 x 21.3 x 16.6 inches
    • Condition: New
    • Fitment Type: Direct Replacement
    • SKU: 7T4Z-6675-A
    • Warranty: This genuine part is guaranteed by Ford's factory warranty.
    More Info
    Fits the following 2009 Ford Edge Submodels:
    • Limited, SE, SEL, SEL Plus, Sport | 6 Cyl 3.5 L GAS

2009 Ford Edge Oil Pan

If you're seeking quality and affordability, look no further than our extensive inventory of genuine 2009 Ford Edge Oil Pan available at FordPartsDeal.com. You can confidently purchase our OEM 2009 Ford Edge Oil Pan as they are supported by the manufacturer's warranty and our hassle-free return policy, alongside the benefit of our fast delivery service.

2009 Ford Edge Oil Pan Parts Q&A

  • Q: How to remove the oil pan from the engine on 2009 Ford Edge?
    A: Sterilizing the vehicle engine allows safe removal of the oil pan since littered materials can trigger engine failure. After detaching the eight bolts and flexplate you must remove the crankshaft sensor ring. Install the engine stand bolt only inside the cylinder block while keeping clear of the oil pan. Set the engine onto a suitable mount. Start by disconnecting the block heater electrical connector from the block heater followed by removing both heat shield and harness retainers of the engine block heater. Mesure the PCV hose from the PCV valve after removing the electrical connection to the Throttle Body and detaching wiring harness retainers from the upper intake manifold. Driver first discards the gaskets before removing the upper intake manifold support bracket bolt and the six bolts that secure the upper intake manifold. After disconnecting the electrical connector for Power Steering Pressure switch technicians must also disconnect the electrical connector of RH Catalyst Monitor Sensor for Front Wheel Drive applications. The RH VCT solenoid electrical connector and all 3 RH coil-on-plug electrical connectors need disconnection followed by detachment of wiring harness retainers from the RH valve cover. The procedure continues for the LH side which requires disconnecting the LH CMS and VCT solenoid electrical connectors and all 3 LH coil-on-plug electrical connectors after detaching the wiring harness retainers from the LH valve cover. The engine block must have the installed A/C compressor while technicians remove the A/C compressor nut and stud before taking out the power steering pump and accessory drive belt tensioner. The removal of the right-hand catalytic converter takes place in FWD vehicles where the nuts and gasket become waste materials. Cylinder block drain plugs from the right-hand and left-hand sides must be removed to drain coolant. The procedure starts by uninstalling six bolts and replacing the coil-on plugs before eliminating the LH and RH valve covers. This work requires disposal of the gaskets. You need the VCT Spark Plug Tube Seal Remover to remove deteriorated VCT solenoid seals along with damaged spark plug tube seals. Start by using a Strap Wrench to remove the crankshaft bolt with washer before discarding it. After that, use a 3 Jaw Puller to remove the crankshaft pulley then utilize an Oil Seal Remover to get rid of the crankshaft front seal. Proceed by disassembling engine mount bracket bolts and studs and the bracket and 22 engine front cover bolts. Start by tightening the six engine front cover bolts hand-tight and continue tightening them with cross-pattern arrangement until the engine front cover-to-cylinder block seal detaches before removing the engine front cover. Then remove the 16 oil pan bolts, install 2 oil pan bolts finger-tight before tightening them back and forth until the oil pan border with the cylinder block breaks free. Finish by removing the oil pan. Wipe the engine front cover and oil pan with a 3M™ Roloc® Bristle Disk (2-in white, part number 07528) operated at 15,000 rpm before washing thoroughly to eliminate all foreign specks. Clear shop towels with no lint should be placed over unsealed engine compartments to stop contamination while they are removed with great care. Use metal surface prep to eliminate oil or coolant residue from the cylinder block sealing surface after removing large amounts of silicone or gasket material along with applying silicone gasket remover. Maintain proper position of the 2 locating dowel pins in the cylinder block.

Related 2009 Ford Edge Parts