FordParts
My Garage
My Account
Cart
OEM 2009 Ford Explorer Sport Trac Heater Core
HVAC Heater Core- Select Vehicle by Model
- Select Vehicle by VIN
Select Vehicle by Model
orMake
Model
Year
Select Vehicle by VIN
For the most accurate results, select vehicle by your VIN (Vehicle Identification Number).
1 Heater Core found

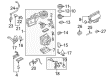 Product Specifications
- Other Name: Heater Assembly - Less Radiator; HVAC Heater Core, Front; HVAC Heater Core
- Position: Front
- Replaces: 7L2Z-18476-A, HC-41, 5L2Z-18476-AA, 6L2Z-18476-A, HC-47
- Item Weight: 3.60 Pounds
- Item Dimensions: 8.2 x 21.1 x 13.6 inches
- Condition: New
- Fitment Type: Direct Replacement
- SKU: H2MZ-18476-Y
- Warranty: This genuine part is guaranteed by Ford's factory warranty.
2009 Ford Explorer Sport Trac Heater Core
If you're seeking quality and affordability, look no further than our extensive inventory of genuine 2009 Ford Explorer Sport Trac Heater Core available at FordPartsDeal.com. You can confidently purchase our OEM 2009 Ford Explorer Sport Trac Heater Core as they are supported by the manufacturer's warranty and our hassle-free return policy, alongside the benefit of our fast delivery service.
2009 Ford Explorer Sport Trac Heater Core Parts Q&A
- Q: How to service the auxiliary heater core on 2009 Ford Explorer Sport Trac?A: The procedure for servicing the auxiliary heater core starts with placing the vehicle on a hoist while leaving it in neutral position and draining engine coolant. Unfasten both heater hose clamps while also detaching the heater hoses from their connections. Start the procedure by taking off the rear quarter trim panel followed by removing the two auxiliary line floorpan bracket nuts. You must first reach the screw and line bracket by removing four line bracket screws and the line bracket which lays above the floorpan line bracket inside the vehicle. The installation requires you to disconnect the auxiliary harness electrical connector before removing two auxiliary heater core and evaporator core housing bolts and the auxiliary heater core and evaporator core housing nut which must be torqued to 6 Nm (53 lb-in). Begin by unplugging both auxiliary actuator electrical connections and continuing with the screw removal process for the three auxiliary mode door actuator screws followed by removing the actuator itself. Disassemble the three screws that hold the auxiliary temperature blend door actuator then separate the actuator. Begin by removing four heater core cover screws followed by removal of both heater core cover and disconnecting heater core hose clamps for the auxiliary heater core removal. The installation requires the opposite order of removal steps along with water lubrication of coolant hoses but only when needed before filling the engine cooling system.
Related 2009 Ford Explorer Sport Trac Parts
 2009 Ford Explorer Sport Trac A/C Accumulator
 2009 Ford Explorer Sport Trac A/C Clutch
 2009 Ford Explorer Sport Trac A/C Compressor
 2009 Ford Explorer Sport Trac A/C Compressor Cut-Out Switches
 2009 Ford Explorer Sport Trac A/C Hose
 2009 Ford Explorer Sport Trac A/C Idler Pulley
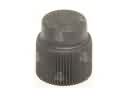 2009 Ford Explorer Sport Trac A/C Service Cap
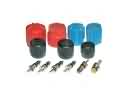 2009 Ford Explorer Sport Trac A/C System Valve Core
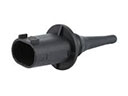 2009 Ford Explorer Sport Trac Ambient Temperature Sensor
 2009 Ford Explorer Sport Trac Blend Door Actuator
 2009 Ford Explorer Sport Trac Blower Motor Resistor
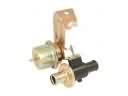 2009 Ford Explorer Sport Trac Heater Control Valve