FordParts
My Garage
My Account
Cart
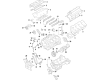
OEM 2009 Ford Taurus X Camshaft
Cam- Select Vehicle by Model
- Select Vehicle by VIN
Select Vehicle by Model
orMake
Model
Year
Select Vehicle by VIN
For the most accurate results, select vehicle by your VIN (Vehicle Identification Number).
4 Camshafts found


2009 Ford Taurus X Camshaft, Driver Side Part Number: 7T4Z-6250-B
$206.00 MSRP: $302.50You Save: $96.50 (32%)Product Specifications- Position: Driver Side
- Base No.: 6250
- Item Weight: 6.10 Pounds
- Item Dimensions: 25.0 x 3.0 x 3.1 inches
- Condition: New
- Fitment Type: Direct Replacement
- SKU: 7T4Z-6250-B
- Warranty: This genuine part is guaranteed by Ford's factory warranty.


2009 Ford Taurus X Camshaft, Passenger Side Part Number: 7T4Z-6250-A
Product Specifications- Position: Passenger Side
- Base No.: 6250
- Item Weight: 4.70 Pounds
- Item Dimensions: 24.2 x 4.2 x 4.2 inches
- Condition: New
- Fitment Type: Direct Replacement
- SKU: 7T4Z-6250-A
- Warranty: This genuine part is guaranteed by Ford's factory warranty.

2009 Ford Taurus X Camshaft, Passenger Side Part Number: 9T4Z-6250-A
Product Specifications- Position: Passenger Side
- Base No.: 6250
- Item Weight: 5.50 Pounds
- Condition: New
- Fitment Type: Direct Replacement
- SKU: 9T4Z-6250-A
- Warranty: This genuine part is guaranteed by Ford's factory warranty.

2009 Ford Taurus X Camshaft, Driver Side Part Number: 9T4Z-6250-B
Product Specifications- Position: Driver Side
- Base No.: 6250
- Item Weight: 5.40 Pounds
- Condition: New
- Fitment Type: Direct Replacement
- SKU: 9T4Z-6250-B
- Warranty: This genuine part is guaranteed by Ford's factory warranty.
2009 Ford Taurus X Camshaft
If you're seeking quality and affordability, look no further than our extensive inventory of genuine 2009 Ford Taurus X Camshaft available at FordPartsDeal.com. You can confidently purchase our OEM 2009 Ford Taurus X Camshaft as they are supported by the manufacturer's warranty and our hassle-free return policy, alongside the benefit of our fast delivery service.
2009 Ford Taurus X Camshaft Parts Q&A
- Q: What precautions should be taken when removing and replacing the camshaft to prevent engine damage and ensure proper installation on 2009 Ford Taurus X?A: The replacement of the camshaft should be done with no open flames and be clean to avoid engine failures. Have the crankshaft left in freewheeling position until you have installed camshafts. Adjust all components to proper torque requirements, clearance of check valves and proper timing marks alignment. Install everything again, watching out of debris.
Related 2009 Ford Taurus X Parts
 2009 Ford Taurus X Crankshaft Pulley
 2009 Ford Taurus X Crankshaft Seal
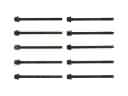 2009 Ford Taurus X Cylinder Head Bolts
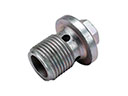 2009 Ford Taurus X Drain Plug
 2009 Ford Taurus X Engine Mount
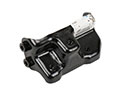 2009 Ford Taurus X Engine Mount Bracket
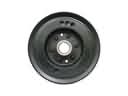 2009 Ford Taurus X Harmonic Balancer
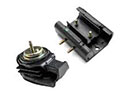 2009 Ford Taurus X Motor And Transmission Mount
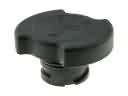 2009 Ford Taurus X Oil Filler Cap
 2009 Ford Taurus X Oil Filter
 2009 Ford Taurus X Valve Stem Seal
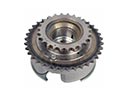 2009 Ford Taurus X Variable Timing Sprocket