My Garage
Cart

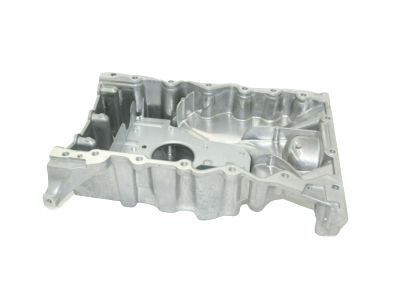
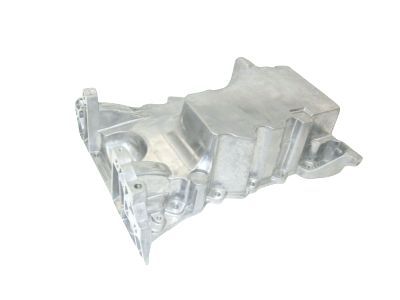
OEM 2009 Lincoln MKS Oil Pan

Oil Drain Pan
  • Select Vehicle by Model
  • Select Vehicle by VIN
Select Vehicle by Model
Make
Model
Year
or
Select Vehicle by VIN
For the most accurate results, select vehicle by your VIN (Vehicle Identification Number).

1 Oil Pan found

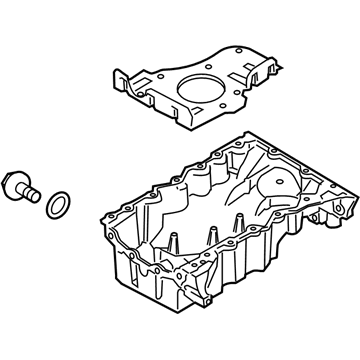
  • 2009 Lincoln MKS Oil Pan Diagram - 7T4Z-6675-A
    View related parts

    2009 Lincoln MKS Oil Pan Part Number: 7T4Z-6675-A

    $130.68 MSRP: $201.67
    You Save: $70.99 (36%)
    Ships in 1-3 Business Days
    ADD TO CART
    Product Specifications
    • Other Name: Pan Assembly - Engine Oil; Engine Oil Pan
    • Manufacturer Note: Use RTV Silicone Sealer In Place Of Gasket For This Application. Refer To Workshop Manual For Specification
    • Base No.: 6675
    • Item Weight: 15.00 Pounds
    • Item Dimensions: 7.7 x 21.3 x 16.6 inches
    • Condition: New
    • Fitment Type: Direct Replacement
    • SKU: 7T4Z-6675-A
    • Warranty: This genuine part is guaranteed by Ford's factory warranty.
    More Info
    Fits the following 2009 Lincoln MKS Submodels:
    • Base | 6 Cyl 3.7 L GAS

2009 Lincoln MKS Oil Pan

If you're seeking quality and affordability, look no further than our extensive inventory of genuine 2009 Lincoln MKS Oil Pan available at FordPartsDeal.com. You can confidently purchase our OEM 2009 Lincoln MKS Oil Pan as they are supported by the manufacturer's warranty and our hassle-free return policy, alongside the benefit of our fast delivery service.

2009 Lincoln MKS Oil Pan Parts Q&A

  • Q: How to service and repair the oil pan on 2009 Lincoln MKS?
    A: Before servicing and repairing the oil pan start the process by extracting the engine from your vehicle while maintaining clean work surfaces because foreign objects could lead to engine breakdown. Start by removing eight bolts which fasten the flywheel before removing the crankshaft sensor ring. The engine stand bolts should be installed directly into the cylinder block while keeping away from the oil pan before mounting the engine on an appropriate stand. Start by discarding the heat shield and disconnecting block heater electrical connectors before releasing all retained harnesses of the engine block heater. Disconnect the PCV hose from the PCV valve after separating the Throttle Body electrical connector and detaching the 4 wiring harness retainers on the upper intake manifold. Tear out two bolts which support the upper intake manifold support bracket and fuel tube bracket from its position on the upper intake manifold. Perform a metal debris inspection on the intake manifold when dealing with upper engine failure then perform a necessary replacement. The upper intake manifold requires removal of its 6 securing bolts while discarding the current gaskets. You need to disconnect four different electrical connectors including the Power Steering Pressure switch and the RH Catalyst Monitor Sensor electrical connector for FWD vehicles, the RH Variable Camshaft Timing solenoid as well as the 3 RH coil-on-plug electrical connectors, and the RH Heated Oxygen Sensor electrical connector. Disconnect the LH CMS and VCT solenoid electrical connectors after detaching all wiring harness retainers from the RH valve cover and stud bolts. Then remove the 3 LH coil-on-plug electrical connectors and the wiring harness retainers from the LH valve cover and stud bolts. First remove the 6 bolts together with the 6 coil-on-plugs. The A/C compressor needs to stay attached to the cylinder block while removing the A/C compressor nut followed by its stud and the PSP tube bracket-to-power steering pump bolt and separating the nut and PSP tube bracket from the RH valve cover stud bolt. The power steering pump requires placement aside after bolting removal and subsequent removal of the 3 bolts which secure the accessory drive belt tensioner. The removal procedure includes discarding both the LH catalytic converter nuts along with its gasket, with additional discard of the same items from the RH catalytic converter for FWD vehicles. The first step requires you to open either the RH cylinder block drain plug or block heater to drain coolant before proceeding to the LH cylinder block drain plug. Begin by discarding both gaskets then perform the next steps. The first step is to remove the LH valve cover after loosening the 11 stud bolts followed by removing the bolt and 10 stud bolts that hold the RH valve cover. Workers must use the VCT Spark Plug Tube Seal Remover and Handle to remove any faulty VCT solenoid seals and spark plug tube seals. The Strap Wrench removes the crankshaft bolt together with its washer but discards the bolt and you need the 3 Jaw Puller and Oil Seal Remover to take out the crankshaft pulley and crankshaft front seal respectively. Apply hand tools only to remove the engine mount studs while you should remove the 2 bolts and engine mount bracket first. Install 6 engine front cover bolts with loose finger-tightness into threaded holes before cross-tightening them in a crisscross pattern to release the engine front cover-to-cylinder block seal. Then remove the engine front cover. Safely lower the oil pan bolts to finger-tight then alternate their torque until the oil pan-to-cylinder block seal disengages and finally remove the pan. Wash the engine front cover and oil pan surface with a 3M Roloc Bristle Disk (2-in white, part number 07528) while maintaining 15,000 rpm speed until all foreign material is deleted. To protect engine cavities from contamination during cleaning install clean shop towels which should be securely removed from the areas after being properly positioned. Remove large silicone and gasket deposits from the cylinder block surfaces before applying silicone gasket remover that stays on for several minutes then wash it off. A second application needs to be performed to eliminate remaining traces of substance. The metal surface preparation should remove all remaining oil and coolant while avoiding metal shine and should verify correct installation of the two locating dowel pins in the cylinder block.