FordParts
My Garage
My Account
Cart
OEM 2009 Lincoln Town Car HVAC Control Module
Heater Control Assembly- Select Vehicle by Model
- Select Vehicle by VIN
Select Vehicle by Model
orMake
Model
Year
Select Vehicle by VIN
For the most accurate results, select vehicle by your VIN (Vehicle Identification Number).
1 HVAC Control Module found


2009 Lincoln Town Car Temperature Control Part Number: 7W1Z-19980-A
Product Specifications- Other Name: Control; Climate Control Module; Blower Control Switch; Dash Control Unit
- Base No.: 19980
- Item Weight: 2.10 Pounds
- Item Dimensions: 6.1 x 4.6 x 10.3 inches
- Condition: New
- Fitment Type: Direct Replacement
- SKU: 7W1Z-19980-A
- Warranty: This genuine part is guaranteed by Ford's factory warranty.
2009 Lincoln Town Car HVAC Control Module
If you're seeking quality and affordability, look no further than our extensive inventory of genuine 2009 Lincoln Town Car HVAC Control Module available at FordPartsDeal.com. You can confidently purchase our OEM 2009 Lincoln Town Car HVAC Control Module as they are supported by the manufacturer's warranty and our hassle-free return policy, alongside the benefit of our fast delivery service.
2009 Lincoln Town Car HVAC Control Module Parts Q&A
- Q: How to service and repair the Rear HVAC Control Module on 2009 Lincoln Town Car?A: After uploading the RATC module configuration to a scan tool one must start the service and repair process. The new RATC module ships in manufacturing mode equipped with B2477 (Module Configuration Failure) error code but this code automatically deletes after successful Programmable Module Installation (PMI). Before moving ahead with a RATC module replacement process ensure you upload configuration data from the existing module. The process begins with seat backrest removal followed by drill operations on the two rivets and connection disconnection before RATC module extraction. The download process of module configuration information from the scan tool to the new module needs to be performed after the installation completes. Installation of the new rivets can be finished by reversing the removal steps, and using the Heavy Duty Riveter to secure them in place.
Related 2009 Lincoln Town Car Parts
 2009 Lincoln Town Car Blend Door Actuator
 2009 Lincoln Town Car Heater Core
 2009 Lincoln Town Car A/C Accumulator
 2009 Lincoln Town Car A/C Clutch
 2009 Lincoln Town Car A/C Hose
 2009 Lincoln Town Car A/C Idler Pulley
 2009 Lincoln Town Car A/C Orifice Tube
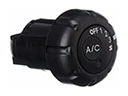 2009 Lincoln Town Car A/C Switch
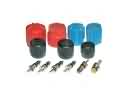 2009 Lincoln Town Car A/C System Valve Core
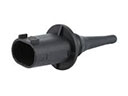 2009 Lincoln Town Car Ambient Temperature Sensor
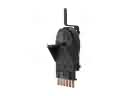 2009 Lincoln Town Car Blower Control Switches
 2009 Lincoln Town Car HVAC Pressure Switch